 |
 10-05-2011, 11:23 PM
|
#1
|
|
Winnebago Master
Join Date: Dec 2009
Location: Out there, somewhere
Posts: 1,742
|
Battery tray removal, '04 Itasca Horizon, 36GD
Ladies and Gents,
I would like to do some maintenance on both of my battery trays. For the life of me, I cannot see how they are removed. They are both made the same way. One roller on the top of each side of the stationary side rails in front, and, two rollers, one on top and one on the bottom, on each side of the rear of the drawer. Now, usually I can figure this kind of stuff out but, this one's got me. The rollers are held in with a single bolt. There is, what appears to be, access holes on each side of the frame for the bolts to come out, to remove each of the two rear rollers.
But, if you look through those holes with a mirror at what would be the heads of the bolts, there's no way to grab the bolts to loosen the nuts. No flat screw driver slot, no phillips slot, no allen hole, nothing. If there was, you could use a very small, stubby screw driver to hold the bolt, turn the nuts loose and then push the bolts out through the holes. Then simply remove the rollers so the drawer/tray would come out. Ain't happening. Hmmmm.
How'd they build the darn things anyway? It's almost like they built them and then installed the entire system and welded the frames in place before the body was put on. Anyone done a removal on these type trays? I'll get pics if it would help anyone. Thanks
Scott
__________________
2004 ITASCA HORIZON 36GD, 2011 GMC Sierra 1500 4x4 Toad '08 GL 1800 Gold Wing  Retired-29.5 yrs, SDFD, Ham - KI6OND
Me, Karla and the Sophie character, (mini Schnauzer)
Retired-29.5 yrs, SDFD, Ham - KI6OND
Me, Karla and the Sophie character, (mini Schnauzer)
|

|

|
|
10-06-2011, 06:41 AM
|
#2
|
|
Winnebago Owner
Join Date: Sep 2000
Posts: 126
|
On my '04 Meridian, the battery trays are manufactured by Kwikee. To remove for re-painting, I removed the rollers and the stop tab, pulled the tray out.
The rollers are attached using an internal (hex) wrenching bolt that goes through the center of the roller. Look carefully at the center of the roller.
RedT in Glendale, AZ
'04 Meridian
'03 Jeep Liberty
M&G Brake System
|
|
|
|
|
10-06-2011, 08:27 AM
|
#3
|
|
Winnebago Master
Join Date: Dec 2009
Location: Out there, somewhere
Posts: 1,742
|
RedT,
Well Sir, I thought I looked pretty good at those bolt ends with the mirror, through what would be the removal holes. I even stuck a small screw driver against the ends, attempting to scrape away maybe some grease, corrosion, paint etc. that might be covering up you internal allen hole etc. But, that effort revealed only a solid end of a bolt. No slot, no allen, nothing. I usually don't get stumped that easily but, I gave up. It was raining and cold and, I figure I'll take it on when the weather clears up and I have a better frame of mind.
It always bugs the heck out of me when a manufacturer does something like that. Why can't they make it easier to maintenance, disassemble, and repair if needed? Thank you for taking the time to respond.
Scott
__________________
2004 ITASCA HORIZON 36GD, 2011 GMC Sierra 1500 4x4 Toad '08 GL 1800 Gold Wing
Retired-29.5 yrs, SDFD, Ham - KI6OND
Me, Karla and the Sophie character, (mini Schnauzer)
|
|
|
|
|
10-06-2011, 01:47 PM
|
#4
|
|
Winnebago Owner
Join Date: Sep 2000
Posts: 126
|
OK, here is a photo of the tray in my Meridian' With the tray extended nearly full, the photo was taken looking toward the back of the coach. Note the roller, and the hole in the rail.
Align the roller with the hole in the tray, and using an allen wrench, (through the hole) hold the roller and remove the nut.
I didn't say it was easy,  I said it was doable. <G>
|
|
|
|
|
10-06-2011, 04:52 PM
|
#5
|
|
Winnie-Wise
Join Date: Jun 2006
Location: Southern California
Posts: 489
|
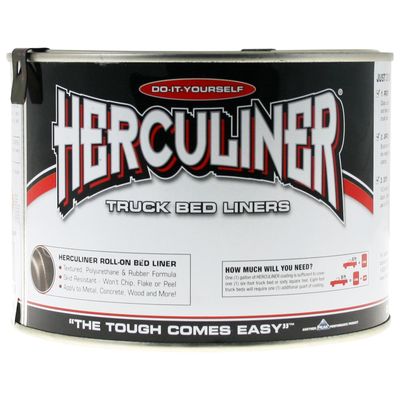
Fire Up, Scott I recently installed new 6 volt coach batteries in my slide out tray and found this Bed Liner paint at Pep Boys Auto Parts. I cleaned the tray and wire brushed all the rust off then wiped down with laquer thinner. The bed liner paint seems to hold up alot better than regular spray paint.
Sammie
__________________
2015 Tiffin Bus 37AP
2016 Ford Explorer
"A Job Begun is Half Done"
|
|
|
|
|
10-11-2011, 08:40 PM
|
#6
|
|
Winnebago Owner
Join Date: Oct 2007
Location: Allentown, PA
Posts: 230
|
If you want to paint that battery tray with something GREAT use POR15. You can google it on the web.
This is the toughest stuff I have ever used. It paints over rust and stops it cold. Just follow the directions. 
Great stuff..... Jim P.
__________________
Meridian 2004 36G DP
2010 Jeep Sahara Unlimited
Two HD's for company
|
|
|
|
|
10-12-2011, 12:17 AM
|
#7
|
|
Winnebago Master
Join Date: Dec 2009
Location: Out there, somewhere
Posts: 1,742
|
Quote:
Originally Posted by Sammie

Fire Up, Scott I recently installed new 6 volt coach batteries in my slide out tray and found this Bed Liner paint at Pep Boys Auto Parts. I cleaned the tray and wire brushed all the rust off then wiped down with laquer thinner. The bed liner paint seems to hold up alot better than regular spray paint.
Sammie
|
Sammie,
Thanks for the tip. I've heard of that product being used before on places it's not intended for and with good results. I might have to look in to it. By the way, when you installed the 6V units, was that a replacement or, did you change from 12V ones to the 6V units? If so, which ones did you get? I'm within making a decision on that change-over very, very soon. I'm thinking of the Costco ones. Thanks again.
Scott
Quote:
Originally Posted by pameridan04
If you want to paint that battery tray with something GREAT use POR15. You can google it on the web.
This is the toughest stuff I have ever used. It paints over rust and stops it cold. Just follow the directions.
Great stuff..... Jim P. |
Jim,
Well Sir, first off, I've got to get that battery tray out. I got frustrated with the project the other day and re-installed the 12V batts and went on to other stuff. I'll attack that project in a few days. Thanks for the tip on that paint. Many people have raved about that paint. I'll have to check it out.
Scott
__________________
2004 ITASCA HORIZON 36GD, 2011 GMC Sierra 1500 4x4 Toad '08 GL 1800 Gold Wing
Retired-29.5 yrs, SDFD, Ham - KI6OND
Me, Karla and the Sophie character, (mini Schnauzer)
|
|
|
|
|
10-12-2011, 12:07 PM
|
#8
|
|
Winnie-Wise
Join Date: Jun 2006
Location: Southern California
Posts: 489
|
Scott, I replaced my 12 volt batteries with four Trojan T-105's 6 volt. They just barely fit in the tray. I had to notch the top of the frame about a half inch to get the battery caps to clear. Also now to check the water level I have to pull the two front batteries and slide the rear ones forward (not a big deal) once a year. Here's a picture of my tray.

Sammie
__________________
2015 Tiffin Bus 37AP
2016 Ford Explorer
"A Job Begun is Half Done"
|
|
|
|
|
10-12-2011, 07:49 PM
|
#9
|
|
Winnebago Master
Join Date: Sep 2004
Location: Glen Allen, VA
Posts: 2,169
|
Quote:
Originally Posted by Sammie
Scott, I replaced my 12 volt batteries with four Trojan T-105's 6 volt. They just barely fit in the tray. I had to notch the top of the frame about a half inch to get the battery caps to clear. Also now to check the water level I have to pull the two front batteries and slide the rear ones forward (not a big deal) once a year. Here's a picture of my tray.
Sammie |
Sammie, get you a set of the Kwik Fill manifolds and you will end the chore of removing your batteries to check and maintain fluid level. The Kwik Fill manifolds generally do not sit higher on the battery than the caps you remove to replace them.
__________________
'07 Country Coach Allure 470 Siskiyou Summit #31578, Cummins ISL 425; 2014 Ford F150 toad; Air Force One Toad Brake.
Glen Allen, VA; Smith Mountain Lake, VA.
|
|
|
|
|
10-23-2011, 05:43 PM
|
#10
|
|
Winnie-Wise
Join Date: Mar 2011
Location: Fairfield, CA
Posts: 261
|
Quote:
Originally Posted by Sammie
Scott, I replaced my 12 volt batteries with four Trojan T-105's 6 volt. They just barely fit in the tray. I had to notch the top of the frame about a half inch to get the battery caps to clear. Also now to check the water level I have to pull the two front batteries and slide the rear ones forward (not a big deal) once a year. Here's a picture of my tray.
Sammie |
Sammie, good job! I am going to do the same to my 39Km same battery setup. I have a question, there are two positive leads coming off my 3 12V batts right now. I don't know where they go(I'm thinking one goes to the inverter and one to the HWH pump up front??), but does it make a difference on which poles on the 4 6V's where they come off from as long as it is 12V at those poles? On your pic, it looks like you took one 12V lead off the middle right hand battery but I can't tell where you took the other one off of. Appreciate any advise you can give, sir.
__________________
Barry & Sue Miller("extended" RVer's, 6 mos + per/year) combined trips.
04 Journey 39K, C-7, 330 hp, towing:19 GMC Canyon 4WD or 2013 Ford Edge AWD, Aero 5050XL, ReadyBrake.
|
|
|
|
|
10-23-2011, 07:05 PM
|
#11
|
|
Winnie-Wise
Join Date: Jun 2006
Location: Southern California
Posts: 489
|
Maybe this will help.

__________________
2015 Tiffin Bus 37AP
2016 Ford Explorer
"A Job Begun is Half Done"
|
|
|
|
|
10-23-2011, 07:17 PM
|
#12
|
|
Winnie-Wise
Join Date: Jun 2006
Location: Southern California
Posts: 489
|
Try this.

Sammie
__________________
2015 Tiffin Bus 37AP
2016 Ford Explorer
"A Job Begun is Half Done"
|
|
|
|
|
10-24-2011, 07:44 AM
|
#13
|
|
Winnie-Wise
Join Date: Mar 2011
Location: Fairfield, CA
Posts: 261
|
Thank you very much, Sammie. The enlarged pic AND the drawing seem to explain it prettyf well.
__________________
Barry & Sue Miller("extended" RVer's, 6 mos + per/year) combined trips.
04 Journey 39K, C-7, 330 hp, towing:19 GMC Canyon 4WD or 2013 Ford Edge AWD, Aero 5050XL, ReadyBrake.
|
|
|
|
|
10-24-2011, 10:21 PM
|
#14
|
|
Winnebago Owner
Join Date: May 2005
Location: Lutz, FL
Posts: 95
|
One thing to keep in mind is the weight limit on the Kwikee battery tray. I was going to replace 3 12V batteries with 4 6V batteries. But the weight limit on the battery tray was 200 pounds and the 4 6V batteries were going to weigh 264lbs or 360lbs depending on which models I would go with. So I stuck with the 12V models at 207lbs.
Here is a link where this was discussed http://www.irv2.com/forums/f101/purc...ies-73734.html
__________________
Bill, Elaine, Addie (Boxer Mix) & Rosie (Boxer Mix)
2008 Winnebago Tour 40WD, 2012 Buick LaCrosse
Blue Ox Tow Bar and Base Plate, US Gear Unified Tow Brake
|
|
|
|
|
01-18-2012, 08:41 PM
|
#15
|
|
Winnebago Owner
Join Date: Feb 2008
Location: Hometown is Schenectady, NY
Posts: 237
|
I have the same weight problem. I'm going from 3 12v to six 6v AGM's so I'll have to mount them elsewhere. Since they don't need venting or at least not as much, I plan on installing them in a storage bay right next to the battery tray. Then maybe the battery tray can be used for something else or maybe 3 on the tray and 3 in the storage bay. Don't know yet, needs some thinkin'
__________________
Ginny & Eric - Full Time 4/14/12 - Our Blog "Walk About With Wheels"
[SIGPIC][/SIGPIC]
2004 Winnebago Vectra 40AD - 350 Cummins ISC; Toad 2012 Wrangler 6 speed
SKP, WIT, FMCA, FCOC, GoodSam, Cummins Power Club
|
|
|
|
|
|
Currently Active Users Viewing This Thread: 1 (0 members and 1 guests)
|
|
|
 Posting Rules
|
You may not post new threads
You may not post replies
You may not post attachments
You may not edit your posts
HTML code is Off
|
|
|
|
 » Recent Discussions
 |
|
|
|
|
|
|
|
|
|
|
|
|
|
|
|
|
|
|
|
|
|
|
|
|
|


 Linear Mode

