I don't have my photos handy, but I can give you a basic walk through.
DISCLAIMER: You are taking full responsibility for any damage. If you are not comfortable doing this, ask for professional help.
You will need a few supplies to do this right.
1) Screw driver (or similar) to move the A/C covers
2) A soft towel, or something similar to lay the covers down on.
3) A large roll of "Blue" painters tape. (don't cheap out, get 3m brand)
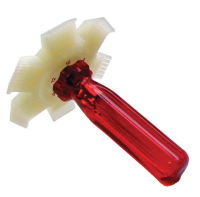
4) Fin comb (Here is a link to amazon
Amazon.com: Mountain 8300 AC Condenser Fin Comb: Automotive Most hardware stores will have something similar.)
If you do not have access to one, you can use a thin flat head screw driver, or knife to accomplish the same thing. It just takes 10x as long.
5) A couple of cans of A/C Coil Cleaner. (Amazon link
Amazon.com: Thermwell Prods. Co. ACF19 Air Conditioner Coil Foaming Cleaner: Home & Garden You can also get something similar at your hardware store. I find I need 2 big cans for 3 A/C's)
5) Garden hose
6) water proof gloves (latex works great, but anything will do)
7) OPTIONAL: 1in square foam weather striping tape. (
Amazon.com: Frost King R734H Sponge Rubber Foam Tape 7/16-Inch, Black: Home Improvement You want the same thickness used on your A/C. The link provided is too thin, but it shows you what to look for. Any hardware store will have this)
Steps (I am doing this by memory, so use your best judgement when working on yours):
1) Use screw driver to remove the 4(?) screws holding the A/C cover on. The covers are very fragile so be extra careful removing them. Lay them upside down on the towel.
2) If your A/C cover has foam tape laid on the inside (should be in something of a number 4 pattern), check for any damage, or loose adhesive. This foam is VERY important as is directs the incoming air through the condenser. If it is missing, or damaged the air can flow over/around the condenser hampering performance.
I am including this youtube video. This video is WRONG. The guy only does a very minor job of cleaning. I am only including this video because there is a clear shot of what the foam should look like as he removes the cover.
If the foam is damaged, replace it.
3) Next step is to remove the inner cover. On early models (as shown in the youtube video above) it is a metal shroud, later models switched to a high density black plastic. On the plastic models there is a series of latches that have to be released. Use a flat head screwdriver to help. I found on ours that Newmar had rushed the job and used a bunch of self tapping screws instead of properly latching the cover.
4) Now that the entire system is exposed, you should see a common motor driving two squirrel cage fans, two radiators, a wiring box, and two openings down into the rv. You need to use the blue tape to seal off the openings into the RV. You will not be perfect at this, but use long strips of tape to seal as best as you can. Also seal off the electrical box, and any motor vents. All this accomplishes it to keep the bulk of the water out of your interior.
5) Now using the garden hose, gently spray both radiators from the inside out. The water coming off should be very black with grim. Go slow so you do not bend any fins.
6) Now is the time to use the fin comb. If you have any bent or crushed fins you need to straighten them.
Here is a youtube video that details the next steps.
For this next step wear gloves as the chemicals are a mild acid. Also when applying this SIT DOWN on the roof. The spray is very slippery.
7) Time to apply the coil cleaner. Liberally spray the cleaner into both radiators, getting both sides. Here is a youtube video that shows what the spray foam should look like
8) Let the spray sit for 10 minutes. I usually use this time to prep the next A/C for cleaning.
9) Rinse time. Using a very gentle spray rinse out both radiators. Make sure to not overflow the interior radiators drain tray. Spray in small bursts if you have too. Their should be a lot of grim coming out of the A/C units. Make sure in between the rinsing of the A/C's to throughly allow clean water to run off the side of your coach. You do not want the coil cleaner on your paint anymore than you have to.
10) When the coils are clean, let them air dry for about 10-15 minutes. Use this time to move on to the next A/C.
11) Remove the blue tape. Some water will have gotten inside. This is ok for a few moments.
12) Re-assemble the A/C.
13) Now turn on the A/C fan only to high. Let it run for at least 30 minutes. After 30 minutes then turn on the heat pump or A/C mode. Let that run for at least an hour to dry out any water that may have gotten into the duct work.
Your A/C's are now clean, and you should see an improvement in both performance, and a lower energy draw. I have seen a decrease of up to 4 amps in electrical draw.
I hope this helps.


 Linear Mode


