Journey with Confidence RV GPS App RV Trip Planner RV LIFE Campground Reviews RV Maintenance Take a Speed Test Free 7 Day Trial ×
RV Trip Planning Discussions

Go Back   iRV2 Forums > THE OWNER'S CORNER FORUMS > Fleetwood Owner's Forum
Click Here to Login
Register FilesVendors Registry Blogs FAQ Community Calendar Today's Posts Search Log in
Join iRV2 Today

Mission Statement: Supporting thoughtful exchange of knowledge, values and experience among RV enthusiasts.
Reply
  This discussion is proudly sponsored by:
Please support our sponsors and let them know you heard about their products on iRV2
 
Thread Tools Search this Thread Display Modes
 
Old 10-23-2017, 10:42 AM   #1541
Senior Member
 
NHRA225's Avatar
 
American Coach Owners Club
Join Date: Jan 2011
Posts: 2,742
Looks Great !!
__________________
Chuck
Brownsburg Indiana
1992 American Eagle-8.3C-450hp
NHRA225 is offline   Reply With Quote
Join the #1 RV Forum Today - It's Totally Free!

iRV2.com RV Community - Are you about to start a new improvement on your RV or need some help with some maintenance? Do you need advice on what products to buy? Or maybe you can give others some advice? No matter where you fit in you'll find that iRV2 is a great community to join. Best of all it's totally FREE!

You are currently viewing our boards as a guest so you have limited access to our community. Please take the time to register and you will gain a lot of great new features including; the ability to participate in discussions, network with other RV owners, see fewer ads, upload photographs, create an RV blog, send private messages and so much, much more!

Old 10-23-2017, 10:52 AM   #1542
Senior Member
 
idoxlr8's Avatar
 
American Coach Owners Club
Spartan Chassis
Join Date: Apr 2017
Posts: 391
Quote:
Originally Posted by GlennLever View Post
This is the after the second coat. full project update once I have created my web page on the project. I did call Dicor for advice but have not heard back from them
Did the leaves stick? I'd leave them alone, they will wear off over some time.

I wanted to get this done to ours but weather is turning fast, supposed to start freezing Friday so need to hurry up and winterize it real soon.
__________________
1998 American Dream Race Car Hauler
idoxlr8 is offline   Reply With Quote
Old 10-23-2017, 12:34 PM   #1543
New to the RV World
 
GlennLever's Avatar
 
Vintage RV Owners Club
American Coach Owners Club
Join Date: Aug 2013
Location: Rochester, NY
Posts: 3,092
Quote:
Originally Posted by idoxlr8 View Post
Did the leaves stick? I'd leave them alone, they will wear off over some time.

I wanted to get this done to ours but weather is turning fast, supposed to start freezing Friday so need to hurry up and winterize it real soon.
I do not think the leaves are even stuck, but am not going to walk on the roof to take them of.

Temperature is IMPORTANT. Do not do it if you will have freezing temperatures.

Guess what, I heard back from Dicor. They said no problems with the overnight for the second coat. On the drying instructions they said they want the roof totally dry after the Cleaner/Activator, and between the first and second coat of the Acrylic they want it just dry enough to walk on, but not fully cured. This is exactly what I had. On the amount used, they state the 125 Sq. Ft. coverage because they do not want anyone to run out half way through the project. The amount I used is fine based on the smoothness of the roof, the temperature of the day and the way it was applied.

Hurrah!

I do not know why the font changes when I copy from word, sorry. Even when I use the font size on the tool bar they will not become equal.
__________________
See projects on my 1997 America Dream here, Index to the projects is in the first post.
https://www.irv2.com/forums/f107/proj...am-174380.html

[SIGPIC][/SIGPIC]
GlennLever is offline   Reply With Quote
Old 10-23-2017, 01:15 PM   #1544
New to the RV World
 
GlennLever's Avatar
 
Vintage RV Owners Club
American Coach Owners Club
Join Date: Aug 2013
Location: Rochester, NY
Posts: 3,092
Racing Points.

So the final points are out in my racing series.

Even with our poor showing in the last three races we ended up third in the over all points.

Interesting enough the Pro Comp race class had a bunch of people close together at the the top, while the other class appeared to have some spacing between the top ten finishers. Not sure why or what it means.

__________________
See projects on my 1997 America Dream here, Index to the projects is in the first post.
https://www.irv2.com/forums/f107/proj...am-174380.html

[SIGPIC][/SIGPIC]
GlennLever is offline   Reply With Quote
Old 10-23-2017, 01:52 PM   #1545
Senior Member
 
idoxlr8's Avatar
 
American Coach Owners Club
Spartan Chassis
Join Date: Apr 2017
Posts: 391
Congrat's on your 3rd place in points Glenn!
__________________
1998 American Dream Race Car Hauler
idoxlr8 is offline   Reply With Quote
Old 10-23-2017, 02:25 PM   #1546
New to the RV World
 
GlennLever's Avatar
 
Vintage RV Owners Club
American Coach Owners Club
Join Date: Aug 2013
Location: Rochester, NY
Posts: 3,092
I screwed up /Jack Knifed the trailer into the Motor Home

I screwed up /Jack Knifed the trailer into the Motor Home

This project can be seen on my web site at this link. https://www.lever-family-racing.com/...age-2017-10-20

I had an unfortunate incident this past weekend. Even though I had a spotter while backing up, I jackknifed the trailer into the motor home.

Driver is always responsible for the operation of the vehicle. The mistake I made was to only check the mirror my spotter was in.

As a past trucker who takes great pride in my driving abilities, the incident was very embarrassing, and yes it was in front of a bunch of people that know me. I used to train tractor trailer drivers. I cannot tell you how many times I told students, if you are in doubt stop, get out and look. This simple action would have saved me three days of work and the motor home will never be the same.

Note the corner that got damaged had been hit before by a previous owner and the repair that was done was not very good. Gaps were wrong, the right rear compartment door only latched with one of the two latches.

Below is the story on my attempt to repair as much of the damage as I can.

So let’s take a look at the damage to the motor Home. The damage to the trailer will be taken care of after the motor home is winterized. The big projects left are the fluid changes, filters, and, oh yes, resealing the roof.

The corner of the utility box that is mounted on the trailer tongue hit the bumper squarely. It put a nice bend in the bumper and caused the tip of the bumper to be pushed out from the body.


The valance the runs under the bumper is no longer straight. The piece between the tail pipe and the outside right rear edge has been pushed in by the bumper. There are also creases on the top and bottom edges of the bumper (the bottom edge is not visible in this picture).


So one of the big things is shown in the pictures below. Embedded between the layers of body fiberglass is a piece of metal used to tie the fiberglass body to the metal frame of the motor home. When the body was flexed the metal remained in place and the fiberglass separated. The metal was bent and is now holding the fiberglass body proud of the right rear compartment door. It is fortunate that this is not a sealed compartment. It is just an access door to the muffler, air cleaner and the air drier.


The fiberglass body also took some damage and I will not be repairing it at this time. Winter is coming and I just will not have time. There is one crack that is in back of the bumper and will never show There is another crack above the upper corner of the bumper.


The bumper removal was actually quite simple. There were only eight bolts that hold it to the motor home but an additional four bolts had to be loosened to line the bumper back up as much as possible.

So now let’s talk a little bit about the damage to the bumper itself. We have the dent that the utility box made to the bumper, and the end of the bumper was also pushed into the motor home. This caused the bumper to bend at the bumper brace. These bumpers are not as strong as you would think. All this damage was done by a cheap aluminum diamond plate utility box bolted to the tongue of the trailer. I will address the repair of that in a different project and it might not be until spring, we are really pushing the weather envelope here.


The body was sprung out and it became worse when the bumper end bracket was removed. I used a ratchet strap to pull the body frame member in until the body panel lined up with the compartment door.

Unfortunately I did not take a picture of the body panel sprung out.

In these pictures it looks like I have pulled the frame too far in; however, when the body panel is attached to the frame, the edges of the front and rear door panel line up.


So now we are really into the repairs. The next problem to address is the separation of the fiberglass body from the metal flange embedded in it. What I did was fill the gap with epoxy. I used a small tongue depressor to shove the epoxy all the way into the gap and completely fill it.


Once again, I am amazed at how many things accumulate as a project progresses.

Speaking of progressing, it is time to start working on the bumper. Although it is not particularly strong, it is stronger than body panels (not that I am a body man at all!) so it presented some interesting problems.


I propped up the bumper so that the side with the bend in it was sitting flat on the work bench. I then took a block of wood and a small hammer and persuaded the dent back out. It did almost come all the way out, the top still shows signs of the past mistreatment and with heat I could have gotten it out, but was not sure what it would have done to the color of the stainless steel, so I left it as a reminder of my carelessness.


Some more delicate tools to work the kinks out of the bumper.


Trying to get the kinks out of the top and bottom edges of the bumper took some creative thinking. I turned the bumper over and used a car strap to go across the bumper and around the work bench. This put downward force on the bumper. Then I hammered on the creases to try and flatten them out. At some point, did I say these bumpers were not strong? I take it back.


I have a friend that has an Eagle and he polished his front and rear bumpers. I have always liked the look and wanted to try it. I started with a regular car buffer (the black one shown) and quickly realized it was going to take MORE POWER (I’m now channeling Tim, the Tool Man, Taylor) so I broke out my six inch grinder and mounted the buffing pad on it and went to town. In 25 minutes this is what I had.

I now wish I had spent more time as I could have gotten it shinier but I was pressed for time. I have a roof coating project that must get done and a small window of GOOD weather. We are currently running 15 to 20 degrees warmer than we should be in October and reality will set in early next week. There are some other housekeeping projects that will have to be done in the bad weather (cold).

The rear bumper (polished) is set on the ground under the front bumper (represents what the rear one looked like before I started).

The corner closest to the camera is the right rear corner when it is on the back of the coach and is the corner I hit.
I think I got it pretty straight (and also shiny).


The better half was a great help on this project, and on the upcoming roof sealing project. The project would not have gotten completed in the time frame that was available without her, I love her dearly. I do not know how she puts up with some of the crap I pull.

I should have painted the area in back of the bumper black as this white has always shown around the edges and does not look very good. I will probably tape the bumper and body off and spray what can be seen.


I could not put these brackets back in this condition so a little sand blasting and a little powder coat and they are looking much better. Time to mount them back to the frame.


I mounted the bumper back on the Motor Home and the damaged end now sticks way out from the Motor Home. I believe it was the delicate tweaking I did to the bumper to remove the bend and creases.

Off it comes again for some additional messaging.


What I needed to do was bend in the damaged end without changing the shape of the other end.

I traced the outline of the edge of the bumper on the bench top and used that to tell when I had the damaged end bent in enough. I was not able to get it to come all the way back.

I braced the good end so that it would not move.

I used a Porta Power up against the main support beam of the house to push down on the bumper and a car strap to pull in on the edge of the bumper. These car straps are certainly getting a workout today.

The Porta Power was a new harbor freight purchase (I really dislike buying foreign stuff. I also believe in buying quality which harbor freight does not have. I really had no choice here), I did break it doing this (the pump would no longer pump) so I took it back and got another one. It was on sale and I had a 20% off coupon and this was the total expense of the repair so, other than lost time, it did not turn out to be too expensive of a repair.

When I was pumping it up, I could hear the floor creaking so I was putting a fair amount of pressure on the bumper.


So, it is nowhere near perfect. It is actually a little better that it was before the little incident. Remember this corner was hit by a previous owner and the rear compartment door had wide gaps and was very hard to latch.

The bumper is pretty straight and is shiny (I will have to come back and hit it again with a buffer to get more shine and to remove the scratches I induced with the second round of tweaking, and then do the front bumper).

The compartment door seams are even. The door is flush and latches firmly.

This is the best I can do with the time constraint I have. The Motor Home still needs some additional winterization (Water has been drained, I want to run some antifreeze through the system).


Now we have to get the trailer over here to fix the utility box. I am really surprised that a cheap flimsy aluminum utility box could have caused all this damage. There certainly is something to be said for structural strength (the box was hit on its corner). Time to go clean up the mess left over from this project and start the next one.
__________________
See projects on my 1997 America Dream here, Index to the projects is in the first post.
https://www.irv2.com/forums/f107/proj...am-174380.html

[SIGPIC][/SIGPIC]
GlennLever is offline   Reply With Quote
Old 10-23-2017, 06:22 PM   #1547
Senior Member
 
NHRA225's Avatar
 
American Coach Owners Club
Join Date: Jan 2011
Posts: 2,742
Glen - You never cease to amaze me with your projects and the detail of such !
My Race Car in in the shop and I have removed all of the Wrap (Vinyl) to the bare body and getting ready for a whole new Paint Job. Work Work and More Work !
__________________
Chuck
Brownsburg Indiana
1992 American Eagle-8.3C-450hp
NHRA225 is offline   Reply With Quote
Old 10-23-2017, 09:44 PM   #1548
New to the RV World
 
GlennLever's Avatar
 
Vintage RV Owners Club
American Coach Owners Club
Join Date: Aug 2013
Location: Rochester, NY
Posts: 3,092
Quote:
Originally Posted by NHRA225 View Post
Glen - You never cease to amaze me with your projects and the detail of such !
My Race Car in in the shop and I have removed all of the Wrap (Vinyl) to the bare body and getting ready for a whole new Paint Job. Work Work and More Work !
Thanks for the kind words. I will be in Indianapolis the first week in November, and will have time to come see it. Will it be done? Did you ever get your generator running (very glad I did not take that project on, I just have too many other things going on. I really want to work on the 49 this winter)?

I have put the roof coating project up on my web site but have not added as yet here. I will be doing that shortly, I want to get the fluids changed before the weather gets cold.

You can preview the whole project at this link.
https://www.lever-family-racing.com/...ant-2017-10-22
.
.
.
__________________
See projects on my 1997 America Dream here, Index to the projects is in the first post.
https://www.irv2.com/forums/f107/proj...am-174380.html

[SIGPIC][/SIGPIC]
GlennLever is offline   Reply With Quote
Old 10-24-2017, 06:33 AM   #1549
Senior Member
 
NHRA225's Avatar
 
American Coach Owners Club
Join Date: Jan 2011
Posts: 2,742
Quote:
Originally Posted by GlennLever View Post
Thanks for the kind words. I will be in Indianapolis the first week in November, and will have time to come see it. Will it be done? Did you ever get your generator running (very glad I did not take that project on, I just have too many other things going on. I really want to work on the 49 this winter)?

I have put the roof coating project up on my web site but have not added as yet here. I will be doing that shortly, I want to get the fluids changed before the weather gets cold.

You can preview the whole project at this link.
https://www.lever-family-racing.com/...ant-2017-10-22
.
.
.
Race Car goes to Brainerd MN on or about the 15th of Nov. For New paint.
Generator has some issues to sort out, but it's all back together, Starts then shuts down- Code 33 for no apparent reason- Taking it to someone I know at Onan here in town- when I get the time.
MH goes to sleep on the 1st of Nov.
__________________
Chuck
Brownsburg Indiana
1992 American Eagle-8.3C-450hp
NHRA225 is offline   Reply With Quote
Old 10-24-2017, 12:31 PM   #1550
New to the RV World
 
GlennLever's Avatar
 
Vintage RV Owners Club
American Coach Owners Club
Join Date: Aug 2013
Location: Rochester, NY
Posts: 3,092
Dicor roof Sealing of EDPM rubber roof.

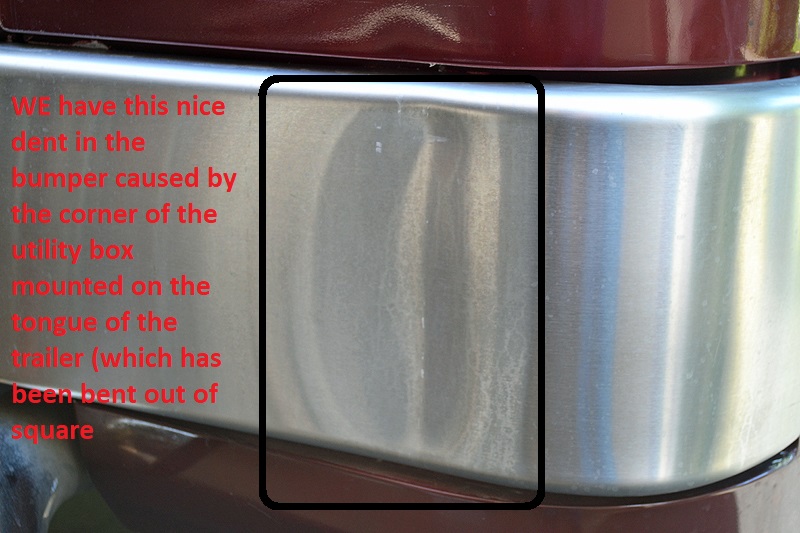
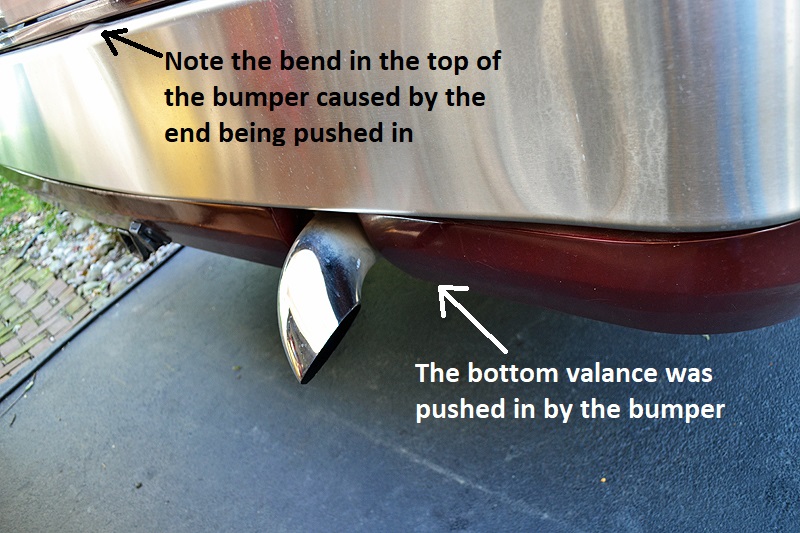
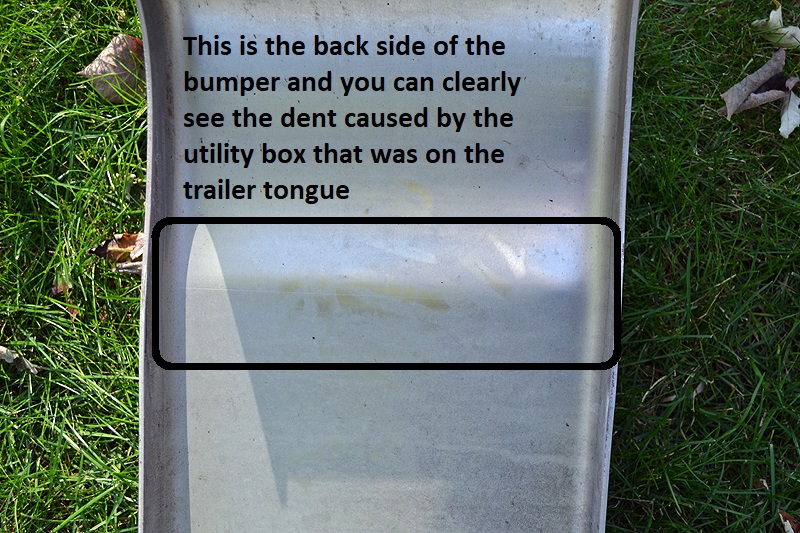
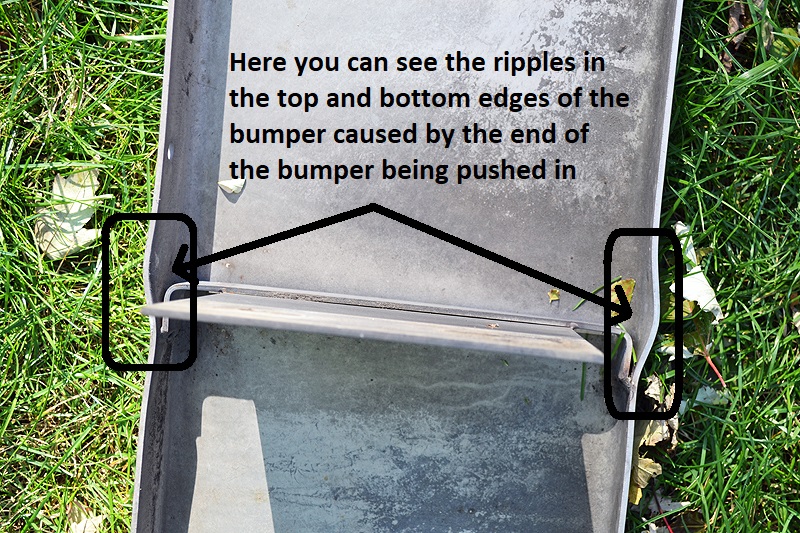
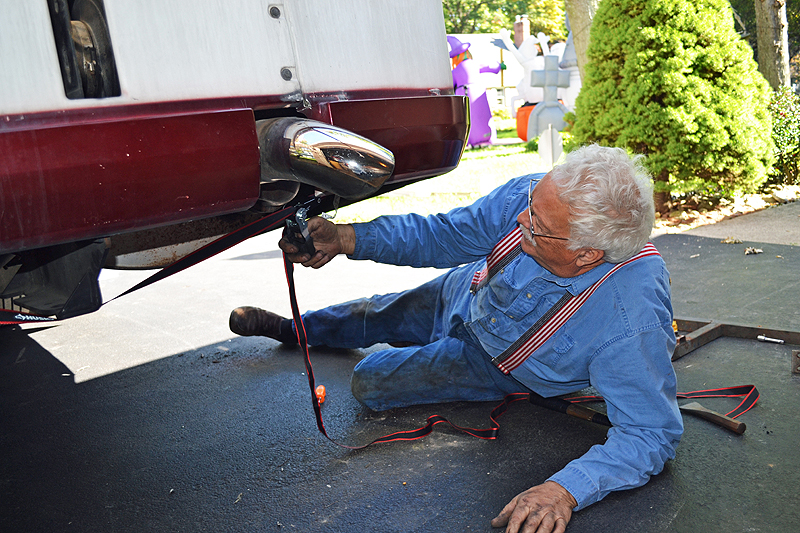
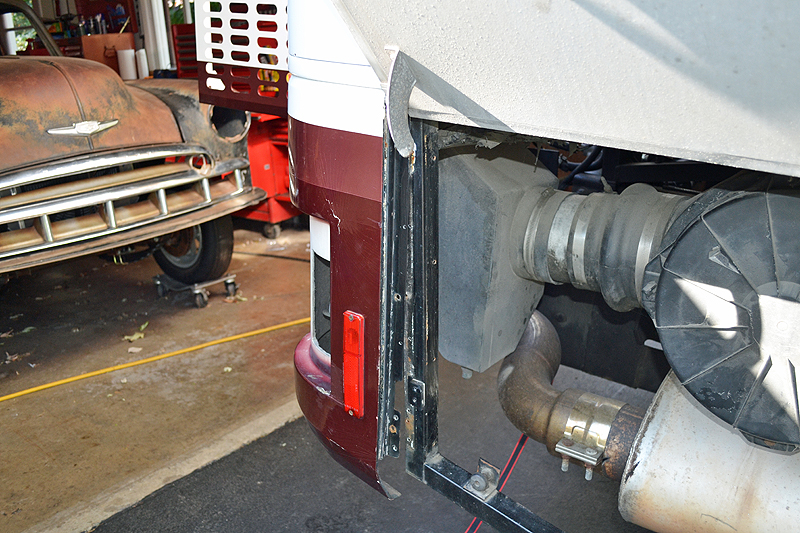
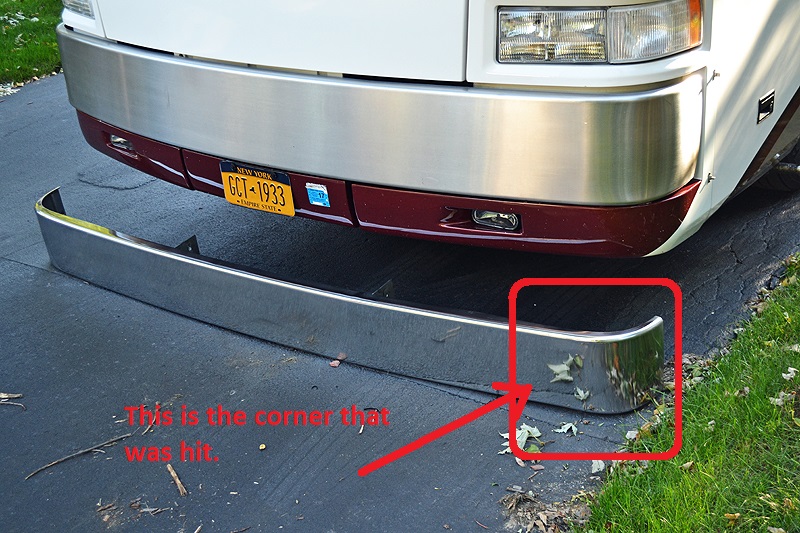
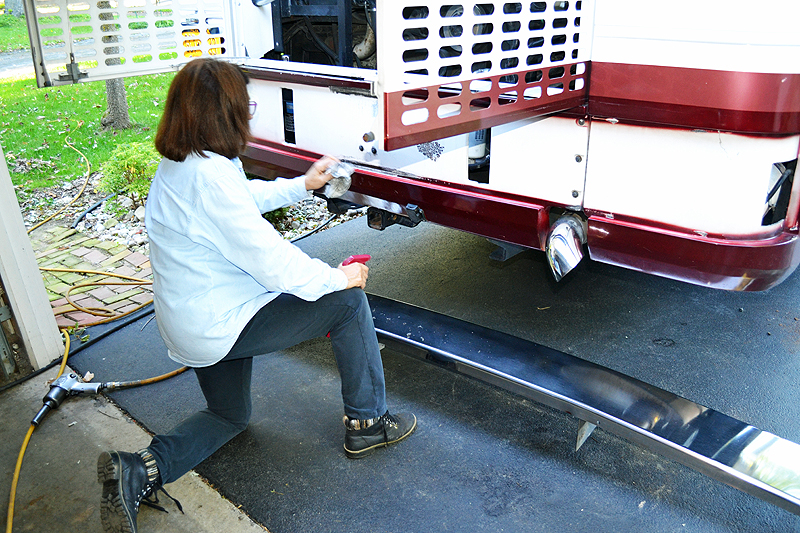
Two notes before we get started on this project. 1) I have posted two projects here in quick succession, so do not miss the project above on the repair of the trailer Jack Knife into the rear of the Motor Home, 2) This was a periodic maintenance Item I did not really know about that has to be checked several times in a year.

This and other projects can be seen on my web site at this link.
https://www.lever-family-racing.com/...ant-2017-10-22

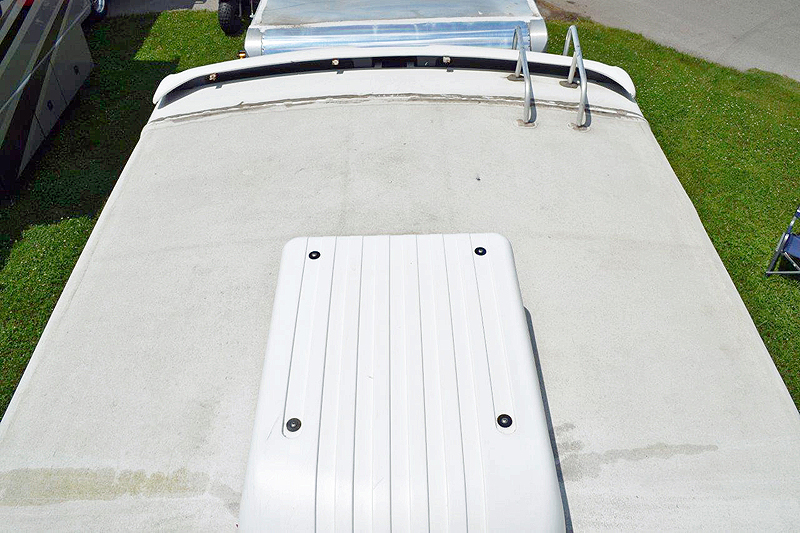
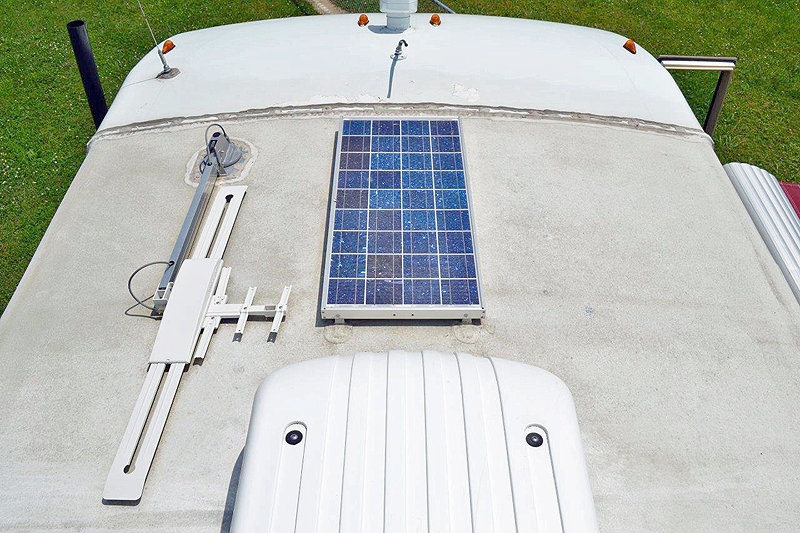
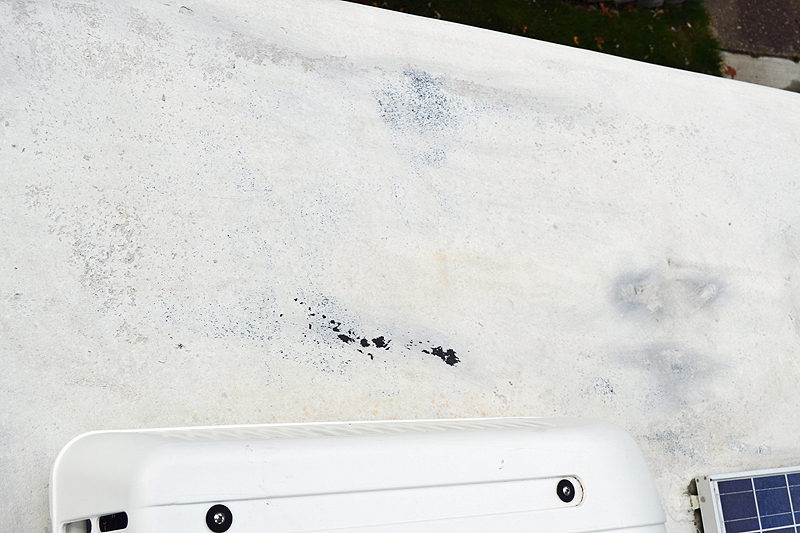
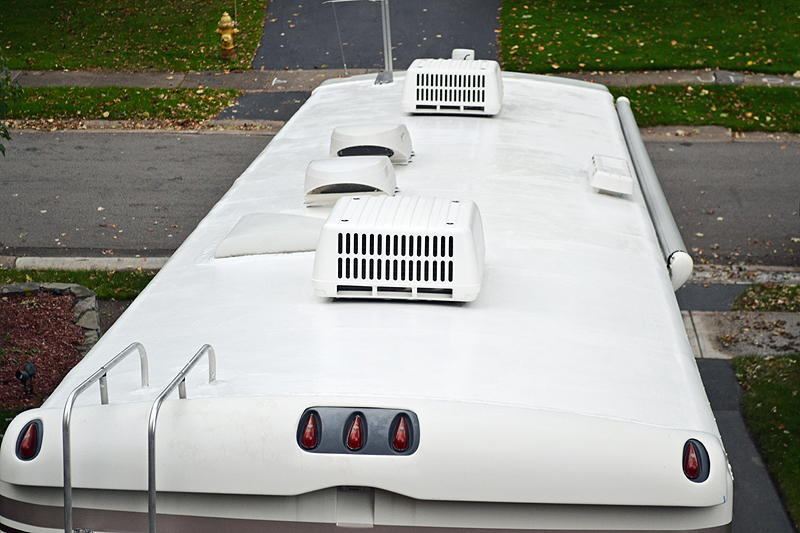
As this season progressed, I noticed the protective coating on the roof was starting to fail. There were two areas the size of a quarter where I could start to see the black EDPM membrane through the protective coating and it certainly was dirty.


I received an estimate to recoat the roof from John Siel of Wilkins RV in Churchville for $2,800. It is true that was back in the height of the RV season. He said it would take four hours to complete. Both the amount and time do the job just did not seem right to me. Time for another do it yourself project and probably get better results.


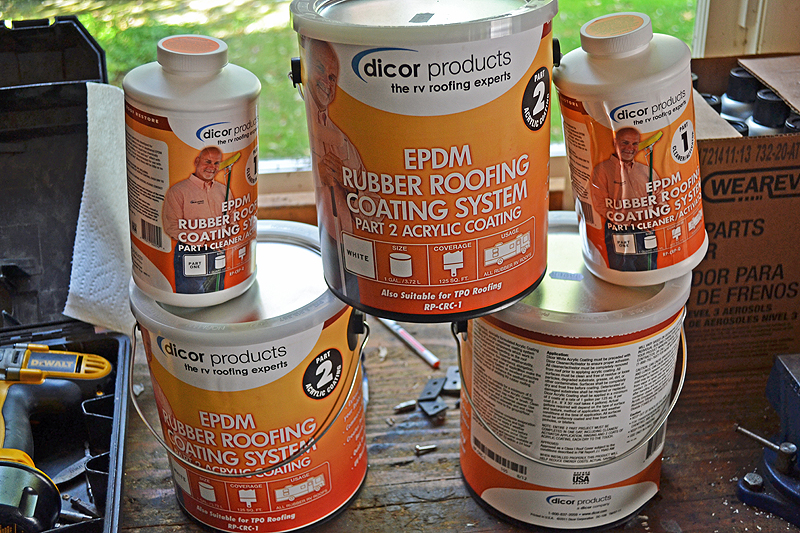
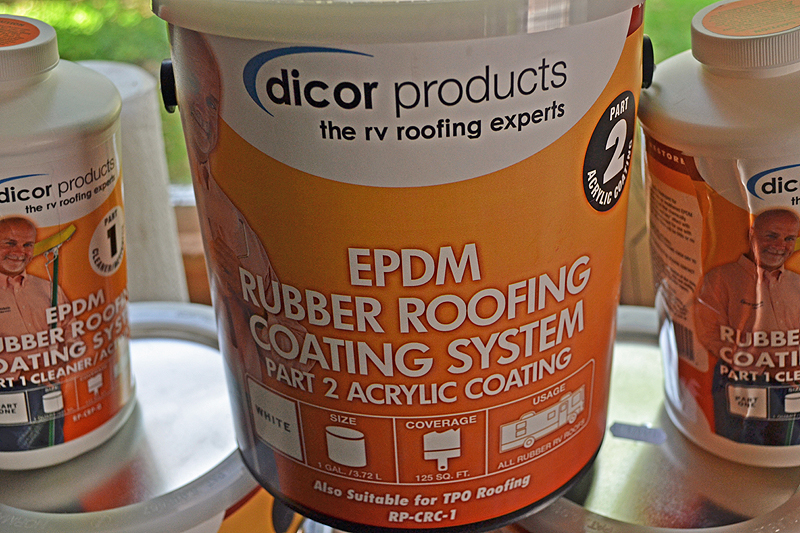
I did some research and it seemed that the Dicor product was the best, also the most expensive. Total material cost for the coatings was $306.68 and we had a gallon left over which we will be returning. There was additional expenses of plastic, rollers, and brushes.

The weather here has been quite warm for this time of the year. In fact it is running 15 to 20 degrees warmer than normal. I will get into how important the weather is in the decision to do the project.

Note: I did not get to take as many pictures to cover this project as I would have liked, but there was a time constraint in the application process and the process took precedent.

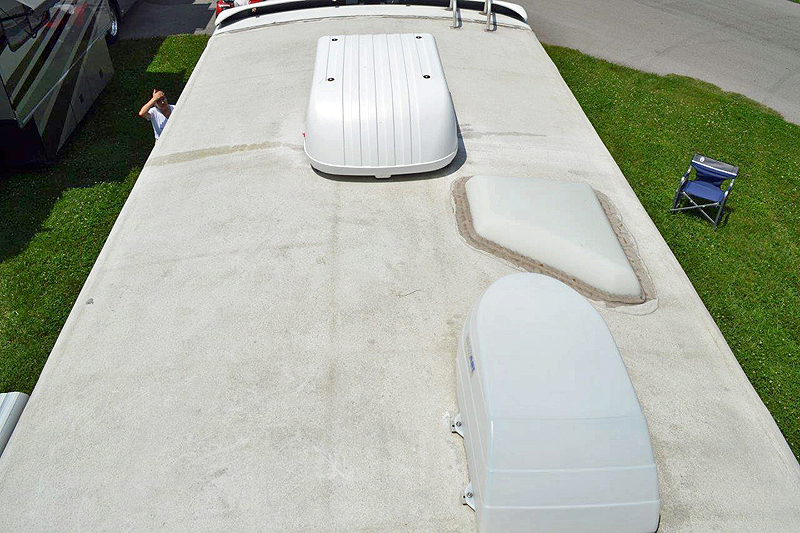
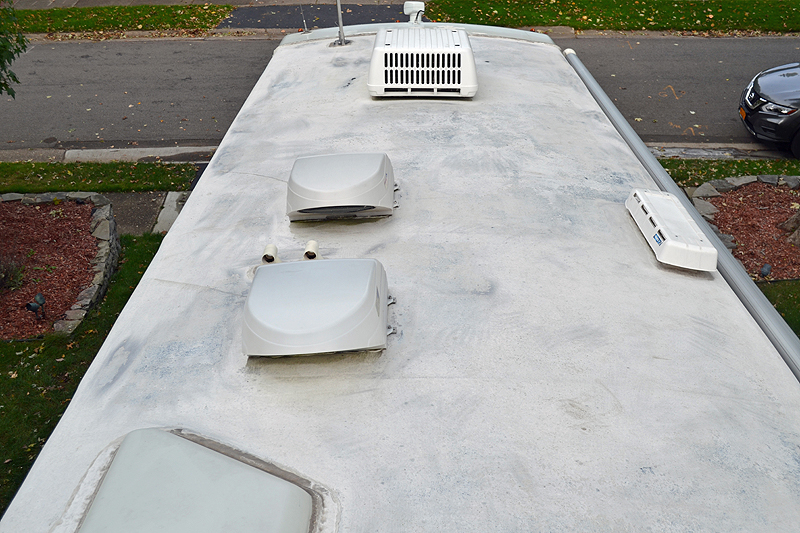
Note: The surface area of my roof…the Motor Home is 39 feet long, however the rubber roof does not cover the entire roof. There is a four foot fiberglass cap in the front and another one foot fiberglass cap at the rear. Also there are two roof fans, a skylight for the shower, a solar panel and two A/C units. So let’s figure the treatable surface is 34 feet by 8 feet = 272 sq. ft. minus 12 sq. ft. (2 ft. X 3. Ft) for the A/C units = 260, minus 4 sq. ft. for the fans = 256sq. ft., shower sky light is 7.5 sq. Ft. = 248.5 sq. ft. and finally the solar panel for 6 sq. ft. which brings us to 242.5 sq. ft. that needs to be treated.

This is important to know so that you can buy the correct amount of material.

Let’s get started. This is a two part application process. The first step is the Cleaner/Activator.


I will add comments and pictures throughout the application steps as I feel needed.

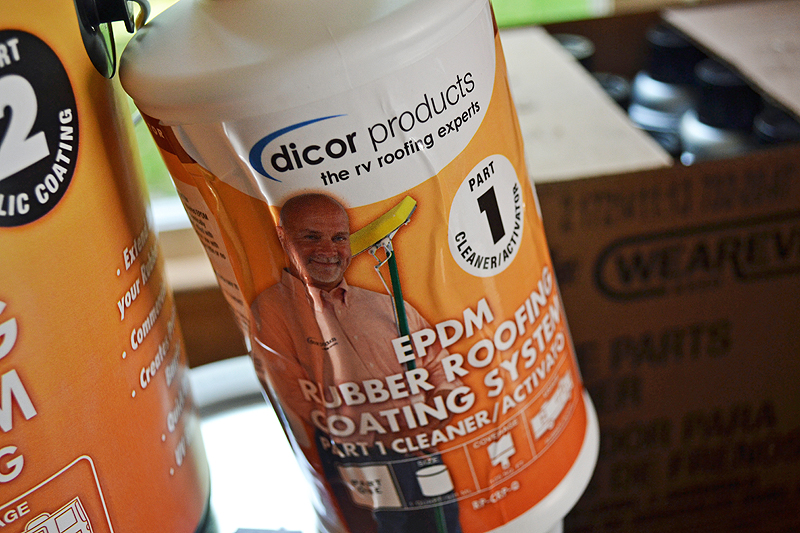
Application Instructions for part 1:
1) Apply Cleaner/activator via a sprayer (Hudson-type agricultural conventional pressure) at an application rate of 125 sq. ft./qt.

I have no idea what kind of sprayer this is, I do have a sprayer that I have used for Round –Up, but did not want to use it for this.


I read the instructions in the store and asked about this and was told that I could roll it on (I used a brush around all the obstructions and my wife did the rain gutter and all the bolts that hold the EDPM membrane in place). This worked just fine.

We had JUST enough with two containers of the Cleaner/Activator to do the entire roof without skimping.

Note: What I should have done was buy three containers and returned the unopened one to insure that we had enough (I did ask if we could return unopened containers and was told we could). I actually sent my wife back to the store to buy a third container but they had sold the entire stock out between the time I was there and my wife got there.

2) Use a 3 – 4 foot arc pattern.

3) Allow Cleaner/Activator to stand for a minimum of 15 minutes.

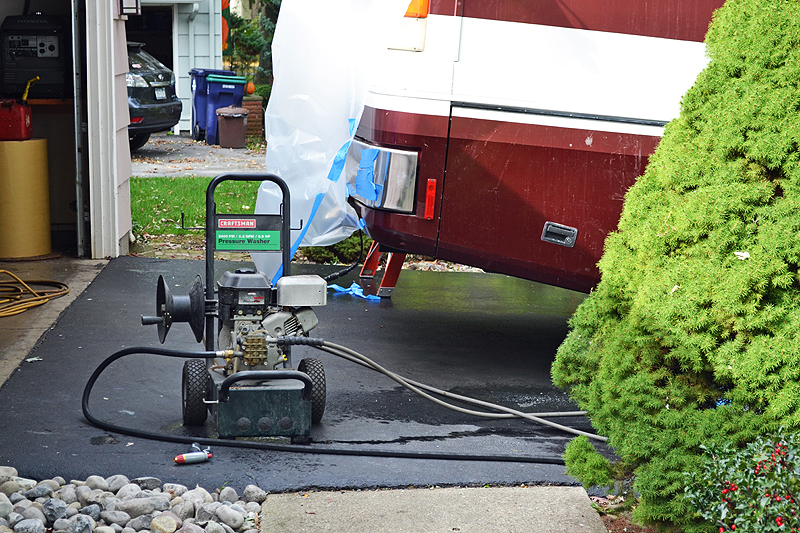
4) Clean EPDM with a commercial power washer (between 2000 – 3500 psi). When cleaning the EPDM, set the pressure washer to a wide pattern. Wash slowly keeping the washer at or around 12 inches from the roof.

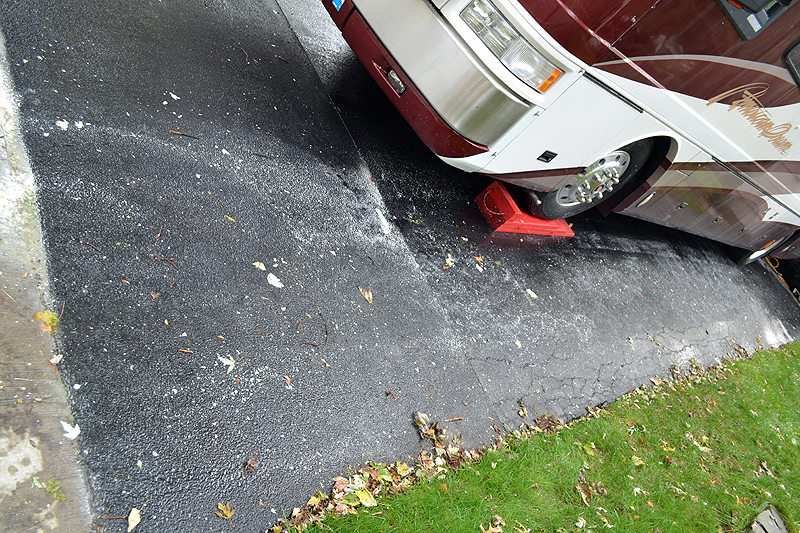
My pressure washer is 2400 PSI at 2.2 gals a minute. I’ll talk about the plastic on the side further into the project.


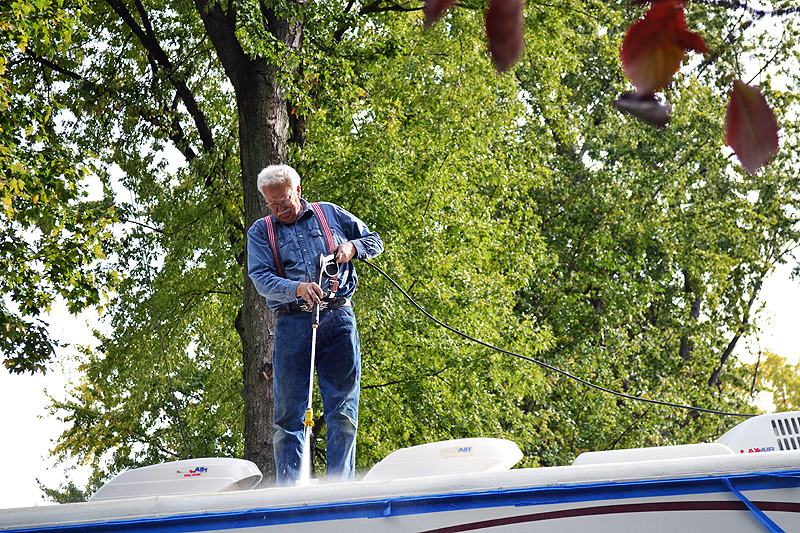
The result was a very clean surface, in this area it looked really good, almost good enough to leave it alone, but wait


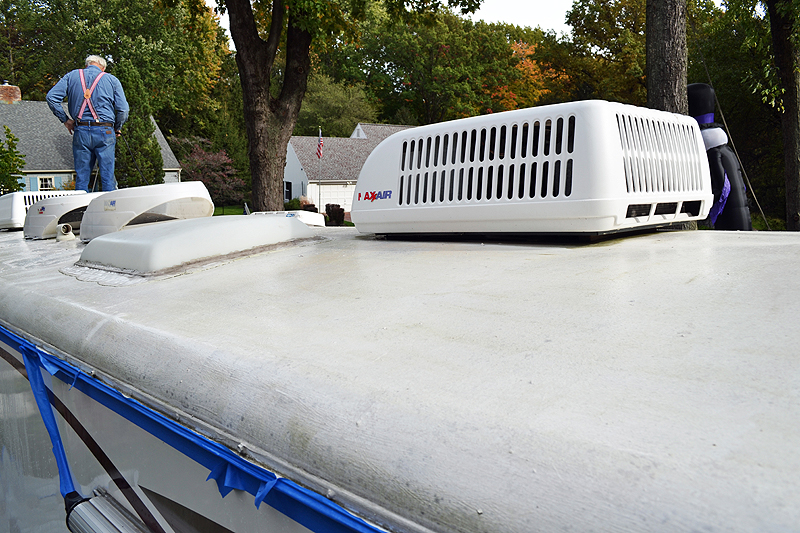
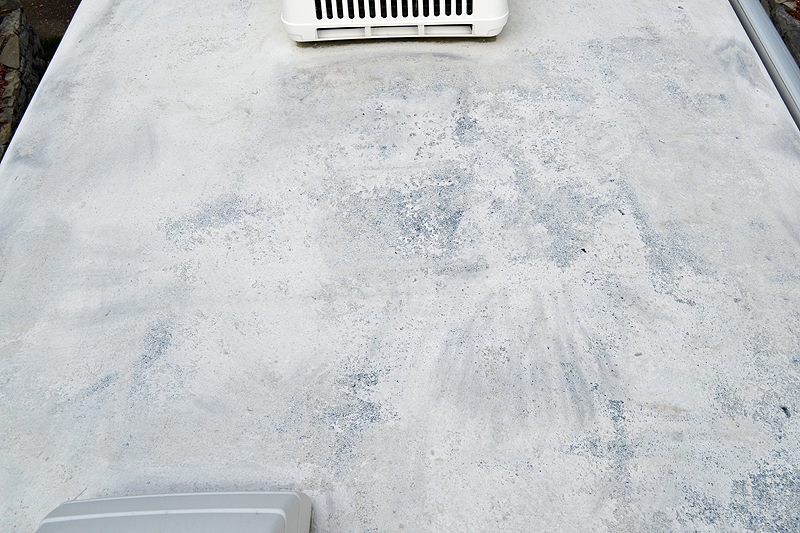
A LOT of the old coating came off with the pressure washer. There were a lot of spots where the Black EDPM membrane could clearly be seen.


5) Rinse thoroughly with power washer. The rinse step may be done at a faster pace than the cleaning step. The final rinse water should be clear with no soap bubbles present.

When the pressure washer peeled off the old coating it left pieces of the old coating attached to the roof sticking up. What we did was take a wire brush (by hand) and went over the whole roof. This picked off even more loose coating.


6) When the surface is dry, coating can begin. (The following was in capital letters.) ALLOW SURFACES TO DRY THOROUGHLY PRIOR TO APPLICATION OF THE ACRYLIC COATING.

This completes the instructions and process for the first step of the two step process.

On to the second step. The instructions for this step are broken up into three sections. 1) Preparation, 2) Weather Precautions, and 3) Application


1) Preparation:
Thoroughly mix the contents for a minimum of 5 minutes prior to application. Dicor Acrylic Coating may be applied by a medium nap roller or brush. Clean equipment with water and universal cleaner.

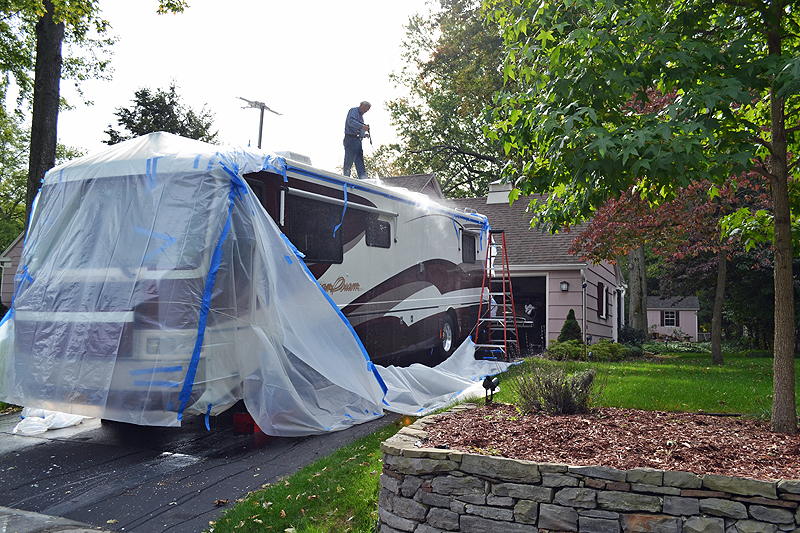
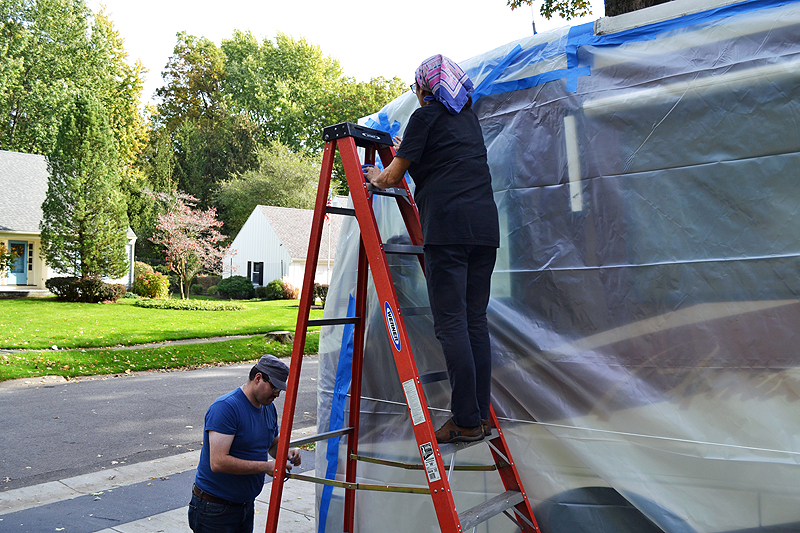
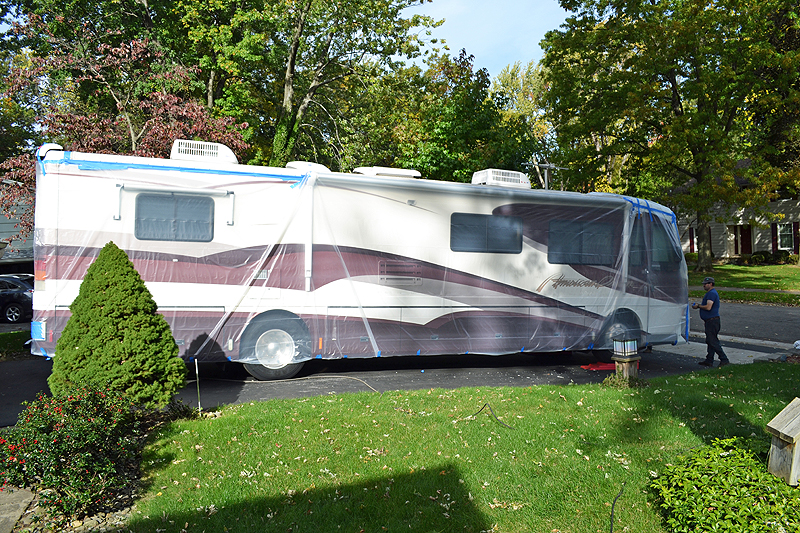
Use plastic sheeting to protect sidewalls and end caps of the units. Be sure plastic runs to the ground/floor.

Notes:
First off the plastic sheeting is a total waste of time unless you are a REALLY messy painter. Putting the plastic up took a long time and actually caused us to not get the whole process done in one day. This point (getting it done in one day) is stressed and capitalized on the back of the can.

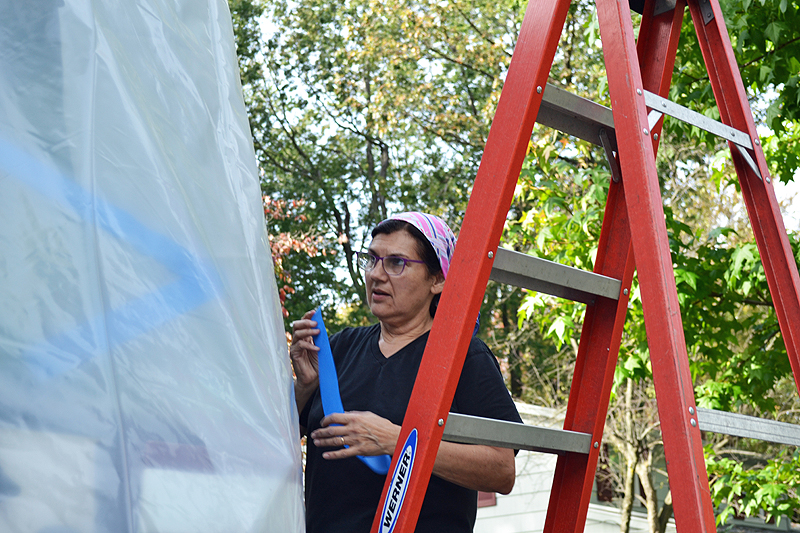
I have both my wife and first son helping put this plastic sheeting up.


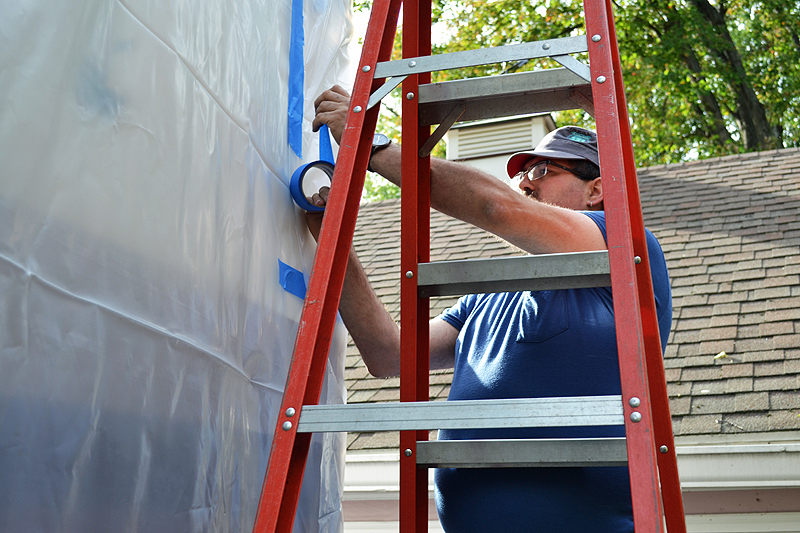
Even though we used two layers of tape in the gutter and the side of the Motor Home to create a base to attach the plastic sheeting and two more layers of tape to hold the plastic to the bus and we taped the plastic sheeting to the bottom of the Motor Home.


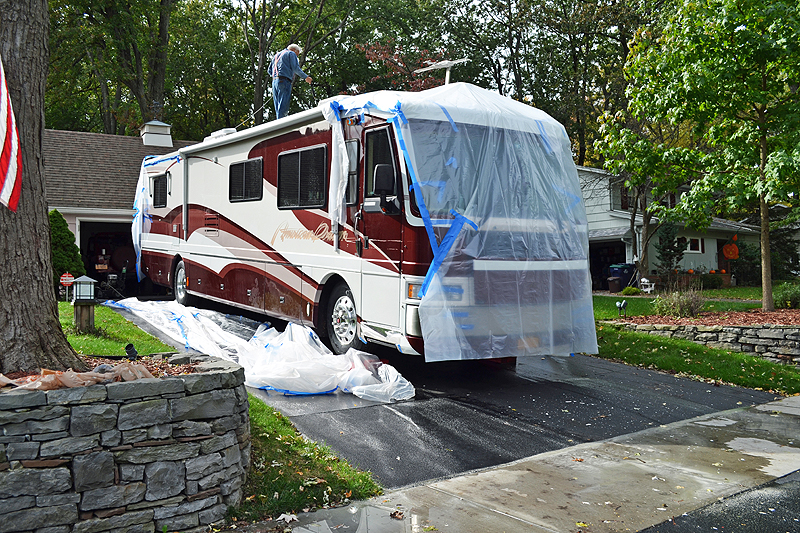
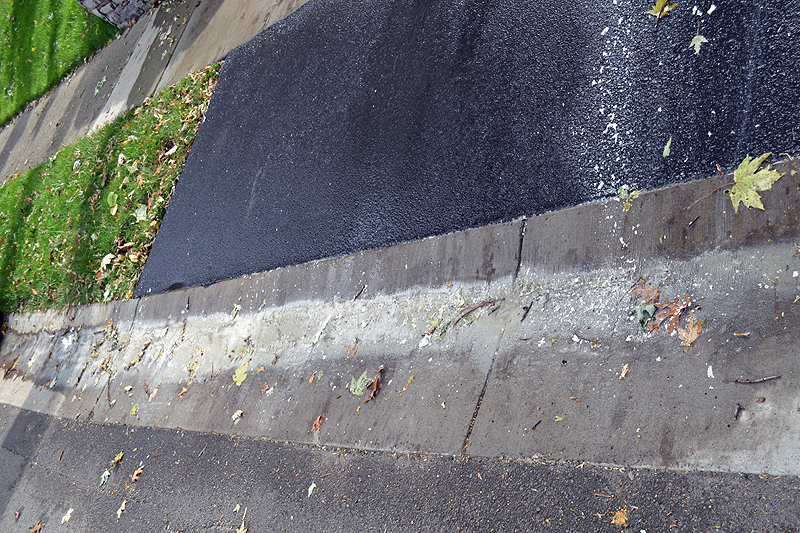
It all came off with the first good wind and presence of the power washer (air movement caused by the jet of water), the water never hit the edge until we lost the plastic, then there was no need to be careful of the plastic at the edge.
To mix the product I took a piece of metal weld filler rod and made a stirrer.

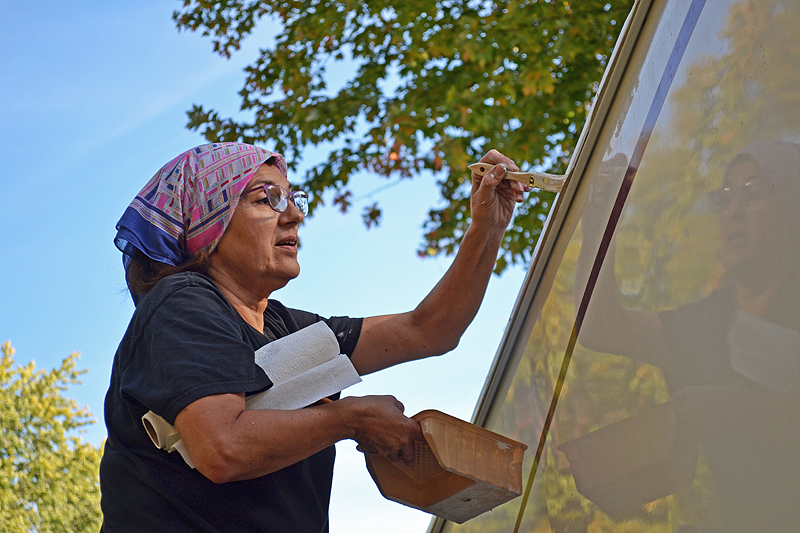
We used a roller on the flat areas of the roof and my wife worked her way around the Motor Home on a ladder doing the gutter, the bolts and hold down strip of the EDPM membrane.


2) Weather Precautions:
Dicor Acrylic Coating requires complete evaporation of water to cure. Cool temperatures and high humidity retard cure. Do not apply if weather conditions will not permit complete cure before rain, dew or freezing temperatures occur. Dicor Acrylic Coating will freeze and become unstable at temperatures below 32 degrees within a 24 hour period after application.

Notes: We are late in the season here, but as I stated above we are experiencing 15 to 20 degree temperatures warmer than normal. Our last coat was applied Sunday morning between 9 and 10 o’clock. Sunday reached 76 degrees and today (Monday) we are supposed to get to 72. Overnight temperatures have been in the fifties. Tonight at 2 in the morning we are expecting rain (they are predicting .28 inches). The weather is then supposed to get much cooler, but no temperatures (even overnight) will be below 40. I believe we are good to go to get a full cure before and rain or freezing temperatures.

3) Application:
Dicor White Acrylic Coating must be proceeded with Dicor Cleaner/Activator to ensure proper adhesion. All Cleaner/Activator must be completely removed from roof prior to applying acrylic coating. All surfaces must be clean and free of residue or loose particles, degraded substrate, grease, oil, dirt, or other contaminates. Surfaces shall be completely dry and frost free before coating. Deteriorated or damaged substrates shall be repaired or replaced. Dicor Acrylic Coating shall be applied in a minimum of two coats at a rate of 1 gallon per 125 sq. ft. per coat (i.e. 8’ X 30” roof takes 4 gallons). Actual gallons required will depend on the type of surface and texture, method of application, and weather conditions at the time of application. All surfaces must be uniformly coated and free of voids, pinholes, or blisters.

The following was in all capital letters, NOTE: ENTIRE 2 PART PROJECT MUST BE COMPLETED IN ONE DAY; INCLUDING CLEANER/ACTIVATOR APPLICATION, RINSING AND 2 COATS OF ACRYLIC COATING, EACH DRY TO THE TOUCH.

Notes: Although the Cleaner/Activator amount specified was right on, we used a little over half what they said should be used of the Acrylic Coating. We did not try to scrimp in the applications. If anything, I put it on in heavy coats, except half way though the second coat when I thought I might run out of our second can, and then only for a small portion of the roof. We did have a small amount of left over product.

They did include this disclaimer “Actual gallons required will depend on the type of surface and texture, method of application, and weather conditions at the time of application”. We had no texture which would tend to use up material, the surface was well prepared. I have placed a call to Dicor to discuss this but have not heard back.

The RV Service Center where I bought this product stated I would use nowhere near what the can was saying. They said I was buying too much, but I absolutely did not want to run out half way through the project.

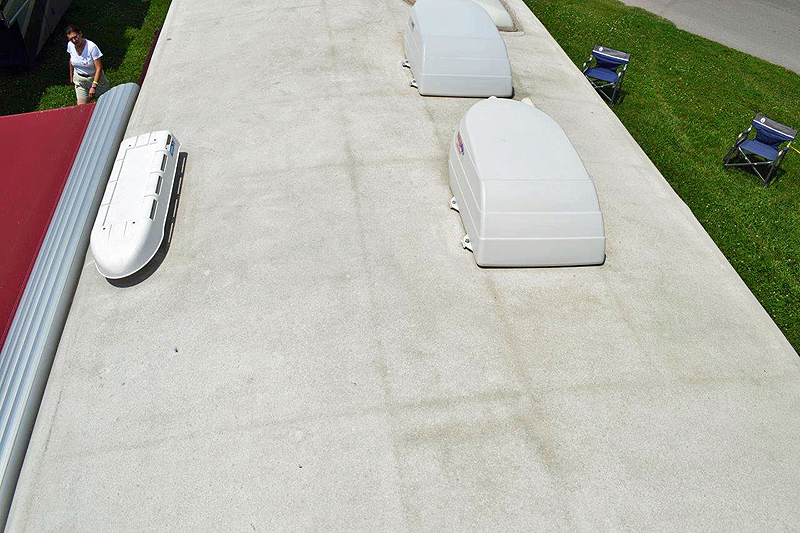
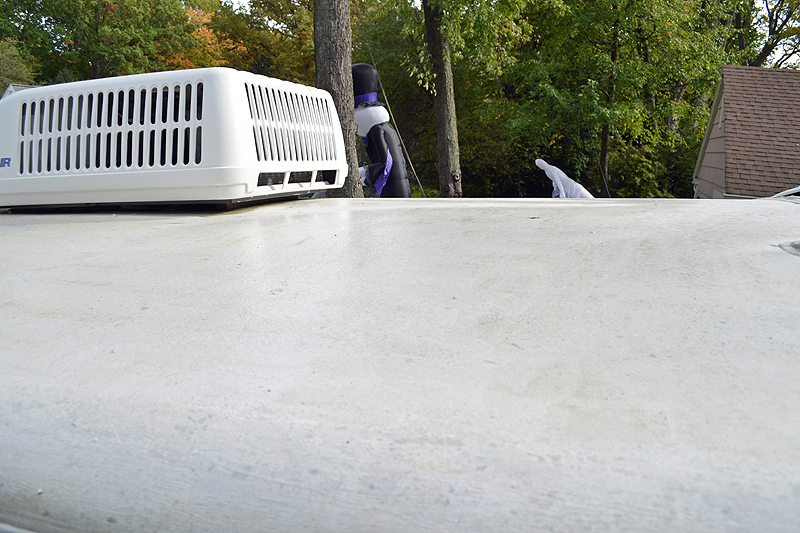
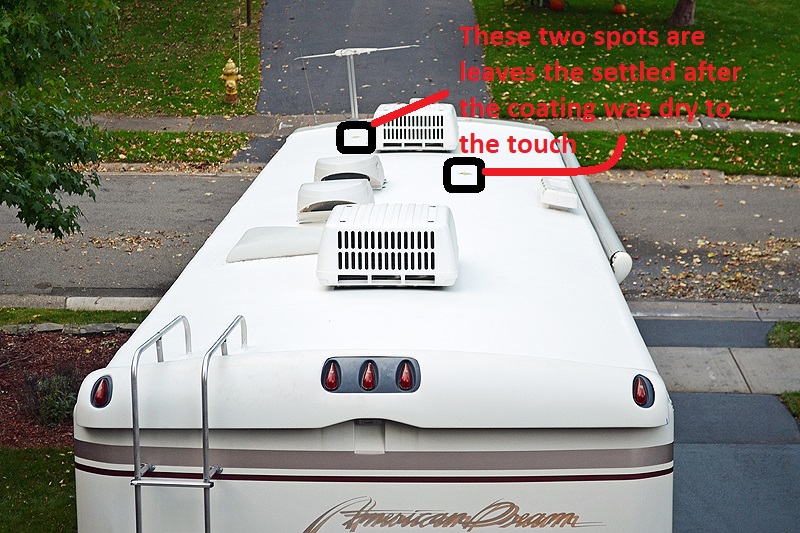
This is how the roof looked like after the first coat.


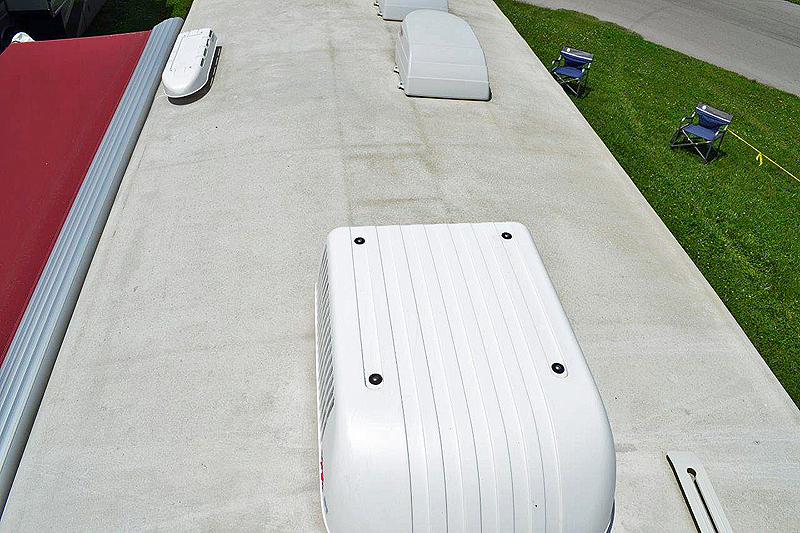
This is how the roof looked like after the second coat.

So let’s talk about this second coat.

First off, we ran out of time to apply the second coat on the same day. If we had not played with the plastic sheeting we would have been fine.


The directions say to apply the second coat as soon as the first is dry to the touch.

Dusk came before the first coat was dry to the touch. I do not think the first coat will fully cure overnight because of the cool temperatures (The directions also say not to apply when frost or freezing temperatures are expected so I think it can take the cool temperatures overnight). We are supposed to have record high tomorrow so the first coat should cure.

There is some contradictory information on the back of the containers. One says “Allow surfaces to dry thoroughly prior to application of the acrylic coating”. The second one states “2 coats of acrylic coating, each dry to the touch”. This is not the same thing as thoroughly dry, at least not to me. I think what they wanted was the surface fully dry after the Cleaner/Activator and not quit so dry between coats of the Acrylic coatings which is exactly what I did.

As a precaution, I painted up a test piece and applied a second coat to it in the morning and let it sit an hour to see if any unwanted side effects happen. Nothing happened. I tried calling Dicor for advice, but they were closed. I left a message and at this point still have not heard back from them (currently 12:01 Monday).

Secondly, you do need two coats. Even though I put the first coat on heavy as I could without having runs or roller marks, when I went to put the second coat on you could still see that it had not fully covered or was sucked into the surface.

I applied the second coat in the same method (heavy as I could without having runs or roller marks) and it did not seem to take as much material. I did, as mentioned above, not go as heavy when I thought I might run out of our second can, and then only for a small portion of the roof.

We did have one full can left over.

Depending on the advice I receive from Dicor (if I hear from them) and the appearance of the roof once I am willing to walk on it again, I may redo the whole procedure in the spring to insure the EDPM Membrane is fully protected.

That is certainly cheaper than replacing the membrane.

Guess what? I heard back from Dicor. They said no problems with the overnight for the second coat. On the drying instructions, they said they want the roof totally dry after the Cleaner/Activator and between the first and second coat of the Acrylic they want it just dry enough to walk on, but not fully cured. This is exactly what I had. On the amount used, they state the 125 Sq. Ft. coverage because they do not want anyone to run out half way through the project. The amount I used is fine based on the smoothness of the roof, the temperature of the day and the way it was applied.

Hurrah!


__________________
See projects on my 1997 America Dream here, Index to the projects is in the first post.
https://www.irv2.com/forums/f107/proj...am-174380.html

[SIGPIC][/SIGPIC]
GlennLever is offline   Reply With Quote
Old 10-24-2017, 04:55 PM   #1551
New to the RV World
 
GlennLever's Avatar
 
Vintage RV Owners Club
American Coach Owners Club
Join Date: Aug 2013
Location: Rochester, NY
Posts: 3,092
Video from Bowling Green

https://www.facebook.com/10001413114...5748846572818/
__________________
See projects on my 1997 America Dream here, Index to the projects is in the first post.
https://www.irv2.com/forums/f107/proj...am-174380.html

[SIGPIC][/SIGPIC]
GlennLever is offline   Reply With Quote
Old 10-24-2017, 06:35 PM   #1552
New to the RV World
 
GlennLever's Avatar
 
Vintage RV Owners Club
American Coach Owners Club
Join Date: Aug 2013
Location: Rochester, NY
Posts: 3,092
Quote:
Originally Posted by GlennLever View Post
I was able to capture the file and upload it to You Tube

__________________
See projects on my 1997 America Dream here, Index to the projects is in the first post.
https://www.irv2.com/forums/f107/proj...am-174380.html

[SIGPIC][/SIGPIC]
GlennLever is offline   Reply With Quote
Old 11-07-2017, 10:46 PM   #1553
New to the RV World
 
GlennLever's Avatar
 
Vintage RV Owners Club
American Coach Owners Club
Join Date: Aug 2013
Location: Rochester, NY
Posts: 3,092
So I just got the Motor Home back from the required annual New York State Heavy Equipment inspection (a story in it self, which I may relate in another post).

All the lights were working when I left the shoop and when I got home the left front headlight was out.

I have not even looked at it yet as I have many things that need to be done before winter sets in (they say first touch of snow this Friday).

Is the headlight a sealed beam or a bulb that twists in? If it twists in is there a better bulb I can use and replace both sides?

Thanks
Glenn

PS My best collection of trinkets for a season yet.

__________________
See projects on my 1997 America Dream here, Index to the projects is in the first post.
https://www.irv2.com/forums/f107/proj...am-174380.html

[SIGPIC][/SIGPIC]
GlennLever is offline   Reply With Quote
Old 11-08-2017, 06:56 AM   #1554
Senior Member
 
idoxlr8's Avatar
 
American Coach Owners Club
Spartan Chassis
Join Date: Apr 2017
Posts: 391
Nice "Trinkets" Glen...

They are regular twist in type bulbs.

There are some LED replacements for them, but have not really researched it yet. I know mine could use a bit brighter bulbs. I saved this link when looking at this stuff earlier, but you should verify the bulb #'s, I'm not sure these are the right ones -

9006 H16 Version 7 LED Headlight Kit

Video -

Quote:
Originally Posted by GlennLever View Post
So I just got the Motor Home back from the required annual New York State Heavy Equipment inspection (a story in it self, which I may relate in another post).

All the lights were working when I left the shoop and when I got home the left front headlight was out.

I have not even looked at it yet as I have many things that need to be done before winter sets in (they say first touch of snow this Friday).

Is the headlight a sealed beam or a bulb that twists in? If it twists in is there a better bulb I can use and replace both sides?

Thanks
Glenn

PS My best collection of trinkets for a season yet.
__________________
1998 American Dream Race Car Hauler
idoxlr8 is offline   Reply With Quote
Reply

Tags
projects


Currently Active Users Viewing This Thread: 3 (0 members and 3 guests)
 

Posting Rules
You may not post new threads
You may not post replies
You may not post attachments
You may not edit your posts

BB code is On
Smilies are On
[IMG] code is On
HTML code is Off
Trackbacks are Off
Pingbacks are Off
Refbacks are Off


Similar Threads
Thread Thread Starter Forum Replies Last Post
American Coach: 1997 American Dream remodel stkt Fleetwood Owner's Forum 263 08-17-2016 03:19 PM
American Dream Exhaust tip and tail pipe extension GlennLever Fleetwood Owner's Forum 7 09-20-2014 06:31 AM
American Coach: 1997 American Dream Coopers Mom Fleetwood Owner's Forum 13 08-26-2014 06:02 PM
Water system problems on American Dream GlennLever Fleetwood Owner's Forum 5 07-13-2014 09:32 AM

» Featured Campgrounds

Reviews provided by


All times are GMT -6. The time now is 12:41 PM.


Powered by vBulletin® Version 3.8.8 Beta 1
Copyright ©2000 - 2024, vBulletin Solutions, Inc.