 |
|
 07-12-2017, 07:56 AM
|
#57
|
|
Senior Member
Join Date: May 2017
Location: Metamora, MI
Posts: 5,525
|
Tejay,
You could certainly use shims for the inside wheels, leave the shims in the lower position and your modified nuts for the outside. Then replace the modded nuts with factory.
When I have to remove my wheels for whatever, I'll probably just shim all six.
Gotta be better than knowing it's off center with the standard method.
Unless you want to start a mini business in selling the cheap, modified nuts to all of us 
I am thinking one really only needs say three in their tool kit? Faster then shimming the outside wheels.
__________________
2002 Newmar Mountain Aire Limited 4370 w/ Spartan K2 and Cummins 500hp
ASE Master Certified (a long.....time ago...)
|

|

|
 |
Join the #1 RV Forum Today - It's Totally Free!
iRV2.com RV Community - Are you about to start a new improvement on your RV or need some help with some maintenance? Do you need advice on what products to buy? Or maybe you can give others some advice? No matter where you fit in you'll find that iRV2 is a great community to join. Best of all it's totally FREE!
You are currently viewing our boards as a guest so you have limited access to our community. Please take the time to register and you will gain a lot of great new features including; the ability to participate in discussions, network with other RV owners, see fewer ads, upload photographs, create an RV blog, send private messages and so much, much more!
|
|
07-12-2017, 08:12 AM
|
#58
|
|
Senior Member
Join Date: Mar 2016
Posts: 172
|
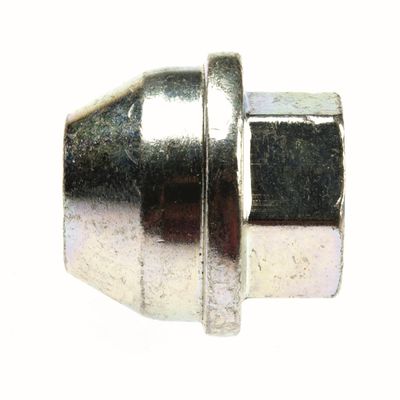
You could use something like these and heat treat them after turning them down on the lathe... heat treating at home is pretty easy to do...
|
|
|
|
|
07-12-2017, 08:25 AM
|
#59
|
|
Senior Member
Join Date: Mar 2016
Posts: 172
|
These are half way there already!
Turn em' down and heat treat em'!!!
|
|
|
|
|
07-12-2017, 08:28 AM
|
#60
|
|
Senior Member
Join Date: Mar 2016
Posts: 172
|
|
|
|
|
|
07-12-2017, 09:45 AM
|
#61
|
|
Senior Member
Join Date: Mar 2016
Posts: 172
|
Quote:
Originally Posted by Waiter21

on their way...
|
Did you get your tool kit yet? BTW... I love the southwind website... Awesome! Extremely helpful! Thank You!
|
|
|
|
|
07-12-2017, 12:11 PM
|
#62
|
|
Senior Member
Join Date: Nov 2014
Location: TEJAS
Posts: 814
|
You can get these at Autozone. Dorman # 611-332.1
|
|
|
|
|
07-12-2017, 09:14 PM
|
#63
|
|
Senior Member
Ford Super Duty Owner
Join Date: Jan 2011
Location: Lowell, Arkansas
Posts: 7,303
|
I've machined a lug to fit inside the stud hole so I can line up the inner rear hub. I'll pull a wheel of tomorrow to measure the stud hole. That will be the big if. If they aren't to thin based on the fact that the stud hole is not much bigger than the actual stud. It still may work.
I'm still on a steep learning curve on this lathe. It's only been since college back in about 1970 that I worked on a metal lathe. Simple idea but a lot of things to learn but it sure is fun.
Boondockin, Interesting video on heat treating at home. I could do some of that stuff as well. So much to learn and so little time.
__________________
TeJay Auto Instructor/4-yrs USAF/ Liz: RN/ WBGO 2014 Vista 30T/ F-53/CHF/5-Star/Koni * Bella & Izzy * Golden /Cocker mix/ Louie The Cat* All Retired
|
|
|
|
|
07-13-2017, 11:52 AM
|
#64
|
|
Senior Member
Ford Super Duty Owner
Join Date: Jan 2011
Location: Lowell, Arkansas
Posts: 7,303
|
I've got 4 tapered lugs ready to install the left front tire. I'm eating lunch and charging the camera battery. I'll post some pics when I'm done. I do believe that having 4 lugs will center the wheel better. In theory three should work, but that's in a perfect world. My machined lugs could be a bit better, smooth and more tapered. So no they are not perfect.
The Tru - Center tapered centering lugs are perfect but they cost $180.
I did use one of those cheap lugs and machined one to use on the rear. It worked fine until I got it slightly under sized. Which means I have to start over. The bright side is being smaller that makes the wall thinner. It didn't fall apart and there's still enough metal wall thickness to do the job. You have to learn from your mistakes.
__________________
TeJay Auto Instructor/4-yrs USAF/ Liz: RN/ WBGO 2014 Vista 30T/ F-53/CHF/5-Star/Koni * Bella & Izzy * Golden /Cocker mix/ Louie The Cat* All Retired
|
|
|
|
|
07-13-2017, 12:09 PM
|
#65
|
|
Senior Member
Join Date: Nov 2005
Posts: 3,968
|
Quote:
Originally Posted by TeJay
I've got 4 tapered lugs ready to install the left front tire. I'm eating lunch and charging the camera battery. I'll post some pics when I'm done. I do believe that having 4 lugs will center the wheel better. In theory three should work, but that's in a perfect world. My machined lugs could be a bit better, smooth and more tapered. So no they are not perfect.
The Tru - Center tapered centering lugs are perfect but they cost $180.
I did use one of those cheap lugs and machined one to use on the rear. It worked fine until I got it slightly under sized. Which means I have to start over. The bright side is being smaller that makes the wall thinner. It didn't fall apart and there's still enough metal wall thickness to do the job. You have to learn from your mistakes.
|
Been there, done that. I was told years ago by one of our machinists, "it's not a problem. Just run the lathe in reverse and reinsert the chips." The skill is in reinserting the chips. They have to go back in the exact order they came out.
__________________
Hikerdogs
2013 Adventurer 32H
|
|
|
|
|
07-13-2017, 12:13 PM
|
#66
|
|
Senior Member
Join Date: Mar 2016
Posts: 172
|
Quote:
Originally Posted by Hikerdogs
Been there, done that. I was told years ago by one of our machinists, "it's not a problem. Just run the lathe in reverse and reinsert the chips." The skill is in reinserting the chips. They have to go back in the exact order they came out.
|
Or letting the smoke out of electrical components and wiring... if you could just get the smoke back in... everything would be fine!
|
|
|
|
|
07-13-2017, 12:20 PM
|
#67
|
|
Registered User
Ford Super Duty Owner
Join Date: Nov 2014
Location: NW Ohio
Posts: 7,114
|
The sleeves showed up in the mail today. Looks like I have a weekend project...
|
|
|
|
|
07-13-2017, 02:18 PM
|
#68
|
|
Senior Member
Ford Super Duty Owner
Join Date: Jan 2011
Location: Lowell, Arkansas
Posts: 7,303
|
Tapered Lugs ? !
I like what the wood carver said, "It's easy to carve an eagle. Just cut away everything that doesn't look like an eagle."
Got the other wheel mounted. I took a good lug and cut it to fit inside the stud hole. It's still a few thousands under but closer. It's going to have to be right on for it to move the rim around. I'm not giving up just taking a brake so I can pack.
Here's the pics. Notice I used 4 lugs. The two at 12 and 6 are right next to the centering tabs. The other two at 9 and 3 are of set but still close.
The readings I got with feeler gauges are RED before and GREEN after. It's a little closer to center but not perfect. We'll see how it rides.
I'm still thinking for this to work well I'll need a lug machined correctly. I'm jusdt about to the point where I know how to machine the lug. It's a work in progress.
If it's cut straight then it won't fit if the wheel is to far off. If it needs to move some it needs to be tapered so it will just fit and the taper move the rim.
We are only talking about a few thousands with this. Just coming out of the gate with this lathe I'm still learning but it sure is fun!!!
For some strange reason it won't let me load any more pics. I tried 4 times to no avail. It's not that I don't know how to do it.
__________________
TeJay Auto Instructor/4-yrs USAF/ Liz: RN/ WBGO 2014 Vista 30T/ F-53/CHF/5-Star/Koni * Bella & Izzy * Golden /Cocker mix/ Louie The Cat* All Retired
|
|
|
|
|
07-15-2017, 06:45 AM
|
#69
|
|
Registered User
Ford Super Duty Owner
Join Date: Nov 2014
Location: NW Ohio
Posts: 7,114
|
I centered the wheels using sleeves, my vibration is gone... Not only is the 55 mph vibration gone, but the small vibrations in the steering wheel are also completely gone. WOW - What a difference.
I made before/after measurements, although I seen better distribution of the measurements, I wouldn't have declared the wheels as being "centered" based on my measurements. Keep in mind my MH is 18 years old, so the rims and hubs have been banged, bent, moved, etc. They are not as pretty and clean as the ones in TeJays photos.
I've concluded that I could NOT center the wheels based on the tab / hub measurements, I had to use the sleeves.
I wrote an article on my site with photos of the measurements and sleeves.
CONCLUSION - Disregard the measurements and just go with the sleeves.
Funny vibration around 50 mph – Wheel Centering on F53 – 1999 Southwind 35S
NOTE - The smallest feeler I have is .003. so if I couldn't get it in there, I marked it as 0.
..
|
|
|
|
|
07-15-2017, 08:07 AM
|
#70
|
|
Senior Member
Ford Super Duty Owner
Join Date: Jan 2011
Location: Lowell, Arkansas
Posts: 7,303
|
Waiter21,
That's an excellent write up as well. Very well explained and clear.
I'll see what I can do to make our rims look old and dirty. LOL Your drawings are a lot easier to see than my posts. I haven't investigated how to do drawings yet.
When I saw your measurements I to was a bit confused. I was hoping to see a more centered rim but just got about what you did which was some shifting of measurements and in some cases no shifting.
The proof is in the results. If it's that noticeably better then there has to be less up and down movement of the rim. That is what we are trying to eliminate.
In defense of why I'm doing this at this point I don't have a vibration that I noticed. I thought the idea of the sleeves was a good one and I'm always trying to make the ride and handling better.
There can and are vibrations that we may not really notice but they do increase wear on suspension parts. They will also effect the tire wear as well.
I'll take the RV out in a few days so we'll see if our rig is better or worse. I don't think it will change much but we'll see.
Yesterday I took one of those cheap lugs and machined it down a bit different than before. I want to get it so it will center the inner and outer rear rims.
The sleeve that I'm trying to make needs to be 1/2" long. The first 3/8" will go through the outer rim. The next 1/8" will then center the inner rim. At least that's the plan.
These cheap lugs are a bit short to do that but I'm confident it can be done. Right now I don't have the time to devote to it so I'll leave the rears as they are.
I'm also working on my skills at machining more precisely. After all that's what it's all about. The sleeve will have to just fit through the stud hole to center the rims.
As I'm writing this I thinking that for the sleeves to work on the rear there may have to be a straight sleeve to fit through the outer rim then into the inner rim. Then maybe a slight taper to center the outer rim. Is that how the end of those sleeves look??
Maybe a precisely machined sleeve fitting through both rims would center the rims on to the studs but I don't know.
Can you guess about how much room there is between the studs and the rim holes. I don't have much room at all. A 14-mm stud is .551 in diameter and the stud hole is about .600. That about .050 thousands space for the stud or .025 for each side. That's not much room for a sleeve or a taper.
You initially said that you had 14-mm X 2.0 lugs. That's on your 1999 rig. I got the same size tapered lugs and it didn't fit. I replaced it with the 1.5 threads and it fit. Ford changed the threads from 2.0 to 1.5. I'd guess that's more thread per inch so it's a fine metric thread.
__________________
TeJay Auto Instructor/4-yrs USAF/ Liz: RN/ WBGO 2014 Vista 30T/ F-53/CHF/5-Star/Koni * Bella & Izzy * Golden /Cocker mix/ Louie The Cat* All Retired
|
|
|
|
|
|
|
Currently Active Users Viewing This Thread: 1 (0 members and 1 guests)
|
|
|
 Posting Rules
|
You may not post new threads
You may not post replies
You may not post attachments
You may not edit your posts
HTML code is Off
|
|
|
|
 » Recent Discussions
 |
|
|
|
|
|
|
|
|
|
|
|
|
|
|
|
|
|
|
|
|
|
|
|
|
|


 Linear Mode

