Journey with Confidence RV GPS App RV Trip Planner RV LIFE Campground Reviews RV Maintenance Take a Speed Test Free 7 Day Trial ×
RV Trip Planning Discussions

Go Back   iRV2 Forums > MOTORHOME FORUMS > Class A Motorhome Discussions
Click Here to Login
Join iRV2 Today

Mission Statement: Supporting thoughtful exchange of knowledge, values and experience among RV enthusiasts.
Reply
  This discussion is proudly sponsored by:
Please support our sponsors and let them know you heard about their products on iRV2
 
Thread Tools Search this Thread Display Modes
 
Old 08-04-2012, 09:59 AM   #1
Junior Member
 
Join Date: Jul 2012
Posts: 22
"New" Rig Project

Got a new to us rig recently (details here http://www.irv2.com/forums/f58/2009-...-a-130789.html) and will be transferring the battery bank (Woodalls Open Roads Forum: Tech Issues: Getting ready to go boondocking) from the "old" 5er to the new MH. There's a compartment just behind the passenger wheel that will fit these just right.

Want to accomplish the following:

1. Pull the OEM Iota DLS-55 converter and replace it with my standalone Paramode 55 amp. Reason is that the Paramode has temp compensation. It gets hot where I live in the summer and the float voltage of the Iota can be a bit too high.

2. The house batteries were apparently relocated to the front engine bay of the MH so I'm going to pull the converter wiring and those batts out then install a box with a couple of posts inside similar to this (Dual PowerPost Cable Connectors Blue Sea Systems). Then run some thicker wire back to the battery compartment (reusing my bus bars). I think my alternator is 130 amps (not sure on this). It looks like a 10 foot run from the front engine bay but I should know for sure this weekend (or at least have a better idea). I'm thinking 4/0 should do it but if you guys think smaller is fine, I'd rather save the money.

3. Install a slide out battery tray. I bought 4 of these (14" Knape & Vogt 8000 Undermount Pantry Slide). Hope those will do the job. I've got 4 battery straps to hold the batts also.

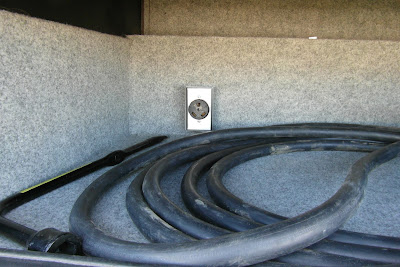
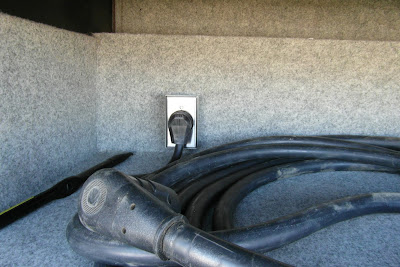
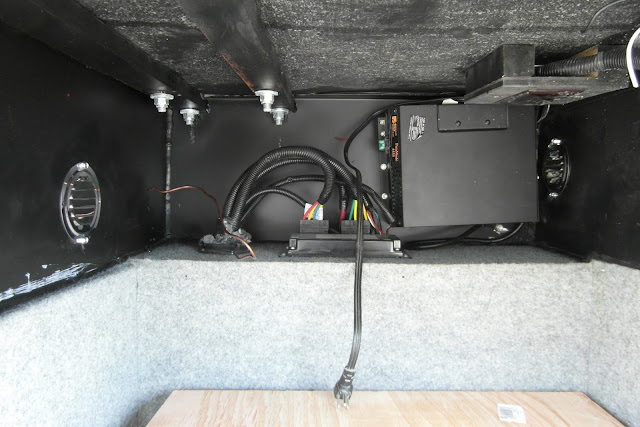
4. Install inverter in compartment behind the steps. Run about 10 feet of #6 to the aforementioned bus bars in the battery compartment. Also, run 10/2 Romex from the inverter to a 30 amp RV receptacle in the shore cord compartment. I'm using a 300W inverter now but plan to get a 2000W one, that's why the Romex is so big. I'll run new thicker DC wires when I get the 2000W.

Batteries in back of truck


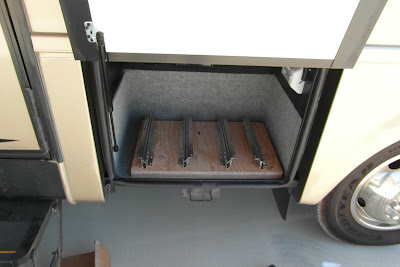
Future battery compartment.


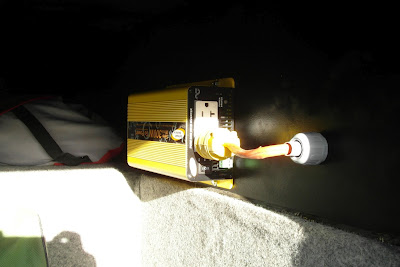
Inverter will go here.


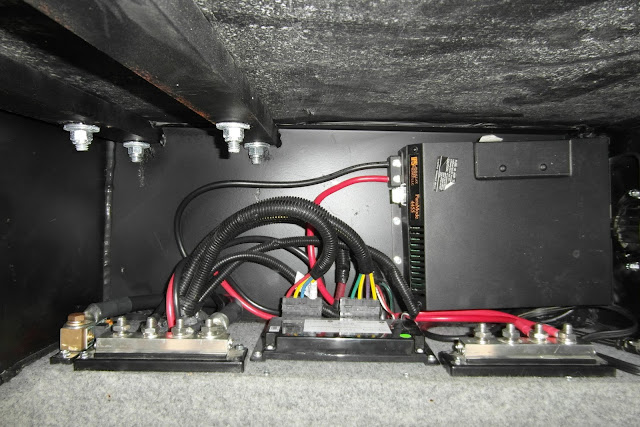
Batt and inverter compartments.
__________________
2009 Newmar Canyon Star 3205
Mena661 is offline   Reply With Quote
Join the #1 RV Forum Today - It's Totally Free!

iRV2.com RV Community - Are you about to start a new improvement on your RV or need some help with some maintenance? Do you need advice on what products to buy? Or maybe you can give others some advice? No matter where you fit in you'll find that iRV2 is a great community to join. Best of all it's totally FREE!

You are currently viewing our boards as a guest so you have limited access to our community. Please take the time to register and you will gain a lot of great new features including; the ability to participate in discussions, network with other RV owners, see fewer ads, upload photographs, create an RV blog, send private messages and so much, much more!

Old 08-04-2012, 10:01 AM   #2
Junior Member
 
Join Date: Jul 2012
Posts: 22
Installed the 30 amp RV outlet in the shore cord compartment yesterday. Wired that directly to my 300W inverter using 28 feet of 10/2 romex. I have to admit, running that 10/2 was a PITA. Glad it's done. Today I start on the slide out battery tray. More to come!

30A RV receptacle


Inverter with 20 amp plug


__________________
2009 Newmar Canyon Star 3205
Mena661 is offline   Reply With Quote
Old 08-04-2012, 11:20 AM   #3
Senior Member
 
Jim_HiTek's Avatar
 
Join Date: Nov 2011
Location: Full time RV'er
Posts: 5,140
Cool. Keep the pics coming!

Did you add bracing or straps to that compartment to hold the extra weight of the batteries?
__________________
'02 Winnebago Journey DL, DSDP, 36' of fun.

Visit my RV Travel & Repair Blog at : https://chaos.goblinbox.com
Jim_HiTek is offline   Reply With Quote
Old 08-04-2012, 11:25 AM   #4
Junior Member
 
Join Date: Jul 2012
Posts: 22
It's pretty thick and I did a test run with the batteries in there. No flexing at all but I'm adding two 3/4" plywood sheets (24" x 15") to the floor anyways.
__________________
2009 Newmar Canyon Star 3205
Mena661 is offline   Reply With Quote
Old 08-04-2012, 04:37 PM   #5
Junior Member
 
Join Date: Jul 2012
Posts: 22
Finished the battery tray! Still more left to do in that compartment though. Have to move the receptacle and the light a little farther back. Plus install some bus bars and shunt for the Victron battery monitor. Then install wires from the inverter, Paramode converter and alternator (most is being reused from my "old" 5er). Here are the pics.


__________________
2009 Newmar Canyon Star 3205
Mena661 is offline   Reply With Quote
Old 08-04-2012, 05:27 PM   #6
Senior Member
 
Jim_HiTek's Avatar
 
Join Date: Nov 2011
Location: Full time RV'er
Posts: 5,140
Slide out assembly looks really good. Are you going to add a metal strap to the side walls? Or a plastic strap to the table?
__________________
'02 Winnebago Journey DL, DSDP, 36' of fun.

Visit my RV Travel & Repair Blog at : https://chaos.goblinbox.com
Jim_HiTek is offline   Reply With Quote
Old 08-04-2012, 05:32 PM   #7
Junior Member
 
Join Date: Jul 2012
Posts: 22
Quote:
Originally Posted by Jim_HiTek View Post
Slide out assembly looks really good. Are you going to add a metal strap to the side walls? Or a plastic strap to the table?
Thanks. Going to drill some eye hooks in the floor and use motorcycle straps. That's what I did in my 5er. The hooks will be front and rear instead of side to side like before. Believe it or not, the batteries are so heavy they hardly move at all. Here's the old setup.
__________________
2009 Newmar Canyon Star 3205
Mena661 is offline   Reply With Quote
Old 08-05-2012, 02:19 PM   #8
Junior Member
 
Join Date: Jul 2012
Posts: 22
Figuring out how I should layout the bus bars and shunt for the battery monitor. Need to swap out the converter too. Should fit but I'll measure to make sure. Also need to drill some holes for ventilation.

__________________
2009 Newmar Canyon Star 3205
Mena661 is offline   Reply With Quote
Old 08-05-2012, 06:38 PM   #9
Senior Member
 
djbmsu's Avatar
 
Join Date: Nov 2011
Location: Polk City Florida
Posts: 1,930
That was the topic I was waiting to see, "ventilation" looks good so far.
__________________
Don and Nancy
[2018 Tiffin Bus 40 AP, 2022 Ford Edge ST , 9yr old sisters Sara n Kaycee, Havanese, Electric Catrike
djbmsu is offline   Reply With Quote
Old 08-06-2012, 04:26 PM   #10
Junior Member
 
Join Date: Jul 2012
Posts: 22
Quote:
Originally Posted by djbmsu View Post
That was the topic I was waiting to see, "ventilation" looks good so far.
I'm shooting for tomorrow to drill the holes. The grills won't be in till later this week. I'm also thinking about swapping converters then too. Probably a good time for that.
__________________
2009 Newmar Canyon Star 3205
Mena661 is offline   Reply With Quote
Old 08-10-2012, 09:26 PM   #11
Junior Member
 
Join Date: Jul 2012
Posts: 22
Pulled the OEM batteries. Giving them to a friend that needs some new one's. Installed a temporary junction box for the existing wire that was connected to the batteries until I can either get a more appropriate one or trace and rerun new wire. The new #1 will be run from that junction box back to some bus bars in the battery compartment. Tomorrow I do a number of things:

1. Drill holes for ventilation. Install grills.
2. Swap converters. Remove old converter wiring.
3. Move receptacle back a few inches. Remove light and cap wires (until I can figure out how to mount them again).
4. Install bus bars and Victron shunt.
5. Install inverter wire connectors. Run wire to bus bars.
__________________
2009 Newmar Canyon Star 3205
Mena661 is offline   Reply With Quote
Old 08-11-2012, 08:26 PM   #12
Junior Member
 
Join Date: Jul 2012
Posts: 22
Progress! This is taking longer than I expected because of the heat. Currently 111F/44C. Taking many breaks. I'll have to replace the light fixture completely as I had to destroy it to get it out. It was like someone welded the sheetmetal screws in there. I must have done a good job with the vents as I can feel air coming through them. Got the bus bars and shunt installed. Ran the wiring for the inverter, connected that to the bus bars. Connected wiring for the converter to bus bars also. Tried to relocate the existing 20 amp receptacle with no luck. I'll have to get a different outlet box and mount it directly to the wall. Tomorrow I pull the old converter wiring completely out (it's hanging under the rig) and install the eye hooks for the battery straps.


__________________
2009 Newmar Canyon Star 3205
Mena661 is offline   Reply With Quote
Old 08-11-2012, 08:55 PM   #13
Moderator Emeritus
 
"007"'s Avatar
 
Nor'easters Club
Workhorse Chassis Owner
iRV2 No Limits Club
Join Date: Oct 2004
Posts: 30,785
Good job Mena661, here is a link from Newmar forum on compartment venting.
__________________
98KSCA, 99MACA, 03 KSCA-3740- 8.1 Chev-- ALLISON Trans
VISIT the NEWMAR QUICK TIPS & EASYMODS 1 & 2
QUICK TIPS # 3
RV SYSTEMS & APPLIANCES & RECALLS --- TECH INFORMATION
"007" is offline   Reply With Quote
Old 08-11-2012, 09:05 PM   #14
Junior Member
 
Join Date: Jul 2012
Posts: 22
Thanks. I'm hoping to be done by Tuesday. Would prefer Monday.
__________________
2009 Newmar Canyon Star 3205
Mena661 is offline   Reply With Quote
Reply


Currently Active Users Viewing This Thread: 1 (0 members and 1 guests)
 
Thread Tools Search this Thread
Search this Thread:

Advanced Search
Display Modes

Posting Rules
You may not post new threads
You may not post replies
You may not post attachments
You may not edit your posts

BB code is On
Smilies are On
[IMG] code is On
HTML code is Off
Trackbacks are Off
Pingbacks are Off
Refbacks are Off


» Featured Campgrounds

Reviews provided by


All times are GMT -6. The time now is 09:59 PM.


Powered by vBulletin® Version 3.8.8 Beta 1
Copyright ©2000 - 2024, vBulletin Solutions, Inc.