Journey with Confidence RV GPS App RV Trip Planner RV LIFE Campground Reviews RV Maintenance Take a Speed Test Free 7 Day Trial ×
RV Trip Planning Discussions

Go Back   iRV2 Forums > iRV2.com COMMUNITY FORUMS > Vintage RV's
Click Here to Login
Register FilesVendors Registry Blogs FAQ Community Calendar Today's Posts Search Log in
Join iRV2 Today

Mission Statement: Supporting thoughtful exchange of knowledge, values and experience among RV enthusiasts.
Reply
  This discussion is proudly sponsored by:
Please support our sponsors and let them know you heard about their products on iRV2
 
Thread Tools Search this Thread Display Modes
 
Old 02-03-2008, 08:02 PM   #1
Senior Member
 
RedneckExpress's Avatar
 
Vintage RV Owners Club
Join Date: Jul 2006
Location: Sauvie Island, OR
Posts: 2,596
Project #4 - Insulating the Cabover

We're back, its been a good long while since I updated this thing, so I think I shall get started with Project #4, Insulating the cabover.

When I bought my KIT, it came with a plywood floor with 1/2" foam board sandwiched between it, the outer layer and the wood frame. Not very good at stopping heat and cold transfer through the cabover.

Well, after reading Sleepy's camper insulating thread, I decided to take my own spin on it.

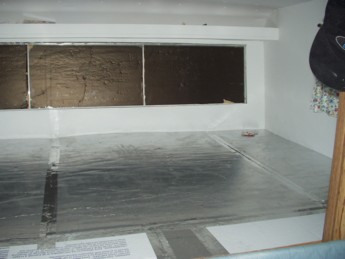
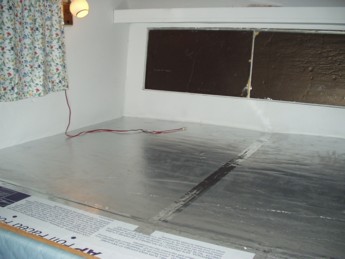
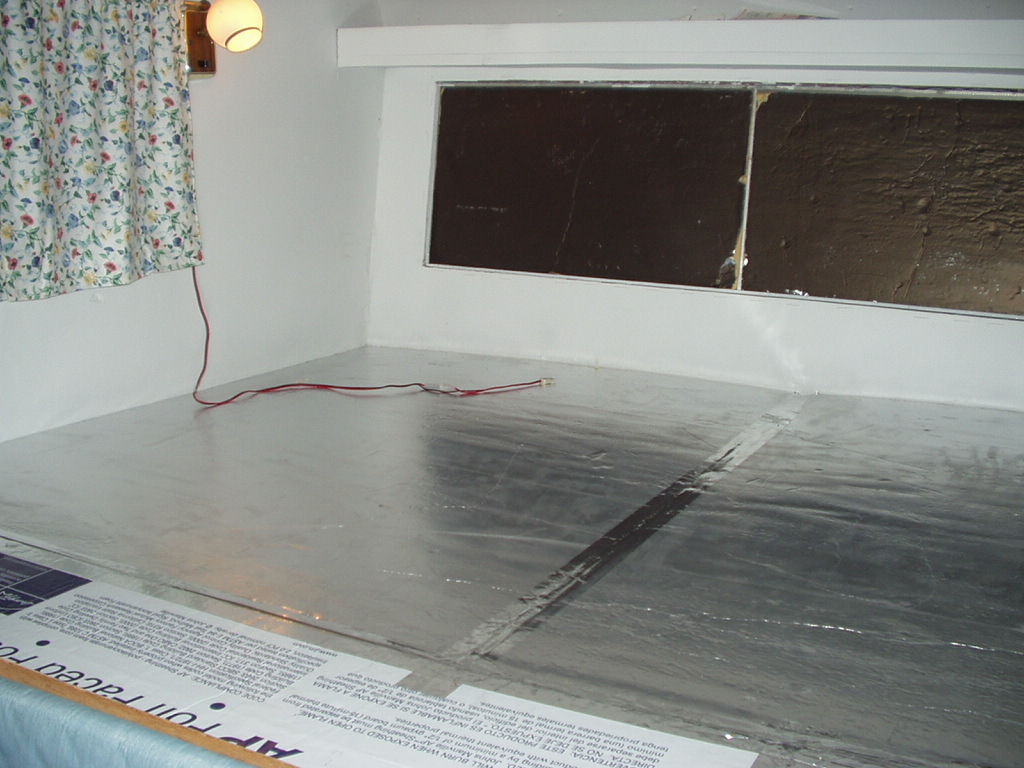
First, I covered the bare plywood cabover floor with 1" thick reflective covered foam board. Then I taped off all the seams between the individual pieces with metalic ducting tape to reduce any cold air seepage between the boards.


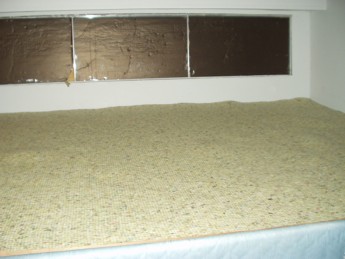
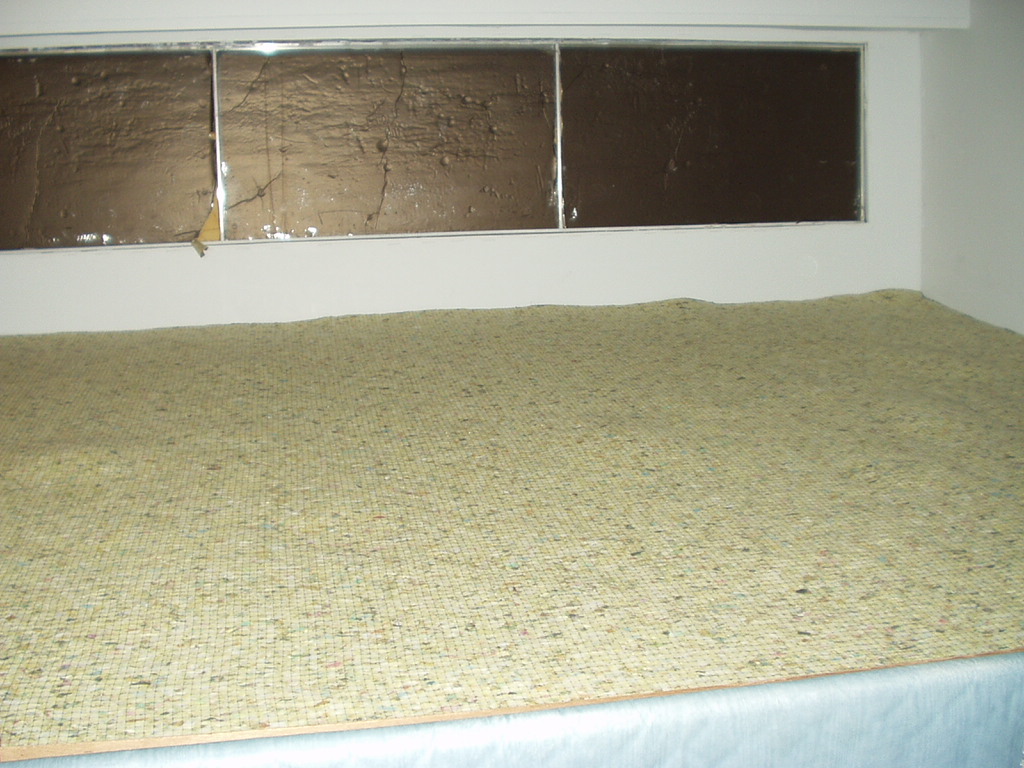
Then I put down a layer of household carpet padding over the top to create a spongy soft padding layer to reduce denting of the foamboard layer when one crawls around on the bed and their knees sink down.
Brand new foam, cost me $15 and I still have a bunch of it left over.


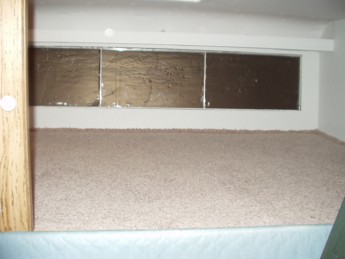
Finally, I cut a piece of remnant carpet I picked up from our local carpet warehouse store for $15. I made it an extra two inches wider than the measurements of the area, then took 1"x1" squares out of the corners so that I could fold the carpet up the wall 1". Then, using a big wallpaper putty knife (Great big thing) I pressed the carpet down till it had nice tight 90 degree seams along the walls and stapled it into place every 3-4". I probably could have skipped that last part, but I wanted to make certain the carpet didn't shift over time and would stay put when I ran the vacuum over it it was done.


All in all, I have a fairly nice cozy cabover floor now, granted, its underneath the matress predominately, but it still is nicer than what it was when I first got the camper. At some point, I might add some base board along the top of the carpet just for kicks, but that's not on the top of the agenda.

This setup was tested back in February winter camping with INSAYN, and the difference in cold transferance from the floor was drastic. Granted, I still lose an arm and a leg because of the giant picture window, but now I don't have it coming up through the bed as much as I did before. Till I come up with a good way to slow the transference of cold through that front window (Even with the foam inserts seen above) I'll just use the backup method which is to toss the excess pillows up against the window (I keep around 6 spare pillows in the camper, they're ones that aren't flat, but aren't fluffy enough for me anymore, so they get used as spares for guests).

Check on back for another project, I've got tons to post!
__________________
'92 Dodge W250 "Dually" Power Wagon
'74
KIT 1106 Kamper Slide-in Truck Camper
'06 Heartland Bighorn 3400RL Fifth wheel
Follow along with me in the The Journey of
RedneckExpress is offline   Reply With Quote
Join the #1 RV Forum Today - It's Totally Free!

iRV2.com RV Community - Are you about to start a new improvement on your RV or need some help with some maintenance? Do you need advice on what products to buy? Or maybe you can give others some advice? No matter where you fit in you'll find that iRV2 is a great community to join. Best of all it's totally FREE!

You are currently viewing our boards as a guest so you have limited access to our community. Please take the time to register and you will gain a lot of great new features including; the ability to participate in discussions, network with other RV owners, see fewer ads, upload photographs, create an RV blog, send private messages and so much, much more!

Reply


Currently Active Users Viewing This Thread: 1 (0 members and 1 guests)
 

Posting Rules
You may not post new threads
You may not post replies
You may not post attachments
You may not edit your posts

BB code is On
Smilies are On
[IMG] code is On
HTML code is Off
Trackbacks are Off
Pingbacks are Off
Refbacks are Off


Similar Threads
Thread Thread Starter Forum Replies Last Post
Kit Camper Projects - Project #3, Fridge Cooling Fans RedneckExpress Vintage RV's 3 03-09-2008 03:19 PM
Kit Camper Projects - Project #8, Yet More Storage RedneckExpress Vintage RV's 1 02-03-2008 08:21 PM
Kit Camper Projects - Project #6, Electrical Upgrades RedneckExpress Vintage RV's 1 02-03-2008 08:13 PM
Kit Camper Projects - Project #2, Bathroom Improvements RedneckExpress Vintage RV's 1 02-03-2008 07:59 PM
Kit Camper Projects - Project #1, Mo' Batteries RedneckExpress Vintage RV's 1 02-03-2008 07:57 PM

» Featured Campgrounds

Reviews provided by


All times are GMT -6. The time now is 01:39 PM.


Powered by vBulletin® Version 3.8.8 Beta 1
Copyright ©2000 - 2024, vBulletin Solutions, Inc.