NOTE: As in all my project threads, all pictures are clickable. Simply click the image featured in this thread and you'll be shown a much larger scale version.
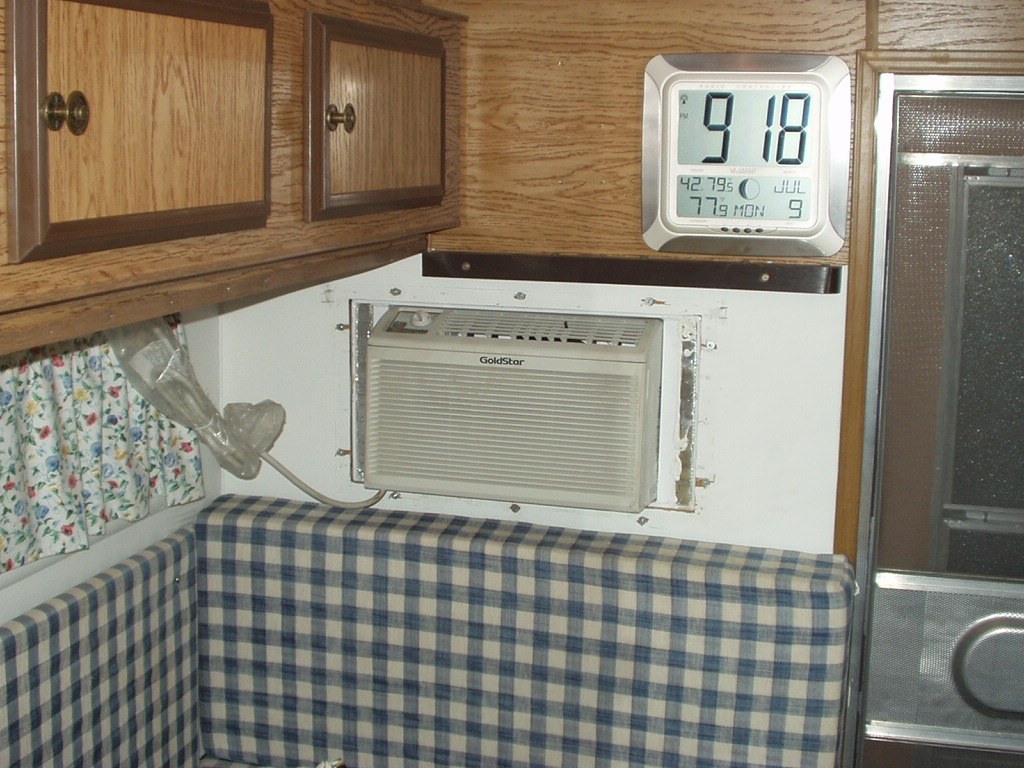
First off, the unit I purchased is a Goldstar (An L.G. product) 5000 BTU A/C unit. It cost $89.99, and I added in the 1 year replacement warranty on the chance that it might die from road use. The unit comes with a factory 1 year parts and labor warranty, and a 5 year warranty on the compressor.
I picked this particular one because it was the first unit I found that measured in at 11 1/8" tall by 17" wide, and it was just small enough to fit inside the frame of the an existing window and still allow for an angle iron frame to go in around it. Also, for those that used the Kenmore unit, this thing is basically its exact clone, the only major differences are 150btu in the rating and the front plastic is more rounded in looks on the Kenmore vs the Goldstar.
One thing I remember reading time and time again was difficulty sealing around the little feet on the bottom of the unit. The solution to those was in the form of a pair of pliers. The single tack weld holding them on will crack very easy and the feet will pop clean from the bottom, making it look like they were never there, making it much easier to make a tight seal.
My concept was to reuse the existing screw holes on the unit where the plastic window assembly attached to secure the A/C unit into the frame. The frame itself would then be secured to the camper using 10 1/4" bolts through the wall to spread the load of the 40lb A/C unit and also to keep a solid seal between the new A/C frame and its butyl tape coating that was sandwiched between it and the wall.
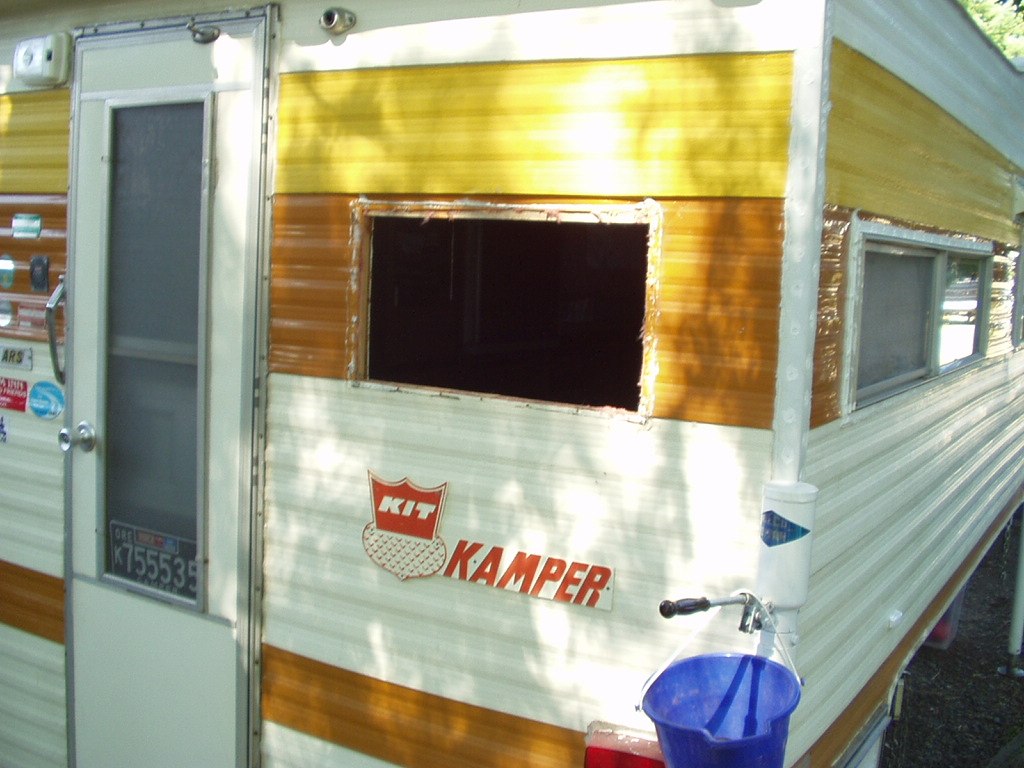
The first part of the process was to remove the old window. This proved to be very very easy, far easier than the other window I had to remove a while back in search of a leak. This window was a leak waiting to happen, removing it to install this A/C actually saved me a possible repeat of the dreaded leaking window frame caper that had played out at the beginning of this year.

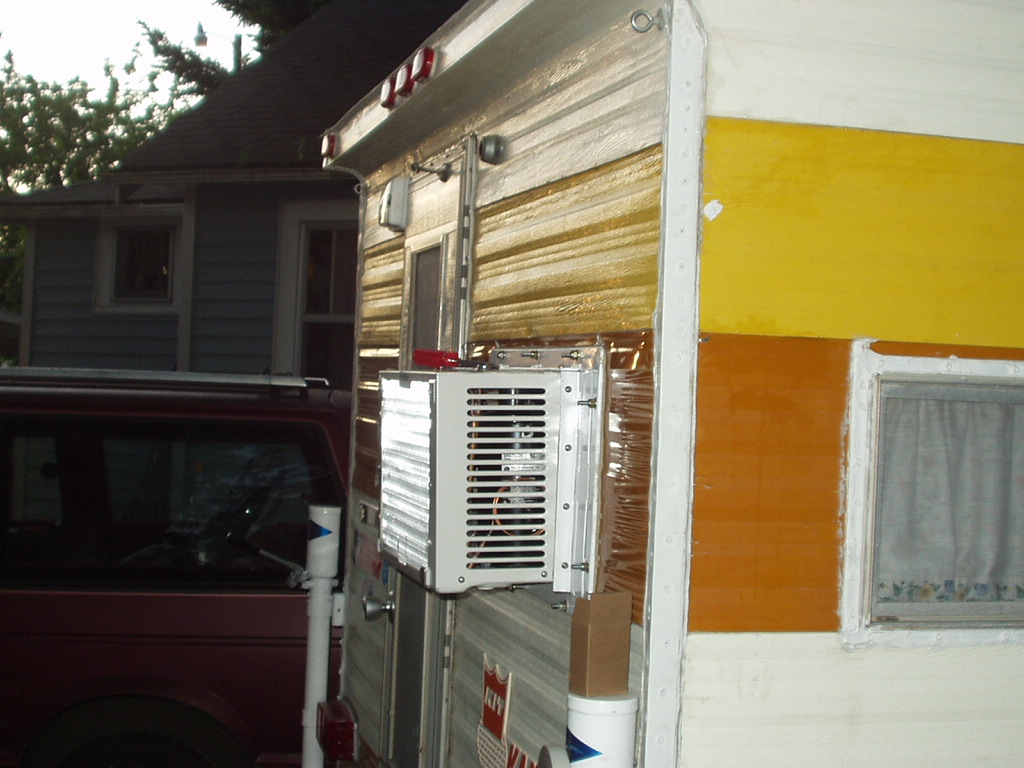
Sadly, I made the stupid mistake of trying to get things together quickly so to be done in a single day, and forgot to take a picture of the steel A/C Frame in place by itself, so we'll just have to skip to the next couple pictures of after the A/C itself was installed.
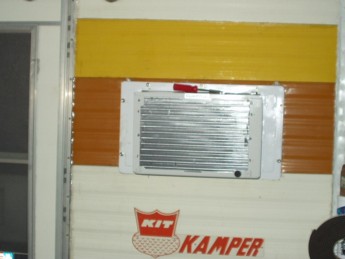

In our design we deliberately gave the A/C a 1 degree slope to keep water from back peddling into the unit. The slope is just enough to make the pan drain properly, but not too steep as to cause the compressor any difficulty. A key reminder to anyone considering adding a home A/C unit to their unit, never run the unit when you are out of level enough that you wouldn't operate your fridge, compressors don't like to be heavily out of level.

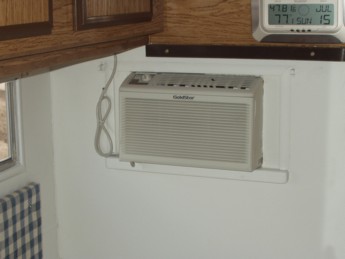
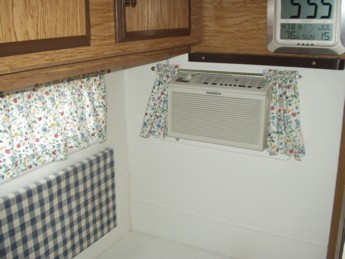
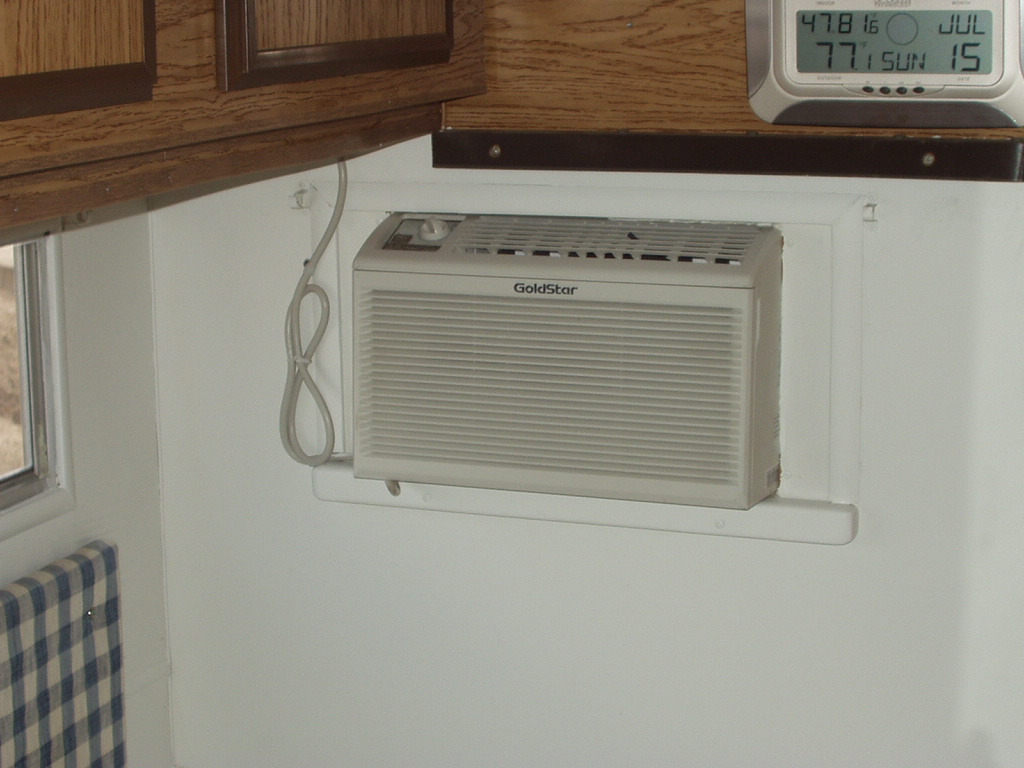
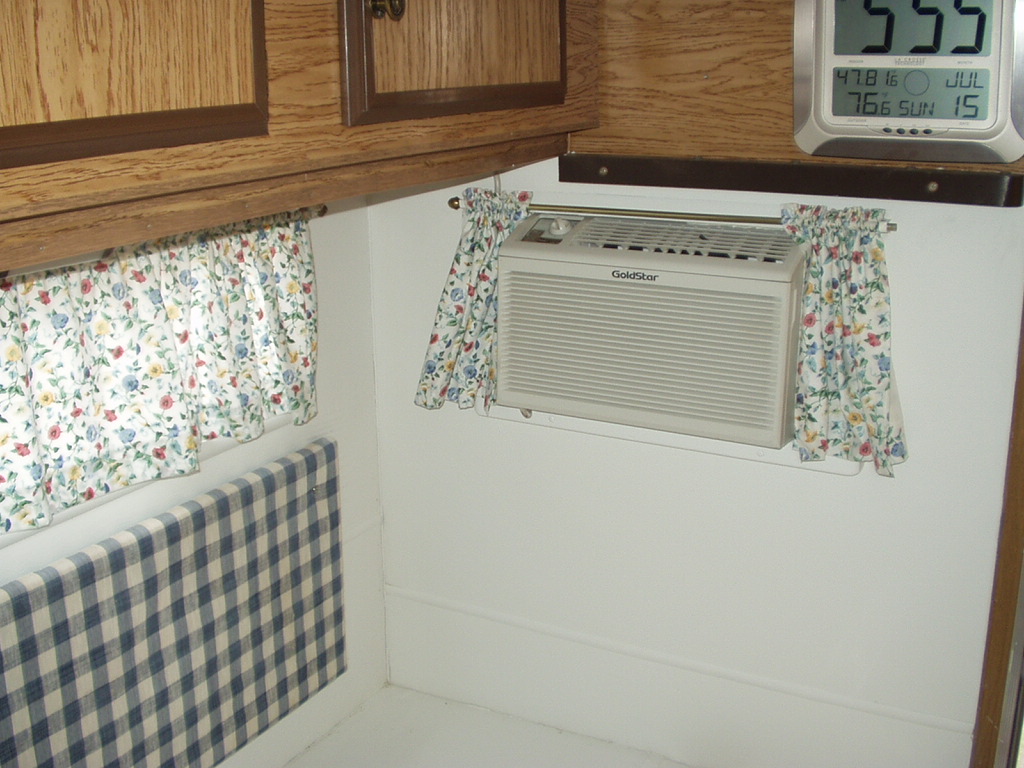
This is how the A/C looks inside the camper. The picture on the left shows it as it was right after being installed. The temperature on the wall is registering what it was inside the camper with the unit on, it was 85+ when we fired it up. The picture on the right is after having the old window trim reinstalled and the supporting ledge added under the unit to both help the butyl seal underneath the A/C stay packed in tight and also to help support the front half of the units frame.
For those that follow my threads, my last project thread,
Kit Camper Projects - Project #6, Electrical Upgrades, I installed the outlet for the A/C unit, along with its own dedicated Circuit breaker.
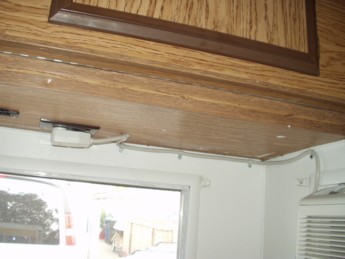
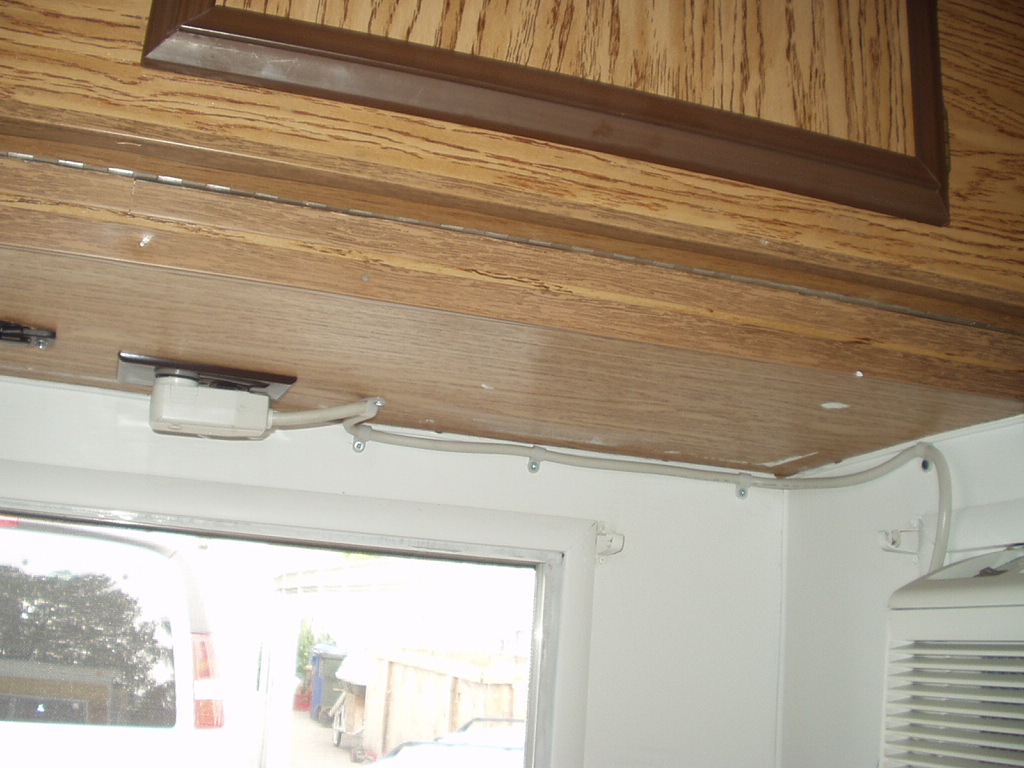
In the picture on the left, you can see the unit's cord now securely plugged into said outlet. If you look in the right hand picture in the previous row of them you can see where I put the rest of the excess cord.
Now, in the right picture, you can see I still made use of the curtains for that window as a nice tidy way of hiding the cord and dressing up the enclosed window.
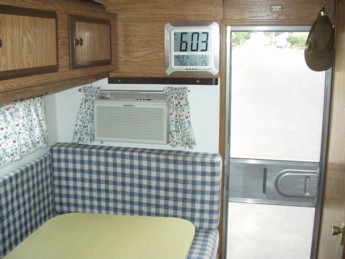
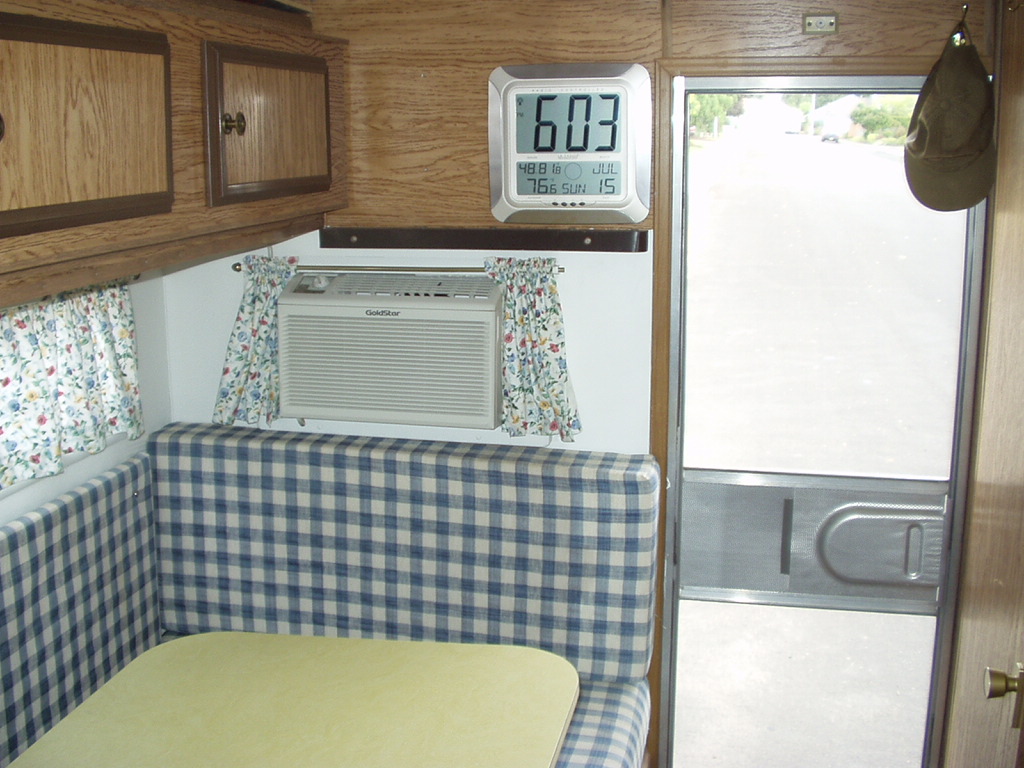
The A/C unit is pefectly situated where it is. The cold air doesn't blow on the person sitting right in front of it and you can still sit comfortably in that seat. The A/C unit itself is actually a good inch and a half shallower than the seat cushion. The cold air blows wonderfully along the ceiling and all the way up into the cabover and slowly makes its way back along the floor towards the back door. The front half of the camper always cools down faster than the back, but the dinette area cools faster than the hallway, so the temperature on the clock takes a bit to catch up with the inside temperature.
Its a wonderful setup, the A/C is super quiet compared to the 13,000 btu roof mounted unit on my parents trailer, even with its ducting. Even laying in the dinette bed, the hum from the A/C is still very low. With the A/C having a gasket around it on all sides inside its steel frame, the vibration from the compressor running is only minimally transfered into the rear wall.


 Linear Mode


