


How to Make an Air Dam for a Solar Panel
on my coach, i have installed 11 large solar panels. the front one is 61.5" wide cross the coach side to side. when coach is moving, especially when head wind is strong, say at 40 mph, and i am driving at 60 mph, that is a combination of 100 mph wind to hit the panel. two months ago when i did the panel upgrade, I did notice that 2 of the 4 front bracket anchor screws backed out about a quarter turn pushing up the dicor. i re-tightened them and re-dicored. i thought it's necessary to protect the panel with a front air dam.
after discussing with the fellow members, here, i made a simple solution. below is a quick report with some photos, hopefully this provides some hints to the fellow rvers in case anyone attempts to do it as well...
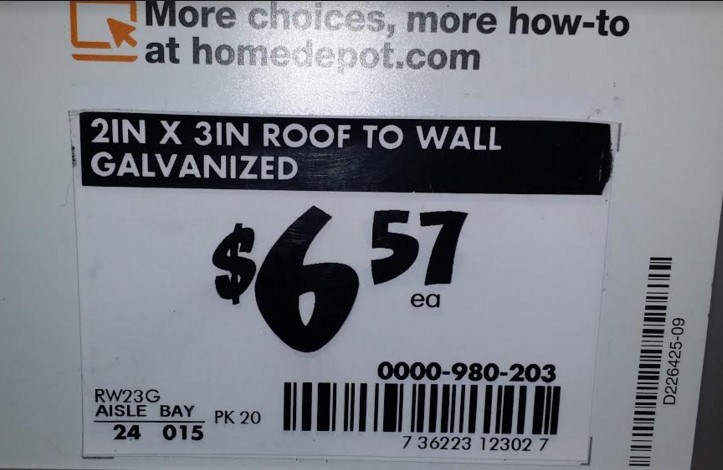
(1) got a 3 inches x 2 inches x 10 ft roof-to-wall galvanized flushing sheet metal, for $6.57 at home depot.
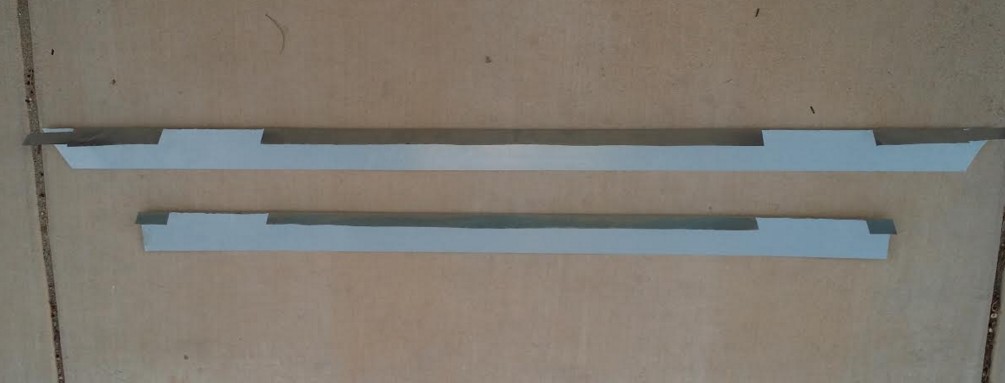
(2) calculated the length. in addition to the length of panel (dam length), add 3 inches to each end to tuck backward. my total length was 61.5 + 3 + 3 = 67.5 inches.
(3) the leftover was to be glued to the dam so to make it more rigid.
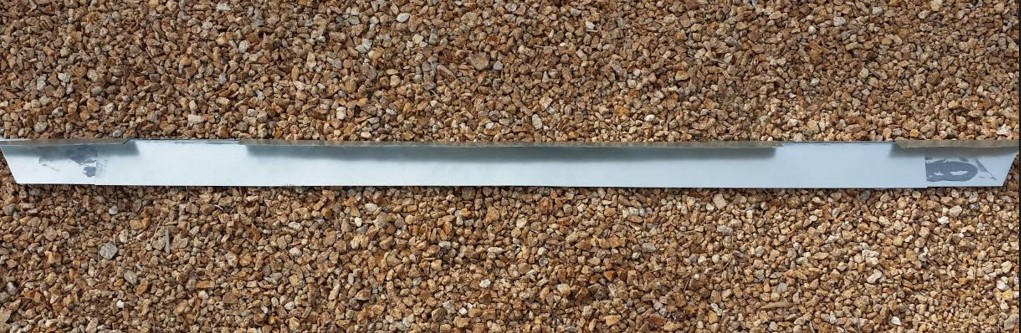
(4) considered the panel brackets and cut out the areas on the sheet metals.
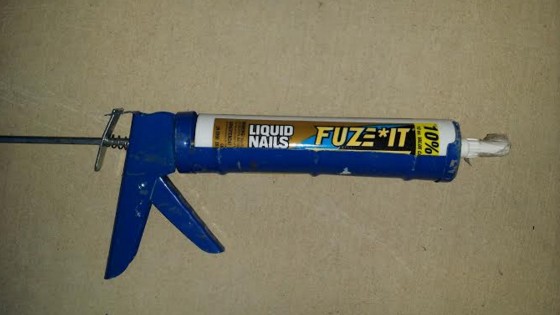
(5) glued the two pieces together with "fuze it" ($6.97 at hd). let sit overnight
(6) attached the dam to panel frame. i planted a 5/16" galvanized screw to the middle of the front panel frame, and cut a slide channel on the dam back side. when installed, a support at the middle was in place in addition to that at two ends.
(7) affixed two ends to the panel sidings with 3/16" rivets
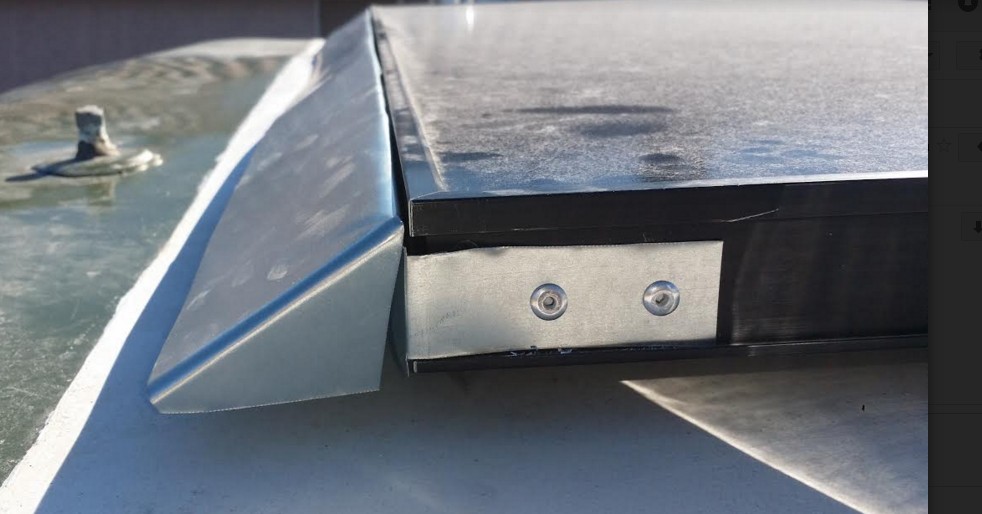
(8) i wrapped the front dam center edge with a wiper blade protector and dicored the edge where it touches roofing. notice the curved roof, only the middle section of the dam touches roof.

now it is completed. hopefully the coach gets a better aerodynamics and eliminates the possibility of loosing front screws again.
after discussing with the fellow members, here, i made a simple solution. below is a quick report with some photos, hopefully this provides some hints to the fellow rvers in case anyone attempts to do it as well...
(1) got a 3 inches x 2 inches x 10 ft roof-to-wall galvanized flushing sheet metal, for $6.57 at home depot.
(2) calculated the length. in addition to the length of panel (dam length), add 3 inches to each end to tuck backward. my total length was 61.5 + 3 + 3 = 67.5 inches.
(3) the leftover was to be glued to the dam so to make it more rigid.
(4) considered the panel brackets and cut out the areas on the sheet metals.
(5) glued the two pieces together with "fuze it" ($6.97 at hd). let sit overnight
(6) attached the dam to panel frame. i planted a 5/16" galvanized screw to the middle of the front panel frame, and cut a slide channel on the dam back side. when installed, a support at the middle was in place in addition to that at two ends.
(7) affixed two ends to the panel sidings with 3/16" rivets
(8) i wrapped the front dam center edge with a wiper blade protector and dicored the edge where it touches roofing. notice the curved roof, only the middle section of the dam touches roof.
now it is completed. hopefully the coach gets a better aerodynamics and eliminates the possibility of loosing front screws again.

Total Comments 2
Comments
-
 NICE VERY NICE
Posted 04-18-2018 at 08:00 PM by coach71 
-
 Sweet! Nice job!
Posted 08-08-2018 at 04:04 PM by TriMoot


