


An Original NewMar NewAire
Posted 03-22-2020 at 06:19 AM by TomAndPeg
Updated 07-29-2020 at 05:22 PM by TomAndPeg (Monetized Links)
Updated 07-29-2020 at 05:22 PM by TomAndPeg (Monetized Links)
DIY Bike Cover -- 03/22/2020
Keeping New-To-Us Bikes Clean & Dry
While traveling near Gainesville, Florida we decided to see if we could trade up our old Raleigh 3-speeds for a pair of bikes with more speeds and fatter tires to better handle the ubiquitous Florida sand.

We checked at several bike shops and found one, Re-Bike at 16 NW 18th St #115, Gainesville, that had a couple of excellent refurbished rides, and the owner was willing to give us a generous trade-in allowance on our Raleighs.
We ended up with a 26" 21-speed Marin for her and a 27.5" 7-speed Felt for him. Both bikes came with tires that were much fatter that those on our old bikes.
While looking for newer bikes, we also wanted to find a good cover that would keep our rides clean and dry when carried behind our toad. A guy at one bike shop said they never stocked covers because most were too expensive. He recommended we repurpose a grill cover instead. Brilliant! So we measured the width, depth, and height of the mounted bikes and headed to Walmart, of course.

We purchased the heavy duty gas grill cover shown for $20 because it seemed to to be about the right size: 72W x 25D x 46H. Note that this particular cover did not come with any retaining straps or clips, which turned out to be a good thing. Because we were winging it, before leaving Walmart, we grabbed 6 heavy duty flat bungee straps, each 4 feet long.
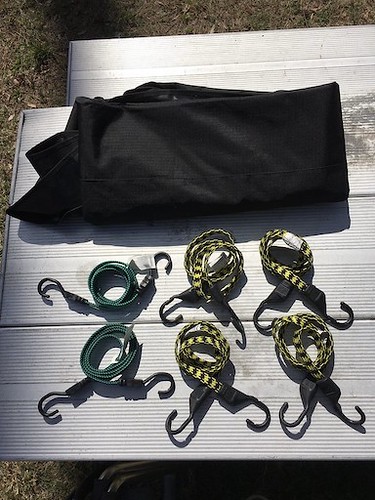
So this is what we started with: the folded grill cover and six bungee straps. (Note that four straps are yellow and two are green because that's what Walmart had in stock.)


First we threw the cover over the bikes, then positioned it left to right and front to back in an effort to distribute the heavy fabric as evenly as possible over both bikes.


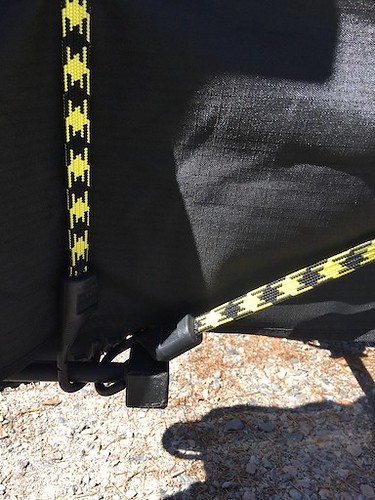
Next we hooked the yellow bungees to the Curt frame and crossed up and over the cover in an "X" pattern, back to front and front to back.


Finally, we used the pair of green bungees to cross over the cover from side to side, hooked from the yellow bungee cross point on either side up and over and down to the carrier frame on the opposite end.


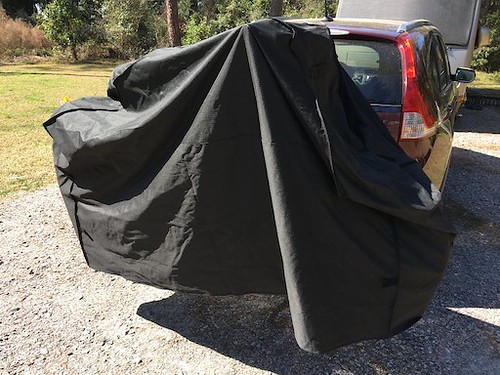
This is how the cover looks when our DIY solution is road ready.
Safety Note: One critical check for any cover like this is to make sure that the toad taillights are visible to motorists from behind. In our case, the cross-over bungees pull the cover down around the bikes more than enough to assure that visibility is maintained.
The result? Since coming up with this solution, we've driven lots of miles through just about every weather condition - we're talking rivers of blood. Because of the bungee straps, the cover doesn't flap around at all and when we get to where we're going, the toad's filthy as usual, but the bikes come off clean and dry (except for the exposed wheel bottoms). Ready to ride!
When dry, we fold the cover up nice and neat and stow it in the back of the toad. We use the original grill cover box to store the bungees.
Problem solved.

Next Up
More RV maintenance projects.

TomAndPeg
Keeping New-To-Us Bikes Clean & Dry
While traveling near Gainesville, Florida we decided to see if we could trade up our old Raleigh 3-speeds for a pair of bikes with more speeds and fatter tires to better handle the ubiquitous Florida sand.
We checked at several bike shops and found one, Re-Bike at 16 NW 18th St #115, Gainesville, that had a couple of excellent refurbished rides, and the owner was willing to give us a generous trade-in allowance on our Raleighs.
We ended up with a 26" 21-speed Marin for her and a 27.5" 7-speed Felt for him. Both bikes came with tires that were much fatter that those on our old bikes.
While looking for newer bikes, we also wanted to find a good cover that would keep our rides clean and dry when carried behind our toad. A guy at one bike shop said they never stocked covers because most were too expensive. He recommended we repurpose a grill cover instead. Brilliant! So we measured the width, depth, and height of the mounted bikes and headed to Walmart, of course.
We purchased the heavy duty gas grill cover shown for $20 because it seemed to to be about the right size: 72W x 25D x 46H. Note that this particular cover did not come with any retaining straps or clips, which turned out to be a good thing. Because we were winging it, before leaving Walmart, we grabbed 6 heavy duty flat bungee straps, each 4 feet long.
So this is what we started with: the folded grill cover and six bungee straps. (Note that four straps are yellow and two are green because that's what Walmart had in stock.)
First we threw the cover over the bikes, then positioned it left to right and front to back in an effort to distribute the heavy fabric as evenly as possible over both bikes.
Next we hooked the yellow bungees to the Curt frame and crossed up and over the cover in an "X" pattern, back to front and front to back.
Finally, we used the pair of green bungees to cross over the cover from side to side, hooked from the yellow bungee cross point on either side up and over and down to the carrier frame on the opposite end.
This is how the cover looks when our DIY solution is road ready.
Safety Note: One critical check for any cover like this is to make sure that the toad taillights are visible to motorists from behind. In our case, the cross-over bungees pull the cover down around the bikes more than enough to assure that visibility is maintained.
The result? Since coming up with this solution, we've driven lots of miles through just about every weather condition - we're talking rivers of blood. Because of the bungee straps, the cover doesn't flap around at all and when we get to where we're going, the toad's filthy as usual, but the bikes come off clean and dry (except for the exposed wheel bottoms). Ready to ride!
When dry, we fold the cover up nice and neat and stow it in the back of the toad. We use the original grill cover box to store the bungees.
Problem solved.
Next Up
More RV maintenance projects.
TomAndPeg

Total Comments 0


