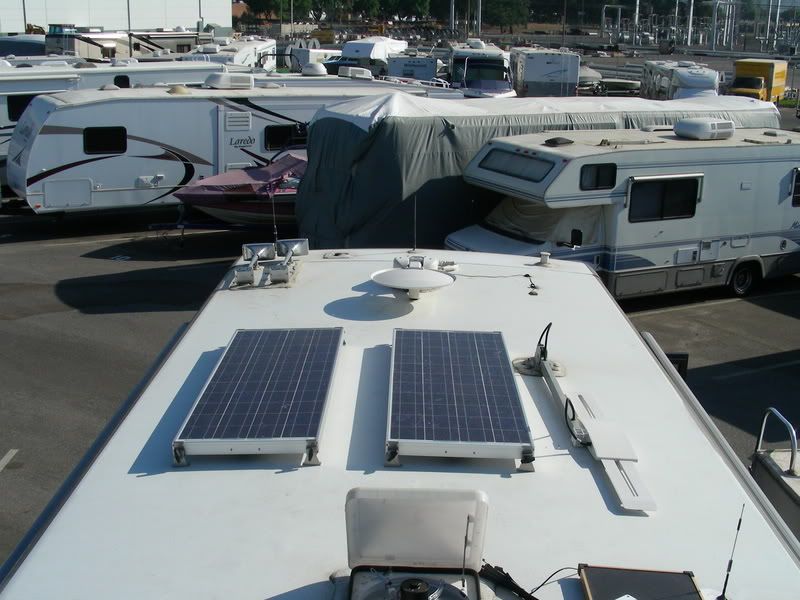
Well, in-between the 105 degree days and working on the patio, I managed to finally get my solar panels installed and wired today.
This is a twin
AM100 panel install from
AM Solar up in Oregon. I spent a bunch of time looking at the various manufacturers, and an equal amount of time sorting through some of the BS of a few of the vendors that IMO clearly don't understand what they sell. This whole thing started to circumvent my batteries bleeding off while in storage, and morphed into something a little bigger with lots of room for expansion. I figure I'll ask Santa for another panel, and there
is a birthday coming up too

. The
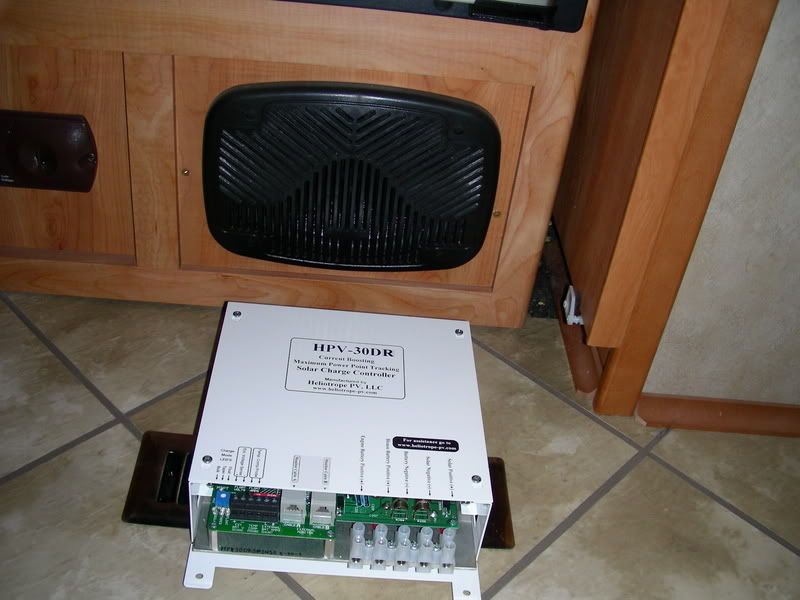
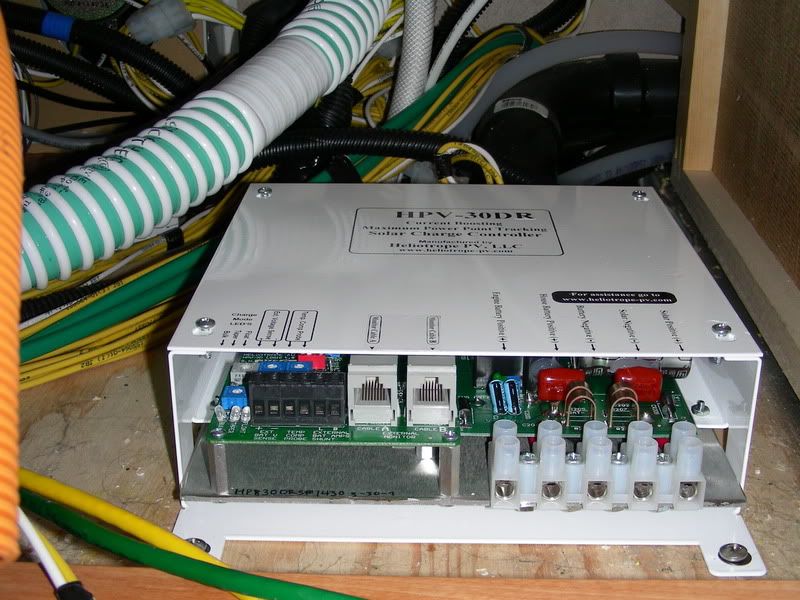
controller is rated at 30A, so I'm good for awhile I think. If the time comes that I exceed this, I'll probably open the panel and look at beefing up the devices and various buss's to carry the extra current. Either way, it'll be awhile before I get this far.
These
panels run at 21V, as opposed to the 17V and lower panels. I chose these panels because they can stay above the operating shutdown threshold of the controller when others have gone to sleep for lack of voltage. Pound for pound they don't make the same current that others do, but I expect them to hang in longer and in more varied conditions than more conventional panels. The obvious trade-off is that these won't make the same current for the same given surface area.
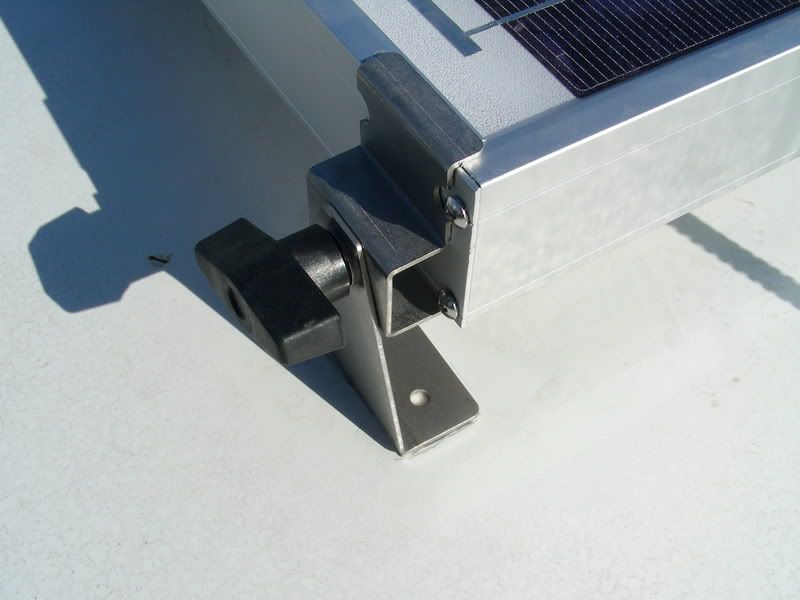
Also, rather than drilling the panels into the roof, AM Solar has feet that use
3M's VHB double-sided tape. This tape is used in place of screwing and welding various surfaces on a variety of applications. I was doubtful that this performs as the folks at AM Solar were implying, but a quick Google of the product convinced me otherwise. Either way I'll keep an eye open on the mounts and drill if necessary, but I doubt if I can get the equivalent "bite" with a few screws that this tape has.
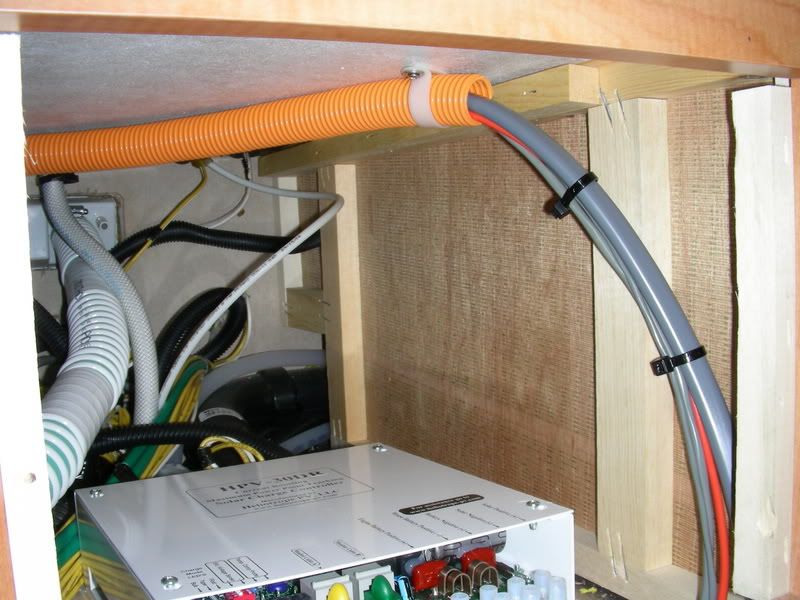
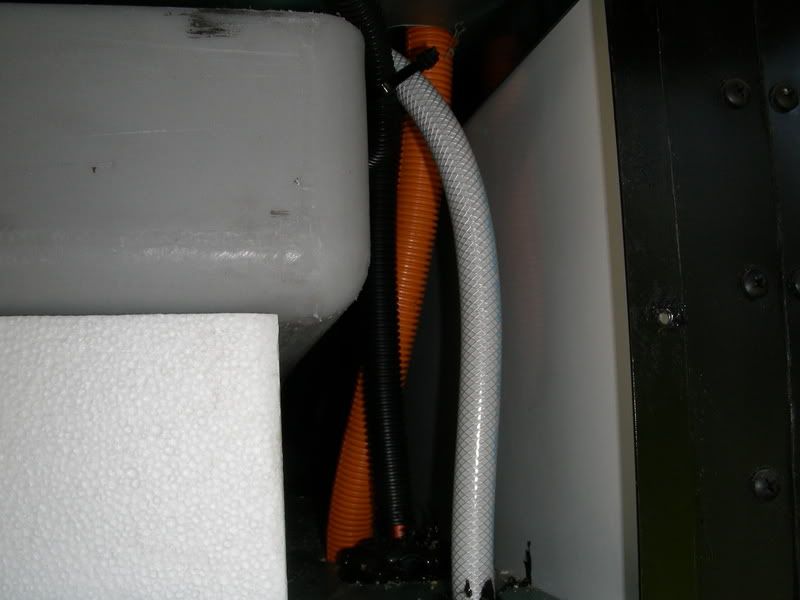
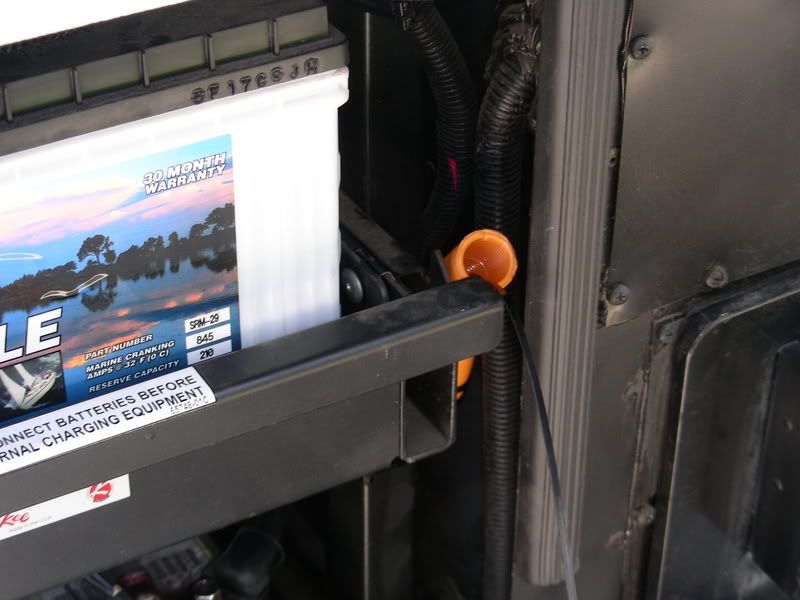
It turns out that in the 34H I have tons of room under the fridge to mount the controller, and it has a straight shot access to the roof mounted J-Box to tie in the panels. The remote works on a pair of CAT-5 cables that I managed to snake down the "One Place" wall, into the basement where the tanks are, and back up. I also ran 3/4" ID low voltage conduit from the controller, through the tank cavity, down to the frame with the rest of the wire loom, and terminate at the battery tray. Too bad it's orange

. This made getting the #8 cable, remote sense, temp sense, and engine charge (although not used yet), a snap to snake through in one pull. One thing I refuse to do is swap color codes on cabling. The supplied cable carries a black and white wire. Protocol says that when there is a White wire, that IT is now ground, and Black is hot. The simple fix to this is to use Black as ground as is the rest of the coach, and Red stripe the White wire with tape at each end. A common practice when an electrician needs to ID or change a wire color he may not have.
When I finally got things wired it was close to 8:00Pm, and the sun was almost behind the mountains, but I still had 3.1A coming off the roof. Tomorrow is a final cable dress on the roof, and while I'm at it, might install the Wilson cell antenna I've been procrastinating about.
Here's the pics:
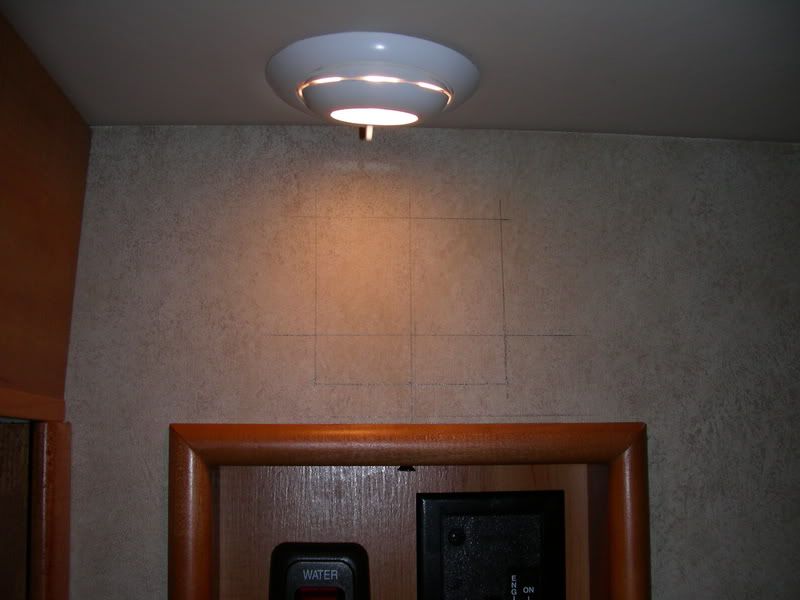
Pick a Mounting Spot:

______________________________
Drill the Panel:

______________________________
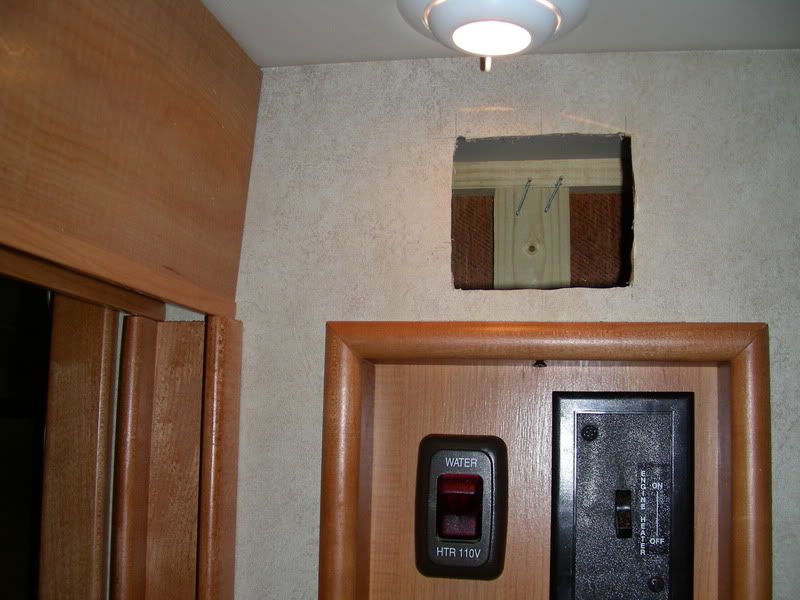
And Trim to Fit:

______________________________
Add Screws:

______________________________
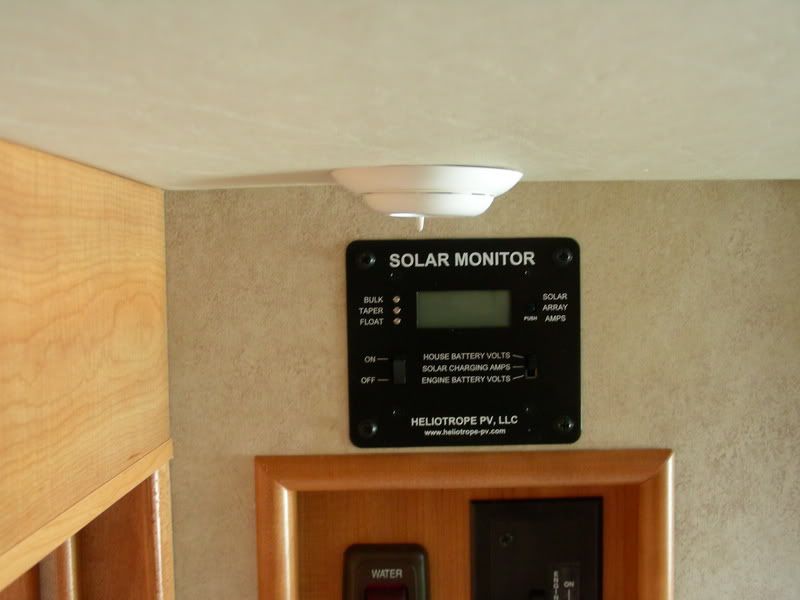
Regulator Where It Will Mount:

______________________________
Under The Fridge:

______________________________
The Perfect Spot:

______________________________
LV Conduit Under the Fridge:

______________________________
Conduit through the Tank Cavity:

______________________________
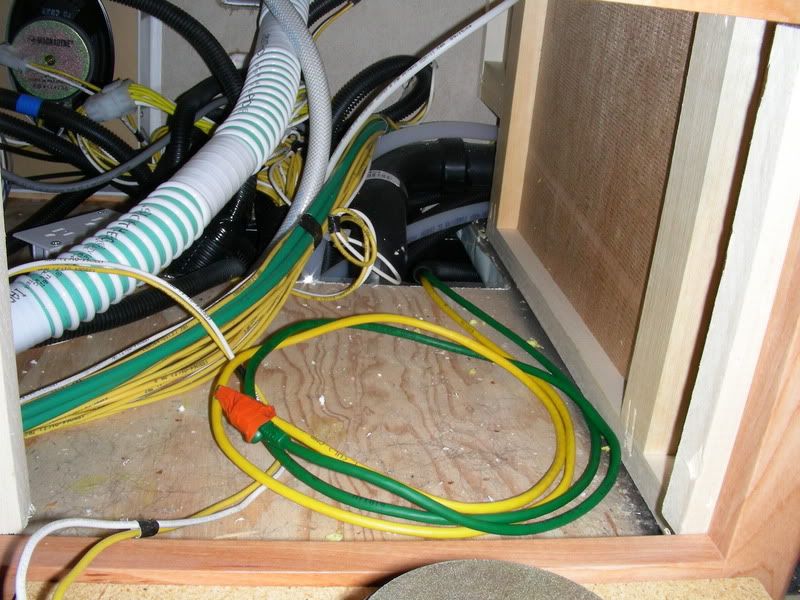
Installed Waiting for Panel Cable:

______________________________
Conduit Pre-Dress @ Battery Tray:

______________________________
Panels Mounted on the Roof (with lots of expansion room):

______________________________
Close-up of the VHB backed mount:

______________________________
All Done, Waiting for Speaker Reinstall:


 Linear Mode


