 |
|
 05-08-2017, 04:04 AM
|
#1
|
|
Senior Member
Monaco Owners Club
Join Date: Jul 2005
Location: Eugene, OR
Posts: 161
|
Delamination Issues
Discovered a delamination issue under the drivers window on my 2002 Windsor when I removed the window to remove the Norcold and put the Samsung in. The delamination was caused by water entering in the upper front corner of the window where the roof and side seam contact the window. Today I was trying to determine the extent of the delam when I discovered that the trim piece running from the lower front corner down and back to the slide was loose at the slide end (about the last 18" or so). What I mean by loose is that it looked just fine, but when i pushed on it, it gave. Seemed solid as a rock to that point. So I screwed up my courage and took the trim off and saw that it was wet underneath. Took out all the screws and removed the aluminum channel. Only screw that came out in its entirety was the screw holding the cap on the upper end of the trim. Most had rusted off or broke off when trying to unscrew them.
I don't know what I need to do with the screw holes. Seems to me that most of them have the end of the broken off screws in them and is likely I can't use those holes. Is that right, or should I be able to drill the piece out and reuse the hole? I'm thinking that new holes would be ok except at the ends of the aluminum channel pieces. For sure, the new screws will be stainless.
Maybe a bigger issue is how to dry out the bottom area of the delam, especially the area behind the trim? I think I'll try to work a wedge under the fiberglass that is covered by the trim and see if that helps out. The window has been out for some time and I think the area just below the window is pretty dried out already. Pretty sure the area around the trim is still wet since I just took it off today. Ugh! More waiting.
Ah, yet another question. While checking the delam extent, I discovered that the fiberglass/luan is not connected to the post that is the structural member between the driver's window and the windshield. I'm assuming that should not be loose, and should be epoxied onto the post.?
Also wondering how far forward from the trim is the fiberglass supposed to be epoxied to the side? I can slide a metal yardstick from the window well up into the front cap area, so there's an area where a bunch is all loose. Can't really see into that area, so it's a guessing game for me.
I'm sure more questions will be coming, but for now that seems to be it.
__________________
Rod & Rita, and 2 Yorkies (Lucy & Fred)
2002 Monaco Windsor 38PBDD using a Roadmaster Sterling to pull a 2007 Honda CRV
|

|

|
 |
Join the #1 RV Forum Today - It's Totally Free!
iRV2.com RV Community - Are you about to start a new improvement on your RV or need some help with some maintenance? Do you need advice on what products to buy? Or maybe you can give others some advice? No matter where you fit in you'll find that iRV2 is a great community to join. Best of all it's totally FREE!
You are currently viewing our boards as a guest so you have limited access to our community. Please take the time to register and you will gain a lot of great new features including; the ability to participate in discussions, network with other RV owners, see fewer ads, upload photographs, create an RV blog, send private messages and so much, much more!
|
|
05-08-2017, 07:42 AM
|
#2
|
|
Senior Member
Join Date: Jan 2016
Posts: 2,186
|
Rod
Many have tackled the separating roof to wall issue .
Here is one link , and searching in the search box in the upper right portion
of each page will provide volumes of reading , also at the bottom of each
page is a box of similar threads .
Good luck
http://www.irv2.com/forums/f115/roof...wall-4005.html
Ray
|
|
|
|
|
05-08-2017, 07:51 AM
|
#3
|
|
Senior Member
Join Date: Jan 2016
Posts: 2,186
|
Rod
I forgot to mention that the area above the windshield is a large open
space , so if that is where you are pushing the metal yardstick into
I think that is probably normal .
Also the roof is not glued down like the walls it just sort of lays up there .
Ray
|
|
|
|
|
05-08-2017, 08:44 AM
|
#4
|
|
Junior Member
Join Date: Jan 2017
Posts: 24
|
There are many options to fixing this. An easy way is using Composet Products. They have a lot of kits that are easy to use
|
|
|
|
|
05-09-2017, 03:56 AM
|
#5
|
|
Senior Member
Monaco Owners Club
Join Date: Jul 2005
Location: Eugene, OR
Posts: 161
|
Quote:
Originally Posted by RVLover357

There are many options to fixing this. An easy way is using Composet Products. They have a lot of kits that are easy to use
|
I have a composet kit. Working on the set-up to apply the pressure. Just trying to find out what parts of the front cap are supposed to be epoxied to the the body. In the pics below you can see the wedges I slipped behind the front cap fiberglass, down the post in pic #1, and along the seam in pic #2. It doesn't look like the cap was ever epoxied to the body along those lines. Looks like the window and the aluminum seam strip are what holds the cap to the body along those lines. I'm good with that if that's what it's supposed to be. Just don't know.
__________________
Rod & Rita, and 2 Yorkies (Lucy & Fred)
2002 Monaco Windsor 38PBDD using a Roadmaster Sterling to pull a 2007 Honda CRV
|
|
|
|
|
05-09-2017, 04:00 AM
|
#6
|
|
Senior Member
Monaco Owners Club
Join Date: Jul 2005
Location: Eugene, OR
Posts: 161
|
Quote:
Originally Posted by RamiDav
Rod
I forgot to mention that the area above the windshield is a large open
space , so if that is where you are pushing the metal yardstick into
I think that is probably normal .
Also the roof is not glued down like the walls it just sort of lays up there .
Ray
|
The area in question is not the roof, it's along the window post and down the aluminum seam under the window - see the pics in my previous posts.
__________________
Rod & Rita, and 2 Yorkies (Lucy & Fred)
2002 Monaco Windsor 38PBDD using a Roadmaster Sterling to pull a 2007 Honda CRV
|
|
|
|
|
05-09-2017, 07:35 AM
|
#7
|
|
Moderator Emeritus


Monaco Owners Club Texas Boomers Club
Join Date: Nov 2015
Location: Central Texas
Posts: 13,426
|
Rod, having just removed my drivers side window to fix a compromised double pane window, I can see what a bad design that is. That molding channels water right into the window seal. Mine hadn't been leaking there, but I'm a little concerned about sealing it back up after replacing the windows. Do yo have any thoughts about how to keep water out of there after you make the delamination repair?
__________________
Dennis and Katherine
2000 Monaco Dynasty
|
|
|
|
|
05-11-2017, 09:57 AM
|
#8
|
|
Senior Member
Monaco Owners Club
Join Date: Jul 2005
Location: Eugene, OR
Posts: 161
|
Quote:
Originally Posted by barmcd
Rod, having just removed my drivers side window to fix a compromised double pane window, I can see what a bad design that is. That molding channels water right into the window seal. Mine hadn't been leaking there, but I'm a little concerned about sealing it back up after replacing the windows. Do yo have any thoughts about how to keep water out of there after you make the delamination repair?
|
Dennis,
I'm not sure. I'm considering taking off the seam cap that is screwed over the end where it meets the window frame at the top. Want a look at that. Other than looking at that, I'll set the window with some butyl tape, and then caulk the heck out of the seam around the window. A local RV store has suggested ProFlex RV Sealant by Geocel. I bought a tube - about $8-9. They strongly suggest not to use silicone, so I thought I'd try what they sell. It's supposed to be flexible. And then I think I'll check all the windows and seams for possible leaks. A delamination is a wake-up call. Would like to be working on mine now, but it started raining last night, and is supposed to do that for almost every day for the next 2 weeks or so. And the temp is not going to be in the range for the epoxy. Rats! But the window is scheduled to be fixed at the end of the month by RV Glass Solutions in Coburg, OR (about 20 miles north of my house). Got the hole in the coach covered with plastic. Hasn't leaked yet. Gotta keep it dry.
__________________
Rod & Rita, and 2 Yorkies (Lucy & Fred)
2002 Monaco Windsor 38PBDD using a Roadmaster Sterling to pull a 2007 Honda CRV
|
|
|
|
|
05-11-2017, 12:40 PM
|
#9
|
|
Senior Member
Join Date: Jan 2016
Posts: 2,186
|
Dennis & Rod
When I took the drivers window out it had this ribbed foam weather strip
all the way around and was caulked all the way around after the
window was installed .
My coach is painted a dark bronze / brown around the window area
so I used Geosel 2300 bronze caulking .
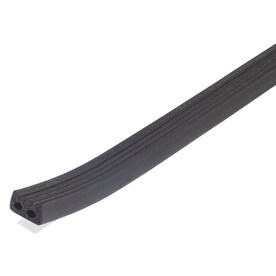
I don't know if this weatherstrip was from the factory but assumed it was so I
bought new weatherstrip at Lowes and replaced it .
It comes in 2 widths , the narrow is what I used .
So far I don't have any leaks that I know of and its been about 5 yrs now .
What do you guys have for weatherstrip between the window frame and
the wall ?
Ray 03 Windsor
|
|
|
|
|
05-11-2017, 01:52 PM
|
#10
|
|
Moderator Emeritus
Monaco Owners Club Texas Boomers Club
Join Date: Nov 2015
Location: Central Texas
Posts: 13,426
|
Quote:
Originally Posted by RamiDav
Dennis & Rod
When I took the drivers window out it had this ribbed foam weather strip
all the way around and was caulked all the way around after the
window was installed .
My coach is painted a dark bronze / brown around the window area
so I used Geosel 2300 bronze caulking .
I don't know if this weatherstrip was from the factory but assumed it was so I
bought new weatherstrip at Lowes and replaced it .
It comes in 2 widths , the narrow is what I used .
So far I don't have any leaks that I know of and its been about 5 yrs now .
What do you guys have for weatherstrip between the window frame and
the wall ?
Ray 03 Windsor |
I had that same foam weatherstrip. I'm going to replace it with black butyl tape and use polyurethane sealant.
__________________
Dennis and Katherine
2000 Monaco Dynasty
|
|
|
|
|
05-12-2017, 05:55 AM
|
#11
|
|
Senior Member
Join Date: Jan 2016
Posts: 2,186
|
Good Morning guys
You may have heard of Chris Throgmartin aka StoneVos who makes the best
replacement slide covers and awnings .
Chris attends most of the large rv rallies where he will do inspection of your
awnings and caulking .
Now I don't know Chris personally but I have bought his products and believe
he is an exceptional person and is always ready and willing to help and advise .
When I read his post this morning I felt it was so closely related to this thread
I wanted to share .
I hope its ok so here it is
Ray
Harry:
I believe I answered you by e-mail but will post this for other members here. I apologize for being so slow in responding. I have been on the road and then at the Maintenance Session.
This is an ongoing problem with all Monaco brand coaches – popping of the upper belt line. I just had PJ fix mine which popped over the entry door. Last year he fixed a popped belt line on my coach over the drivers window.
The cause is the caulking line on top of the belt line opens up. Water and moisture seeps in and rusts out the rivets ( or screws whichever the factory guy had in his pocket at the time ) and then the belt line pops out. This can be prevented by keeping track of the caulking. For those who have coaches that are over 8 years old then the entire upper and lower belt line should have all the old caulking removed and new caulking applied. Body caulking should be replaced every 8 years.
You should recaulk using ProFlex RV caulking. This is the same caulking that was used by Monaco when your coach was built. NEVER use silicone caulking on your coach.
I have found popped belt lines everywhere on Monaco coaches but the most prominent locations are near the curved radiuses of the belt lines at the front and rear near the cap seams. The belt lines can also pop anywhere though as you and others have found out. If I do 100 inspections at a rally I will always find at least 5 popped belt lines with the vast majority being over the drivers window. I did a small 50 coach rally in April and found 3.
Owners should be aware that there are two types of belt line pops. 1.) The beltline pops from the side wall and roof. 2.) The belt line pops and stays attached to the roof but the wall pops inward. I found a Dynasty last year that I stuck my hand up the side wall and right into the roof section but the belt line was still attached to the roof. You can see these from the ground as there will be a gap between the belt line and wall. The side wall pop will appear normal unless you stand right next to the wall and look up. Then you will see the gap.
You Will lose a wall to delam if you do not get the popped belt line fixed right away. If you find one while on a trip, simply apply gorilla ape over the opening until your home or can get into a service center to get it fixed. Because this problem is so prevalent with our coaches you should inspect your coach every 3 months for popped belt lines.
Hope this helps,
Chris T
|
|
|
|
|
05-12-2017, 06:42 AM
|
#12
|
|
Moderator Emeritus
Monaco Owners Club Texas Boomers Club
Join Date: Nov 2015
Location: Central Texas
Posts: 13,426
|
Quote:
Originally Posted by rlbow43
Dennis,
I'm not sure. I'm considering taking off the seam cap that is screwed over the end where it meets the window frame at the top. Want a look at that. Other than looking at that, I'll set the window with some butyl tape, and then caulk the heck out of the seam around the window. A local RV store has suggested ProFlex RV Sealant by Geocel. I bought a tube - about $8-9. They strongly suggest not to use silicone, so I thought I'd try what they sell. It's supposed to be flexible. And then I think I'll check all the windows and seams for possible leaks. A delamination is a wake-up call. Would like to be working on mine now, but it started raining last night, and is supposed to do that for almost every day for the next 2 weeks or so. And the temp is not going to be in the range for the epoxy. Rats! But the window is scheduled to be fixed at the end of the month by RV Glass Solutions in Coburg, OR (about 20 miles north of my house). Got the hole in the coach covered with plastic. Hasn't leaked yet. Gotta keep it dry.
|
I'm using the butyl tape too and some type of sealant. I was going to go with Dicor, but they don't make a black non-sag sealant so I'm thinking about Sikaflex or even black windshield sealant.
__________________
Dennis and Katherine
2000 Monaco Dynasty
|
|
|
|
|
05-12-2017, 07:18 AM
|
#13
|
|
Senior Member
Join Date: May 2012
Posts: 2,947
|
Quote:
Originally Posted by barmcd
I'm using the butyl tape too and some type of sealant. I was going to go with Dicor, but they don't make a black non-sag sealant so I'm thinking about Sikaflex or even black windshield sealant.
|
I just went through this exercise, in February, March. Butyl tape under aluminum strip ok, trim it back after compression, install cap over channel, use Proflex Geocel, NO silicone. I blue taped the roof line and channel cap to assist in getting a clean line and allows to finger pass without making a mess, just pull tape. Do the top and bottom of cap cover.
The hardest part is getting the roof and walls back together evenly. Good luck.
__________________
Perry & Julie: 2008 Monaco Camelot 40PDQ, 400ISL, Toad; 2015 Chevy Equinox.
[SIGPIC][/SIGPIC]
|
|
|
|
|
05-12-2017, 07:48 AM
|
#14
|
|
Senior Member
Join Date: Jul 2012
Posts: 136
|
Quote:
Originally Posted by rlbow43
I have a composet kit. Working on the set-up to apply the pressure. Just trying to find out what parts of the front cap are supposed to be epoxied to the the body. In the pics below you can see the wedges I slipped behind the front cap fiberglass, down the post in pic #1, and along the seam in pic #2. It doesn't look like the cap was ever epoxied to the body along those lines. Looks like the window and the aluminum seam strip are what holds the cap to the body along those lines. I'm good with that if that's what it's supposed to be. Just don't know.
|
Rod Hi to answer your question about the mechanical connection of the cap to the inner steel framing they didn't use an adhesive ,epoxy or sealant on the fiberglass caps front or rear ,the only thing that is holding the caps to the sidewalls are the screws and rivets that go thru what is being called the beltline and of course the rivets under the tar tape or etherbond on the roof,caulk that overlap between the cap and sidewall with an adhesive of your choice before you install the screws or rivet for the aluminum channel base of the belt line cover ,also it's my opinion that trapped water causes most of the failures of the fasteners screws and rivets , water is being trapped under the BL cover do to caulking the top and bottom side of the cover which leaves no place for the water to escape and of course some is caused by mechanical movement between the cap and sidewall or roof .
|
|
|
|
|
|
|
Currently Active Users Viewing This Thread: 1 (0 members and 1 guests)
|
|
|
 Posting Rules
|
You may not post new threads
You may not post replies
You may not post attachments
You may not edit your posts
HTML code is Off
|
|
|
|
 » Recent Discussions
 |
|
|
|
|
|
|
|
|
|
|
|
|
|
|
|
|
|
|
|
|
|
|
|
|
|


 Linear Mode

