Journey with Confidence RV GPS App RV Trip Planner RV LIFE Campground Reviews RV Maintenance Take a Speed Test Free 7 Day Trial ×
RV Trip Planning Discussions

Go Back   iRV2 Forums > RV SYSTEMS AND TECHNOLOGIES FORUMS > RV Systems & Appliances
Click Here to Login
Register FilesVendors Registry Blogs FAQ Community Calendar Today's Posts Search Log in
Join iRV2 Today

Mission Statement: Supporting thoughtful exchange of knowledge, values and experience among RV enthusiasts.
Reply
  This discussion is proudly sponsored by:
Please support our sponsors and let them know you heard about their products on iRV2
 
Thread Tools Search this Thread Display Modes
 
Old 07-14-2016, 11:17 AM   #1
Junior Member
 
Join Date: Jul 2016
Posts: 3
Adding booster fans to your ceiling A/C vents.

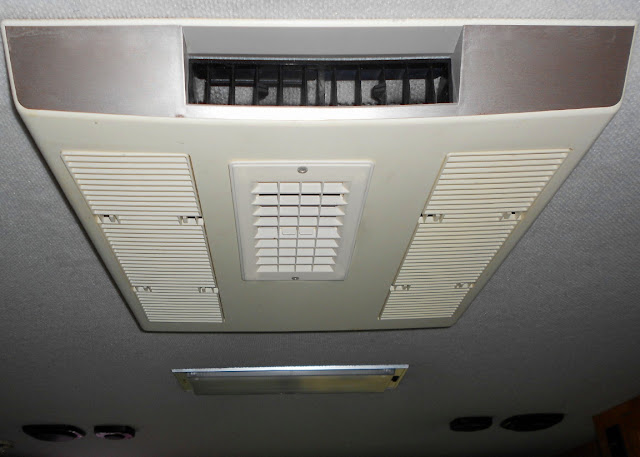
I removed one of my ceiling vent covers and measured the opening in the ceiling. I would like to say the hole is perfectly round but it isn't. Roughly 5 inches in diameter.
Here is what I started with, 127mm diameter, 38mm deep, 110V, 24W, .22A, aluminum cased, 16MPH, 123CFM, cooling fan.


Shaved off the ears of one side of the fan with a combination of hacksaw and dremel tool with a cut-off wheel. Followed up with a table top grinder to remove all of the flat sides of the fan to make it match the circular portion of the fan shroud. I left the opposite side of the fan as-is so that I would have a mounting flange with screw holes. Take care of the small wires and connector while you are at it.


I temporarily installed the fan with temp wiring to see what my numbers would be. The vent started at 3.5 mph with the factory installed vent cover. With the booster fan turned on, it went up to 15.3 mph. Granted, the fan is rated for that mph, so that number shouldn't be a surprise however; it sure moves a lot more air now and would hopefully improve the initial cooling time.


The fan depth of 38mm is almost exactly the depth of the first layer of Styrofoam in my ceiling. There now is no way to direct the direction the air is blowing but I think I will only put these fans outside the four corners of the main a/c unit. Hopefully this will decrease the time it takes my a/c to cool down the living room area of the rv on those hot summer days.

I will be running the wiring through the duct work back to the a/c unit and installing a single on/off switch on the a/c cover to activate the booster fans.
Sir Ken is offline   Reply With Quote
Join the #1 RV Forum Today - It's Totally Free!

iRV2.com RV Community - Are you about to start a new improvement on your RV or need some help with some maintenance? Do you need advice on what products to buy? Or maybe you can give others some advice? No matter where you fit in you'll find that iRV2 is a great community to join. Best of all it's totally FREE!

You are currently viewing our boards as a guest so you have limited access to our community. Please take the time to register and you will gain a lot of great new features including; the ability to participate in discussions, network with other RV owners, see fewer ads, upload photographs, create an RV blog, send private messages and so much, much more!

Old 07-14-2016, 11:38 AM   #2
Senior Member
 
sanfordturbo's Avatar
 
Join Date: Dec 2011
Posts: 134
what a clever idea.

I'm not sure how much cold air you will draw out of the existing system, but it will certainly move more air around in the cabin.

I went another route to cool down my cabin. I installed a 2nd unit.
__________________
SANFORDTURBO
2021 Discovery LXE 44H - Freightliner XCM
2012 Thor ACE 29.2
sanfordturbo is offline   Reply With Quote
Old 07-14-2016, 12:03 PM   #3
Senior Member
 
Join Date: Jul 2014
Posts: 35,442
You need to be carefull not to pull too much air thru the coils to fast.

They won't have enough time to extract much heat and you will use effectiveness.
twinboat is offline   Reply With Quote
Old 07-14-2016, 12:08 PM   #4
Junior Member
 
Join Date: Jul 2016
Posts: 3
Quote:
Originally Posted by sanfordturbo View Post
what a clever idea.

I'm not sure how much cold air you will draw out of the existing system, but it will certainly move more air around in the cabin.

I went another route to cool down my cabin. I installed a 2nd unit.
You rich people.

Quote:
Originally Posted by twinboat View Post
You need to be carefull not to pull too much air thru the coils to fast.

They won't have enough time to extract much heat and you will use effectiveness.
Mostly trying to move more air but I see your point.
Sir Ken is offline   Reply With Quote
Old 07-14-2016, 12:41 PM   #5
YC1
Senior Member
 
YC1's Avatar


Join Date: Jun 2011
Location: FL
Posts: 11,452
I found the vents in mine protruded way up into the duct work. Seems the further down the chain I lost a lot of air. Trimming them down to be level with the inside bottom of the duct improved air flow.
__________________
Certified Senior Electronic Technician, Telecommunications Engineer, Telecommunications repair Service Center Owner, Original owner HR 2008

.
YC1 is offline   Reply With Quote
Old 07-14-2016, 01:15 PM   #6
Registered User
 
mel s's Avatar
 
Join Date: Mar 2010
Posts: 8,777
Adding a 4" x 8" register into the air conditioner ceiling cover, (directly below the output), allows you open the register and direct the flow of cooled air downward to cool the area faster...(when the register is closed the cooled air flows normally).

mel s is offline   Reply With Quote
Old 07-14-2016, 09:12 PM   #7
Senior Member
 
Join Date: Feb 2010
Posts: 4,654
These are great ideas.

Yes they could cause too much air glow across evaporator but they also compensate for resistance to air flow in the duct work.

An old school non electronic thermostat can be used to control the fans.
__________________
Tony & Lori
1989 Country Coach Savannah SE
TQ60 is offline   Reply With Quote
Old 07-15-2016, 08:53 AM   #8
YC1
Senior Member
 
YC1's Avatar


Join Date: Jun 2011
Location: FL
Posts: 11,452
Mel, I did something like that too and it worked well. The problem is the fans are so noisy I had to turn the television up and down.

Going inside the intake of the air conditioner with some duct tape I made sure there were as few sharp angles and leaks as possible. I then cut the intake area hole as large as possible and covered the part that would be where you installed that register. Thus eliminating any noisy air output at that location.

The noise dampening cover is a 12 inch by 12 inch filter box with two latches and intake vents. I forced the intake vents closed and lined the inside of them with noise dampening material. Opening the end away from the main area of the rv allows plenty of intake air and really keeps the fan noise down to half or less.
Attached Thumbnails
Click image for larger version

Name:	669 (640x360).jpg
Views:	191
Size:	141.6 KB
ID:	133103   Click image for larger version

Name:	670 (640x360).jpg
Views:	110
Size:	135.6 KB
ID:	133104  

Click image for larger version

Name:	671 (640x360).jpg
Views:	129
Size:	136.8 KB
ID:	133105   Click image for larger version

Name:	672 (640x360).jpg
Views:	147
Size:	191.9 KB
ID:	133106  

Click image for larger version

Name:	673 (640x360).jpg
Views:	137
Size:	191.6 KB
ID:	133107   Click image for larger version

Name:	674 (640x360).jpg
Views:	133
Size:	193.9 KB
ID:	133108  

Click image for larger version

Name:	Vent 2.jpg
Views:	142
Size:	132.1 KB
ID:	133109   Click image for larger version

Name:	Vent cover.jpg
Views:	101
Size:	132.1 KB
ID:	133110  

__________________
Certified Senior Electronic Technician, Telecommunications Engineer, Telecommunications repair Service Center Owner, Original owner HR 2008

.
YC1 is offline   Reply With Quote
Old 07-15-2016, 10:17 AM   #9
Registered User
 
mel s's Avatar
 
Join Date: Mar 2010
Posts: 8,777
Quote:
Originally Posted by YC1 View Post
Mel, I did something like that too and it worked well. The problem is the fans are so noisy I had to turn the television up and down.

Going inside the intake of the air conditioner with some duct tape I made sure there were as few sharp angles and leaks as possible. I then cut the intake area hole as large as possible and covered the part that would be where you installed that register. Thus eliminating any noisy air output at that location.

The noise dampening cover is a 12 inch by 12 inch filter box with two latches and intake vents. I forced the intake vents closed and lined the inside of them with noise dampening material. Opening the end away from the main area of the rv allows plenty of intake air and really keeps the fan noise down to half or less.
YC1

Great minds think alike.
(Sometimes you have to "think out of the box").
mel s is offline   Reply With Quote
Old 07-15-2016, 11:45 AM   #10
YC1
Senior Member
 
YC1's Avatar


Join Date: Jun 2011
Location: FL
Posts: 11,452
The pop down duct worked well but starved other areas of the rv. Quicker cooling at first but when closed there was additional noise from air still passing through.

When I began the project I could just barely feel the air out of the furthest vents. Now I can get chilled under them.
__________________
Certified Senior Electronic Technician, Telecommunications Engineer, Telecommunications repair Service Center Owner, Original owner HR 2008

.
YC1 is offline   Reply With Quote
Reply

Tags
ceiling, fan, vent


Currently Active Users Viewing This Thread: 1 (0 members and 1 guests)
 

Posting Rules
You may not post new threads
You may not post replies
You may not post attachments
You may not edit your posts

BB code is On
Smilies are On
[IMG] code is On
HTML code is Off
Trackbacks are Off
Pingbacks are Off
Refbacks are Off


Similar Threads
Thread Thread Starter Forum Replies Last Post
floor vents to wall vents ? kustom iRV2.com General Discussion 5 09-16-2015 09:14 PM
Fantastic Fans and Vents / Installation Experiences? Big_Boy Palazzo Motorhomes 10 07-15-2015 10:32 PM
replaced small fans in roof vents padutchmnm Excel Owner's Forum 21 02-14-2012 09:29 AM
Vents, Vents, I'm venting! BpK9Miami Damon 7 07-07-2010 08:34 PM

» Featured Campgrounds

Reviews provided by


All times are GMT -6. The time now is 08:53 AM.


Powered by vBulletin® Version 3.8.8 Beta 1
Copyright ©2000 - 2024, vBulletin Solutions, Inc.