 |
|
 03-10-2021, 09:19 AM
|
#43
|
|
Member
Join Date: Oct 2019
Location: Mansfield, PA
Posts: 60
|
Will be getting back into the RV project this weekend. Was distracted with the purchase of this 1954 M221:


This truck is in very good condition for the age and very original. And, it's vintage!
Guy
|

|

|
 |
Join the #1 RV Forum Today - It's Totally Free!
iRV2.com RV Community - Are you about to start a new improvement on your RV or need some help with some maintenance? Do you need advice on what products to buy? Or maybe you can give others some advice? No matter where you fit in you'll find that iRV2 is a great community to join. Best of all it's totally FREE!
You are currently viewing our boards as a guest so you have limited access to our community. Please take the time to register and you will gain a lot of great new features including; the ability to participate in discussions, network with other RV owners, see fewer ads, upload photographs, create an RV blog, send private messages and so much, much more!
|
|
03-10-2021, 03:59 PM
|
#44
|
|
Senior Member


Join Date: Apr 2004
Posts: 3,797
|
Does going from your Jeeps to this qualify as a "upgrade" ?. You may need a bigger motorhome to tow this to military vehicle shows 
Quote:
Originally Posted by Gloomis

Will be getting back into the RV project this weekend. Was distracted with the purchase of this 1954 M221:
This truck is in very good condition for the age and very original. And, it's vintage!
Guy
|
__________________
George Schweikle Lexington, KY
2005 Safari (Monaco)Trek 28RB2, Workhorse W20, 8.1, Allison 1000 5 spd, UltraPower engine & tranny, Track bars & sway bars, KONI FSD, FMCA 190830, Safari Int'l. chapter. 1999 Safari Trek 2830, 1995 Safari Trek 2430, 1983 Winnebago Chieftain, 1976 Midas Mini
|
|
|
|
|
03-11-2021, 05:43 AM
|
#45
|
|
Member
Join Date: Oct 2019
Location: Mansfield, PA
Posts: 60
|
Quote:
Originally Posted by George Schweikle
Does going from your Jeeps to this qualify as a "upgrade" ?. You may need a bigger motorhome to tow this to military vehicle shows |
Hello George. I think if anything is going to tow, it'll be this truck towing the RV!
Guy
|
|
|
|
|
03-14-2021, 02:30 PM
|
#46
|
|
Member
Join Date: Oct 2019
Location: Mansfield, PA
Posts: 60
|
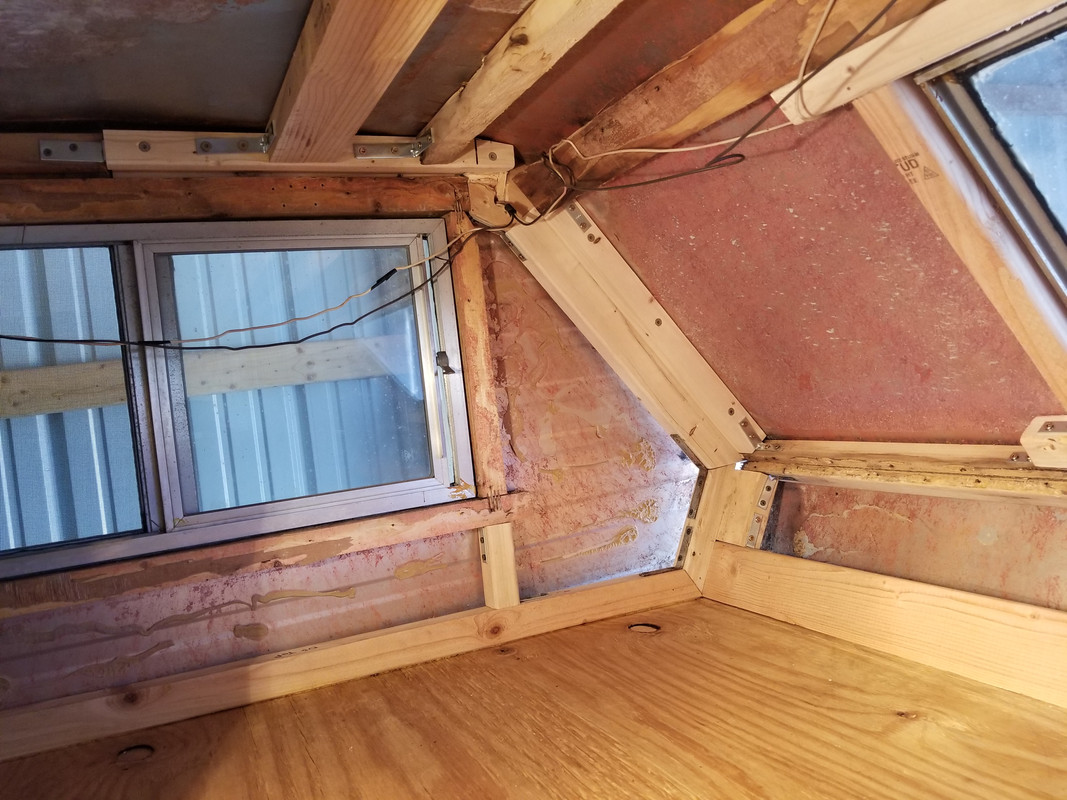
Made more progress today. Wall repair is done by the side window. Secured seat frames and added a brace for the water fill. Original was bowed out and I wanted to pull back towards center of RV. I'll have to remove the fasteners at the bottom of the outside skin so that the vertical side does not "bubble" on me when I install the insulation.


Next week will be back to the front bunk to replace the frame around the front window.

Guy
|
|
|
|
|
03-14-2021, 03:01 PM
|
#47
|
|
Member
Join Date: Oct 2019
Location: Mansfield, PA
Posts: 60
|
This is the last piece for the van to camper transition. As I've stated, I'll use a piece of aluminum to replace the original external piece of plastic.


Guy
|
|
|
|
|
03-20-2021, 02:46 PM
|
#48
|
|
Member
Join Date: Oct 2019
Location: Mansfield, PA
Posts: 60
|
Replaced front bunk widow frame today and removed DS front bunk corner support. I'm thinking this is the last piece of the structure that has to be replaced. As I thought about this possibly being the end of replacing structure a sense of accomplishment came over me. However, the journey isn't done yet!
Took me about 45 min to dig the caulk off of all the screw heads and remove them all.

Old frame removed:

Had to get creative with holding frame in so I could put some screws in from the outside to hold in place:

Frame completed:

Front corner with brace removed:

This is it! Easy build and replace.

Guy
|
|
|
|
|
03-22-2021, 06:30 AM
|
#49
|
|
Member
Join Date: Oct 2019
Location: Mansfield, PA
Posts: 60
|
Corner post has been replaced:


After installation I went back "in" and added / removed some brackets so that nothing would interfere with the paneling. I also cut a grove for the front marker lights wiring.
Guy
|
|
|
|
|
03-27-2021, 06:12 PM
|
#50
|
|
Member
Join Date: Oct 2019
Location: Mansfield, PA
Posts: 60
|
I added (2) additional roof supports between the AC unit and rear. The roof was dented down in this area and with no support and someone walking on the roof, I can see why.

Second accomplishment of the day was installing the gussets for supporting the rear end to the roof. Original design had a cabinet in the top corner that would of acted as a gusset. As I'm not putting it back in, this was the solution. These are 12" on centers.

Guy
|
|
|
|
|
03-27-2021, 07:40 PM
|
#51
|
|
Member
Join Date: Oct 2019
Location: Mansfield, PA
Posts: 60
|
Few more pictures.


Guy
|
|
|
|
|
03-28-2021, 04:57 PM
|
#52
|
|
Senior Member
Monaco Owners Club
Join Date: Nov 2015
Posts: 2,298
|
Looking good. Nice work. Looking forward to seeing your ongoing progress
__________________
Steven & Laurie
2006 Moncaco Executive Ranier
Detrioit Series 60 (515HP), Allison 4000 series
|
|
|
|
|
04-04-2021, 07:17 PM
|
#53
|
|
Member
Join Date: Oct 2019
Location: Mansfield, PA
Posts: 60
|
|
|
|
|
|
04-14-2021, 05:02 PM
|
#54
|
|
Senior Member
Join Date: Oct 2020
Location: MINNESOTA
Posts: 524
|
Coming from someone who has done this to two Class C wood frame RV's I can admire your hard work. It is very tedious and it makes you wonder how they lasted as long as they did. I know for a fact that both the ones I rebuilt were leaking from the day they left the factory...
Nice work and I look forward to following along on the rest of the build!
|
|
|
|
|
04-20-2021, 08:29 PM
|
#55
|
|
Member
Join Date: Oct 2019
Location: Mansfield, PA
Posts: 60
|
|
|
|
|
|
04-21-2021, 06:24 PM
|
#56
|
|
Senior Member
Join Date: Oct 2020
Location: MINNESOTA
Posts: 524
|
Yup that part really is no fun. It's a lot of labor to clean those up. On the last one I did someone used flexseal spray on all the seams. It was a nightmare to clean up. It's looking good!
|
|
|
|
|
|
|
Currently Active Users Viewing This Thread: 1 (0 members and 1 guests)
|
|
|
 Posting Rules
|
You may not post new threads
You may not post replies
You may not post attachments
You may not edit your posts
HTML code is Off
|
|
|
|
 » Recent Discussions
 |
|
|
|
|
|
|
|
|
|
|
|
|
|
|
|
|
|
|
|
|
|
|
|
|
|


 Linear Mode

