 |
|
 01-04-2020, 05:37 PM
|
#1
|
|
Member
Join Date: Oct 2019
Location: Mansfield, PA
Posts: 60
|
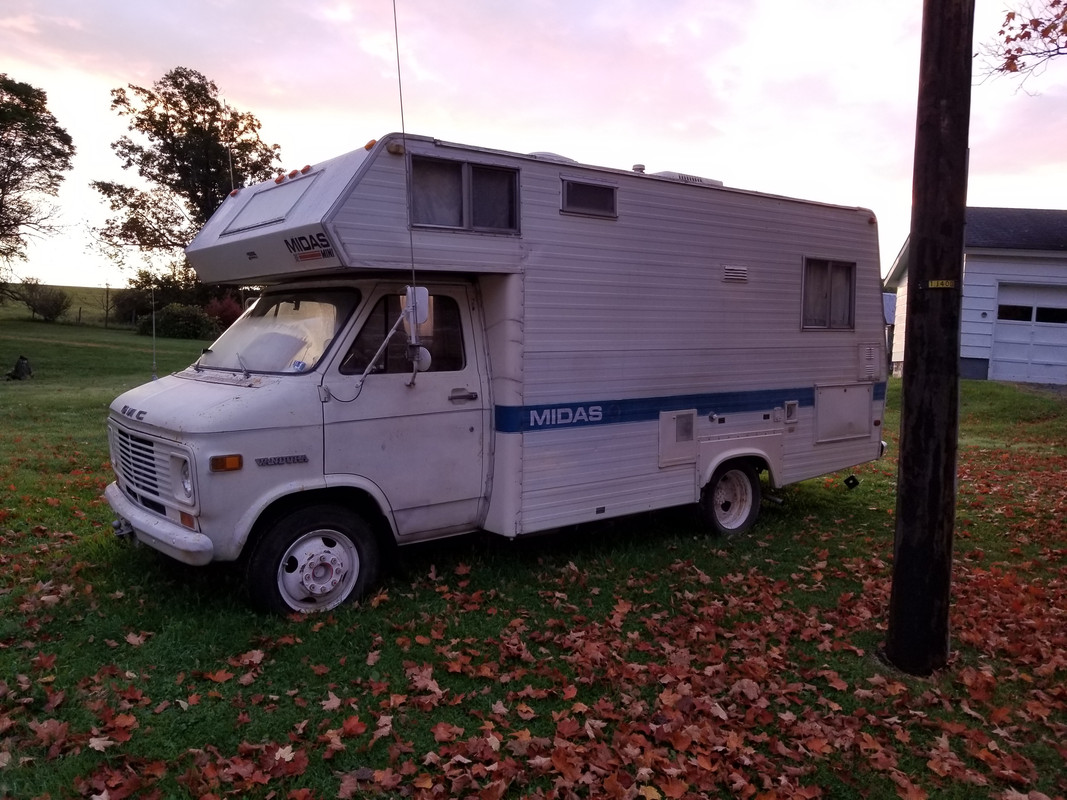
1975 GMC Midas M190 Rebuild
Hey guys. Thought I'd share our project. Bought this RV in the Fall. Has 58k, 350 engine. Has some water damage that I'm repairing now. Overall the unit is in good shape for the year. Runs very well and engine is super quiet. This is our first RV. Main reason for this purchase is to use for attending military swap meets. Most of these are several day events and are at fairgrounds. Here it is:
Overhead bunk before:

After:


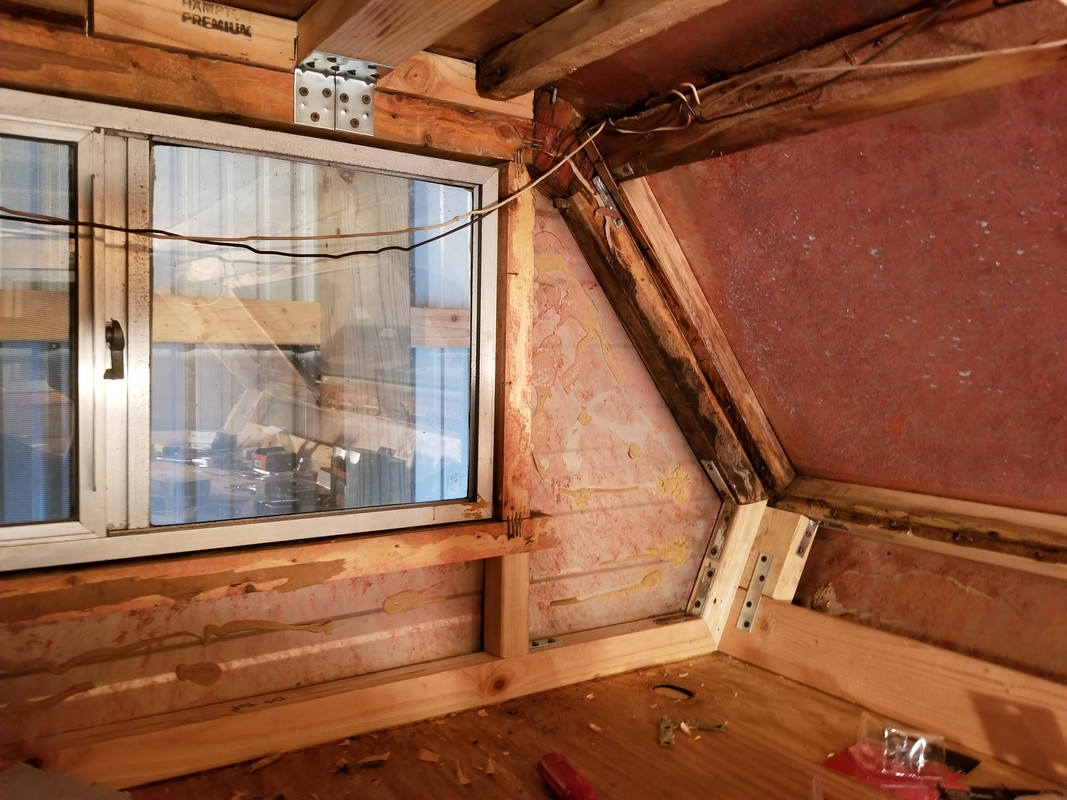
On the passenger side the water damage stopped behind the cabinets appropriately mid body. Driver side stopped above driver door.


The front structure is repaired, now to the back. This is the rear door area.
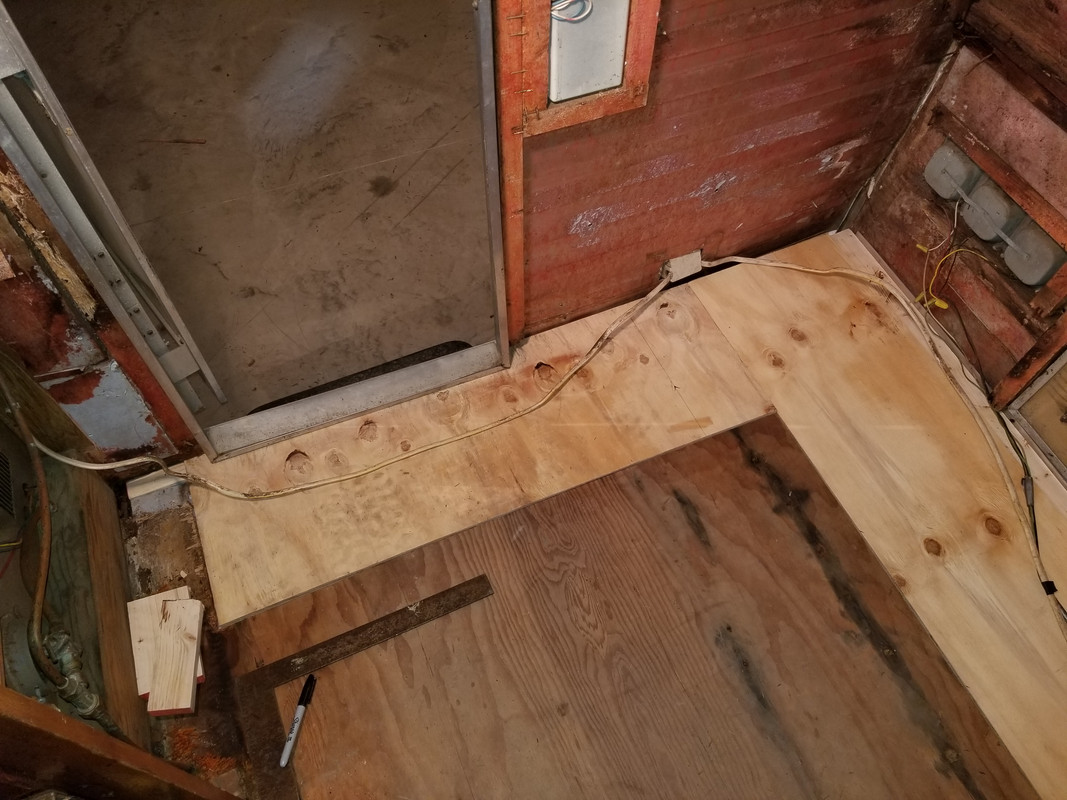

The passenger side rear corner support is shot. The rear floor had minor damage. Removed and replaced. Now I'll work my way up to the top.
Work is being done inside my brothers pole barn. This is nice as it won't fit in my garage.

And for those interested, this is what we take to the shows. 1972 M151A2:

Guy
|

|

|
 |
Join the #1 RV Forum Today - It's Totally Free!
iRV2.com RV Community - Are you about to start a new improvement on your RV or need some help with some maintenance? Do you need advice on what products to buy? Or maybe you can give others some advice? No matter where you fit in you'll find that iRV2 is a great community to join. Best of all it's totally FREE!
You are currently viewing our boards as a guest so you have limited access to our community. Please take the time to register and you will gain a lot of great new features including; the ability to participate in discussions, network with other RV owners, see fewer ads, upload photographs, create an RV blog, send private messages and so much, much more!
|
|
01-05-2020, 11:57 AM
|
#2
|
|
Senior Member
Join Date: Mar 2016
Location: Moving out of Connecticut
Posts: 656
|
Looks like you are doing the rot repair correctly.
When you get done with that, count on replacing all the rubber parts of the chassis. It has all aged out by now. Not just the tires (if over 8yo - read the dates on them) but the fuel lines, coolant line as brake lines are also aged out and the fuel lines were probably not designed for today crapahol motor fuel.
Brake fluid and coolant have also aged out or been contaminated and should be flushed and replaced, but hey, you got to have those rubber lines replaced to so do it all at the same time....
another old coach owner.
Frank
|
|
|
|
|
01-05-2020, 12:36 PM
|
#3
|
|
Member
Join Date: Oct 2019
Location: Mansfield, PA
Posts: 60
|
After interior is addressed I'm doing just as described. I've already purchased new tires and all rubber will be replaced. I'm also replacing waterpump, fuel pump and rebuilding the carburetor. Was told that the former owner had replaced front brake calipers and rotors but haven't verified that yet.
Guy
|
|
|
|
|
01-11-2020, 05:39 PM
|
#4
|
|
Member
Join Date: Oct 2019
Location: Mansfield, PA
Posts: 60
|
Made a little progress on project today. Replaced rear lower side board. Had to recut the piece as I forgot to add some material. I know, measure twice, cut once...

Panel remade:

This is the inner panel. I cut a piece of aluminum flashing and installed both as the original had a few holes.

View from the inside. Nothing is bolted down yet, that's the next step.

As the passenger side rear supports are rotted, I'm supporting the roof with some jacks until I replace the supports.

Guy
|
|
|
|
|
01-19-2020, 08:31 PM
|
#5
|
|
Member
Join Date: Oct 2019
Location: Mansfield, PA
Posts: 60
|
|
|
|
|
|
01-26-2020, 07:07 PM
|
#6
|
|
Member
Join Date: Oct 2019
Location: Mansfield, PA
Posts: 60
|
The top passenger side support is now replaced from front to back. Removed the refrigerator as I have some repair work to do by the access door. Found two punctures in the roof that are about 1/2" in diameter. They were sealed but they were leaking at some point over the last 45 years. Feels good to get the new wood in and see progress.

Used a router to make the groove for the wiring.

Still have to frame around the roof vent. After that, build rear corner support.

Guy
|
|
|
|
|
01-28-2020, 11:12 AM
|
#7
|
|
Senior Member


Join Date: Apr 2004
Posts: 3,797
|
Hi Gloomis. What a great job on your restoration. Here's some Midas information since I assume you will be transporting your jeep on a trailer: We had a 1976 Midas almost like yours but the 23 ft. version. I towed a car trailer and unfortunately found that what appeared to be frame rails extending back from the rear spring mountings were not continuous. The "rails" ended and were welded to a cross member at the back of the spring attachments, but these joints failed and the rails on both sides fell downward from the trailer tongue weight. I had reinforcements welded to the rail joint, but both lower sides of the motorhome skin cracked from lack of support right after the joints failed.
So I suggest you check the rear frame structure carefully before towing anything.
And, that's the Ford built jeep with independent rear suspension, correct?. During my Army service I remember hearing that drivers had to have a special license & training to drive these due to lots of roll-overs.
Quote:
Originally Posted by Gloomis

.... This is our first RV. Main reason for this purchase is to use for attending military swap meets. Most of these are several day events and are at fairgrounds...
And for those interested, this is what we take to the shows. 1972 M151A2:
Guy |
__________________
George Schweikle Lexington, KY
2005 Safari (Monaco)Trek 28RB2, Workhorse W20, 8.1, Allison 1000 5 spd, UltraPower engine & tranny, Track bars & sway bars, KONI FSD, FMCA 190830, Safari Int'l. chapter. 1999 Safari Trek 2830, 1995 Safari Trek 2430, 1983 Winnebago Chieftain, 1976 Midas Mini
|
|
|
|
|
01-29-2020, 05:28 PM
|
#8
|
|
Member
Join Date: Oct 2019
Location: Mansfield, PA
Posts: 60
|
Hello George. Thank you for the compliment and information. I've read about the rear frame extensions not being intended for towing. I started my career as a welder and I'm confident that I can make a safe hitch point. The 1972 M151A2 is made by AMG. Unibody with independent front and rear suspension. Ford had the contract for the 151's until 1970 1/2.
Guy
|
|
|
|
|
02-01-2020, 02:48 PM
|
#9
|
|
Member
Join Date: Oct 2019
Location: Mansfield, PA
Posts: 60
|
Made some more progress today. Rear hatch bottom brace is now replaced and fastened down. Started working my way up from the bottom. Going slow but making progress.


 archaeologist starting salary
Guy
|
|
|
|
|
02-04-2020, 04:58 PM
|
#10
|
|
Member
Join Date: Oct 2019
Location: Mansfield, PA
Posts: 60
|
Was able to cut a few pieces tonight in preparation for working on project this weekend. Had to replace ends on the PS of these rear crossmembers. These are under the rear window and they have an angle cut on them for the angle on the back of the RV. Vintage Sears saw used for vintage RV!


Guy
|
|
|
|
|
02-08-2020, 04:52 PM
|
#11
|
|
Member
Join Date: Oct 2019
Location: Mansfield, PA
Posts: 60
|
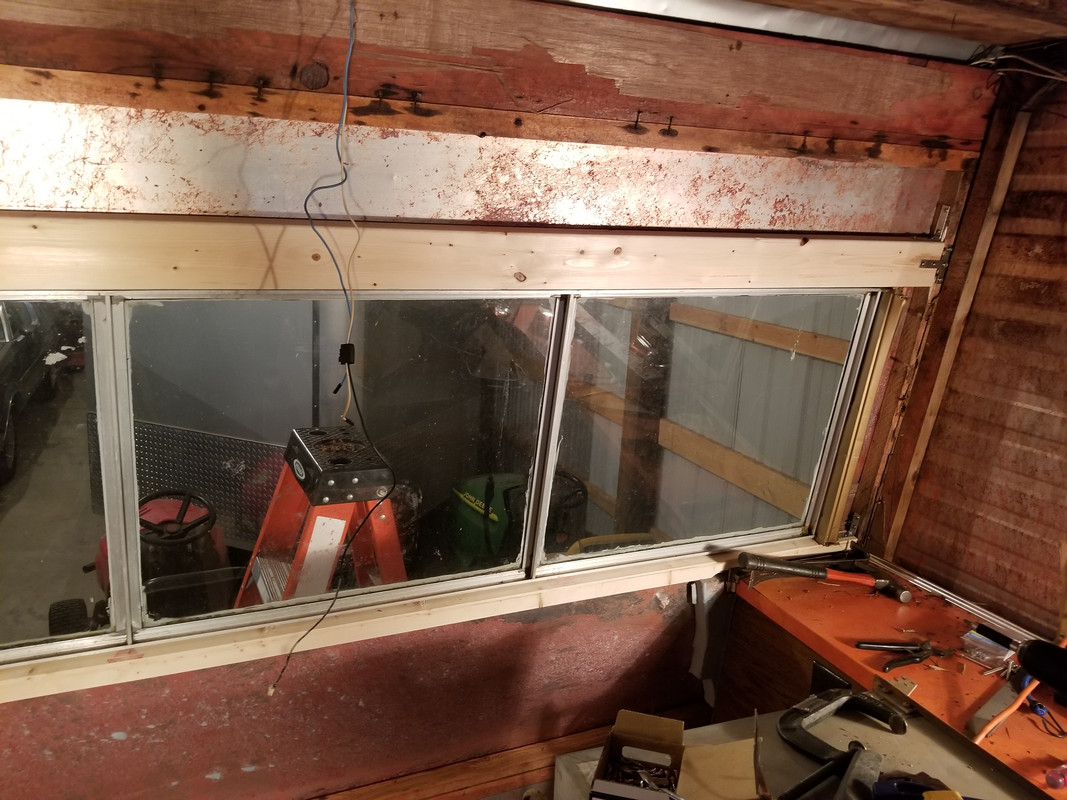
Pushing forward on the project. I think I've found the reason the rear passenger side supports were rotted out. Looks like the factory boys trimmed the width on the rear panel an excessive amount. Not much overlap under the edge trim where the seal is. I'll have to make a piece to cover and make sure I seal it up good. I think the rear top was similar based on what I noticed today. I have some short pieces to add around the PS tail light and then I'm at the top crossmember.


Guy
|
|
|
|
|
02-09-2020, 01:37 PM
|
#12
|
|
Member
Join Date: Oct 2019
Location: Mansfield, PA
Posts: 60
|
|
|
|
|
|
02-17-2020, 10:29 AM
|
#13
|
|
Member
Join Date: Oct 2019
Location: Mansfield, PA
Posts: 60
|
Good news! I can see the light at the end of the tunnel on the interior structure repair. My goal on Saturday was to remove all of the rotted wood on the driver side rear as the passenger side is complete. I was hoping that I would not have to get behind the shower and was happy to find that the damage stops about 60" up from the rear. I still have some issues behind the refrigerator / heater area but that won't hold up putting the interior back together.

Guy
|
|
|
|
|
02-23-2020, 05:54 AM
|
#14
|
|
Member
Join Date: Oct 2019
Location: Mansfield, PA
Posts: 60
|
In order to remove the rear top crossmember I had to dig out the fasteners that were under about 1/4" of caulk. There were about 30ish of them. This was not fun!

View from inside:

Crossmember removed:

New top drivers side roof support:

Set in place:


Guy
|
|
|
|
|
|
|
Currently Active Users Viewing This Thread: 1 (0 members and 1 guests)
|
|
|
 Posting Rules
|
You may not post new threads
You may not post replies
You may not post attachments
You may not edit your posts
HTML code is Off
|
|
|
|
 » Recent Discussions
 |
|
|
|
|
|
|
|
|
|
|
|
|
|
|
|
|
|
|
|
|
|
|
|
|
|


 Linear Mode

