On the suggestion by Reddog1, I've decided to break my individual projets up into their own respective threads to make them easier to read. I will be removing them from the original camper thread, and turning the first post into a link section to all the projects.
So, on to Project #1, More Batteries
--------------------------------------
Project #1 - Mo' Batteries
First off, let me thank fellow NATCOA member Sooty1234, if it weren't for him I wouldn't have the two nice SCS225's I do now. I want to also thank forum member Matthew_B of Dallas, Oregon for the idea for locating the batteries from a setup he had done on his own camper.
Now, as most of you know, my camper is old. And being as old as it is, when it was built, the concept of onboard house batteries in a camper were unheard of. If you had a battery, it was housed in the engine compartment of the truck. On my current setup, I already have this, one solitary Group 27 under the hood of the truck to feed the camper, not a whole lotta battery capacity there.
For a while, I didn't know exactly which batteries I wanted to go with for additional house batteries, till a fellow natcoa member had posted an add for a set of brand new unused SCS225s. One interesting drive north to meet a fellow Natcoa member and $100 later, I had two unused, but maintained SCS225 batteries.
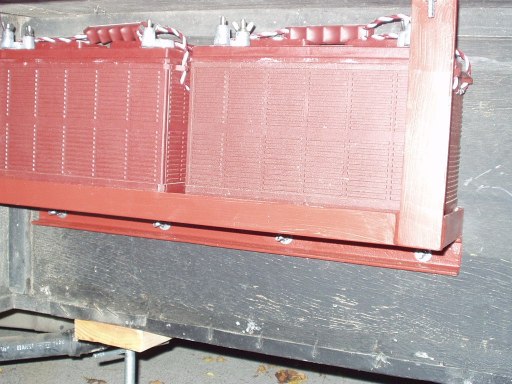
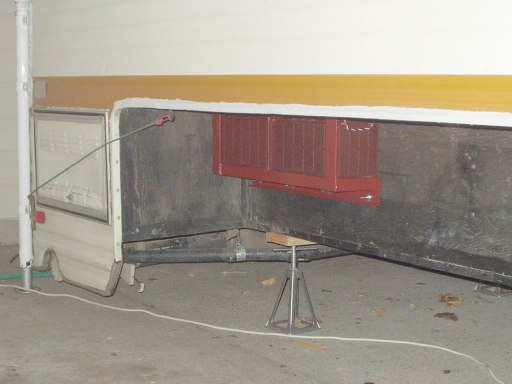
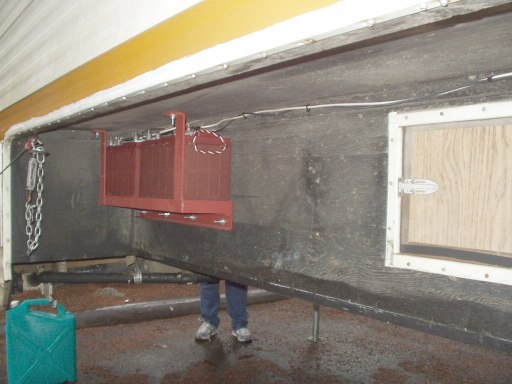
The question then became of how to mount them. I really wanted the batteries to stay with the camper when it was loaded and unloaded. SCS225's are heavy batteries, and the thought of having to lug them up into and back out of the truck each time I loaded and unloaded so my camper would keep house power didn't really appeal to me. So, I contacted my metal fabricator buddy to make this for me:

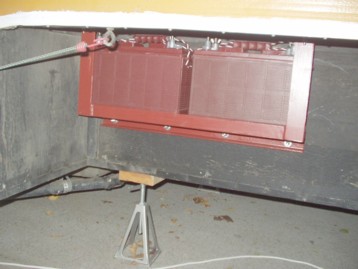
It's a nice piece of iron work, made from angel, channel, flat, and a piece of square tubing. Its sized so that the batteries can't wiggle back out once loaded, but with a bit of effort can be pried out. (BTW, this concept was tested and proven to work by driving around downtown seattle with the camper loaded. Didn't budge an inch even after the royal beating my suspension got.)
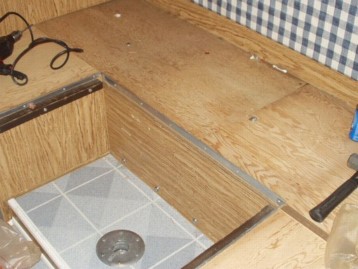
I was really limited to only one location I could add a battery rack on my camper as reaching other locations from the inside was near impossible due to lack of clearance or appliances being in the way. So, I wound up installing it underneath my dinette. To keep people from getting scraped on or my cushions from getting damaged, the rack was secured in place using Carriage bolts with washers to help displace the load on each. My side walls on the truck bed portion of my camper are just solid plywood, rather than a combination of skin and 1x2s, so there wasn't really anything to worry about drilling through when it came time to do the drilling. The lower lag bolts (3 of them) are visible inside the camper, but unless the table top's off, yer very unlikely to even notice them, as they're just barely above the floor.

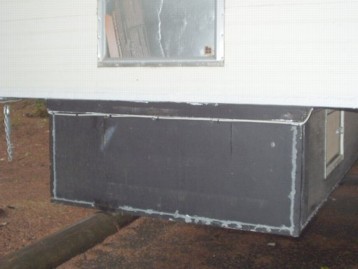

I wound up routing my 8 gauge wires that feed my batteries to the main system along the outside of the camper. There really wasn't any good way to go along the inside, so I used a combination of staples and zip ties to snug the bundled wires in place along the inside corners of the camper wings. Along the front of the truck box portion, I switched to some left over washers and drywall screws to help secure it as I had run out of staples, the washer approach was far more secure than just the zip ties, but was a pita to make corrections with.
I still need to get some join blocks to connect all my feed wires together at, for my Sol Duc trip, I just used a couple of wire nuts and eletric tape.
Scroll Down to See Project #2 - Shower Head Cutoff Valve.


 Linear Mode


